Easy Homemade Sourdough Bagels
Picture this: homemade sourdough bagels that are perfect for breakfast, toasted and slathered with cream cheese. Or make yourself a delicious bagel sandwich for lunch. That is in your future with this easy-to-follow sourdough bagel recipe. This recipe walks you through making sourdough bagels that are mixed, fermented, boiled and baked to perfection. Now, I know the three-day thing might sound a bit much, but trust me, these bagels are worth every second. They are easy to make and taste like the real deal. Easy homemade sourdough bagels are so yummy. I can’t wait for you to try them.
Sample Sourdough Schedule for Easy Homemade Sourdough Bagels
Bread made with 100% natural yeast takes extra time. Because of this I like to start my sourdough recipes with a sample schedule so I can get an idea for what the timing looks like for making this bread. This sample schedule assumes you are using a ripe/active sourdough starter and keeping your dough at a temperature of 76-78ºFahrenheit.
| Day 1 | Overnight/12 hours |
| 8:00 PM (12 hours) | Mix Stiff Sweet Levain |
| Day 2 | Mix/Bulk Fermentation/Cold Bulk Fermentation |
| 8:00 AM – 8:15 AM (15 minutes) | Mix Bagel Dough |
| 8:15 AM -11:45 AM (3.5 hours) | Bulk Fermentation |
| 11:45 AM -12:00 PM (15 minutes) | Shape Bagels |
| 12:00 PM – 2:00 PM (2-3 hours) | Proof |
| 2:00 PM- 8:00 AM (19 hours) | Cold Bulk Fermentation |
| Day 3 | Boil and Bake |
| 8:00 AM (50 minutes) | Boil and Bake |
Ingredients in Easy Homemade Sourdough Bagels
- Ripe Sourdough Starter: Use an active/ripe sourdough starter (doubled in size/bubbly/mild sour aroma) to mix the levain
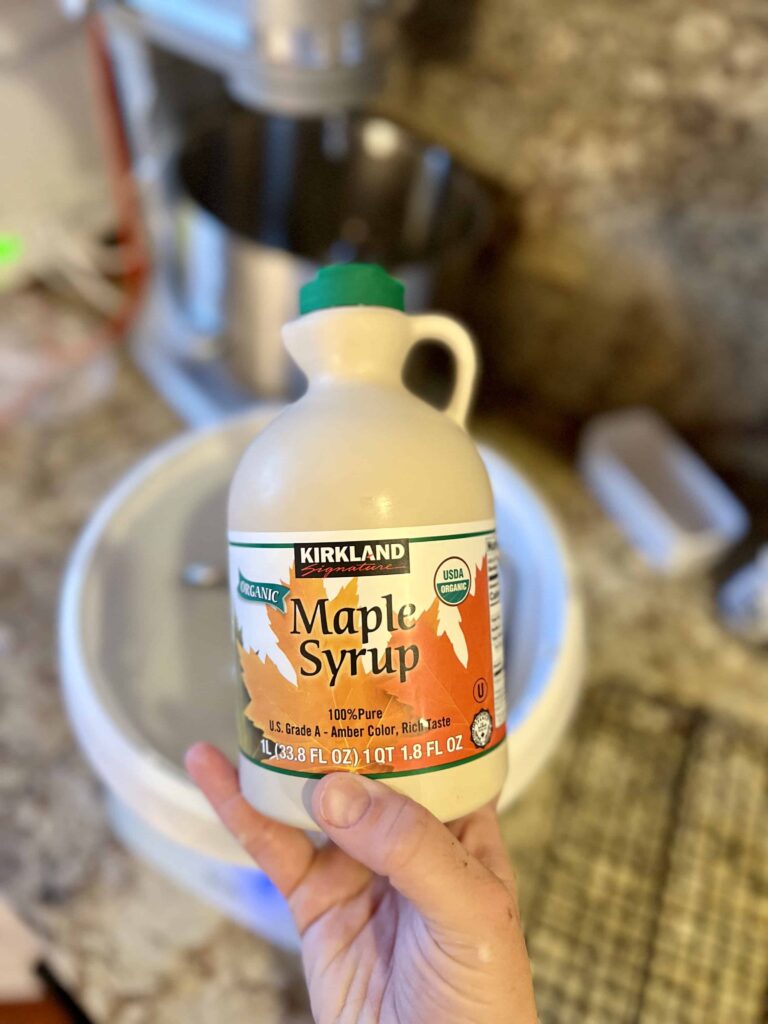
- Pure Maple Syrup: Barley Malt Syrup is traditionally used in bagels, but it’s not an ingredient I often have on hand. I use pure maple syrup instead with great results.
- Bread Flour: I almost always use bread flour for any bread that I am kneading. It’s especially important in bagels to use a bread flour (12.5% protein) combined with vital wheat gluten OR a high protein flour (around 14% protein). The higher protein content and properly activating the gluten results in a lighter/springy bagel
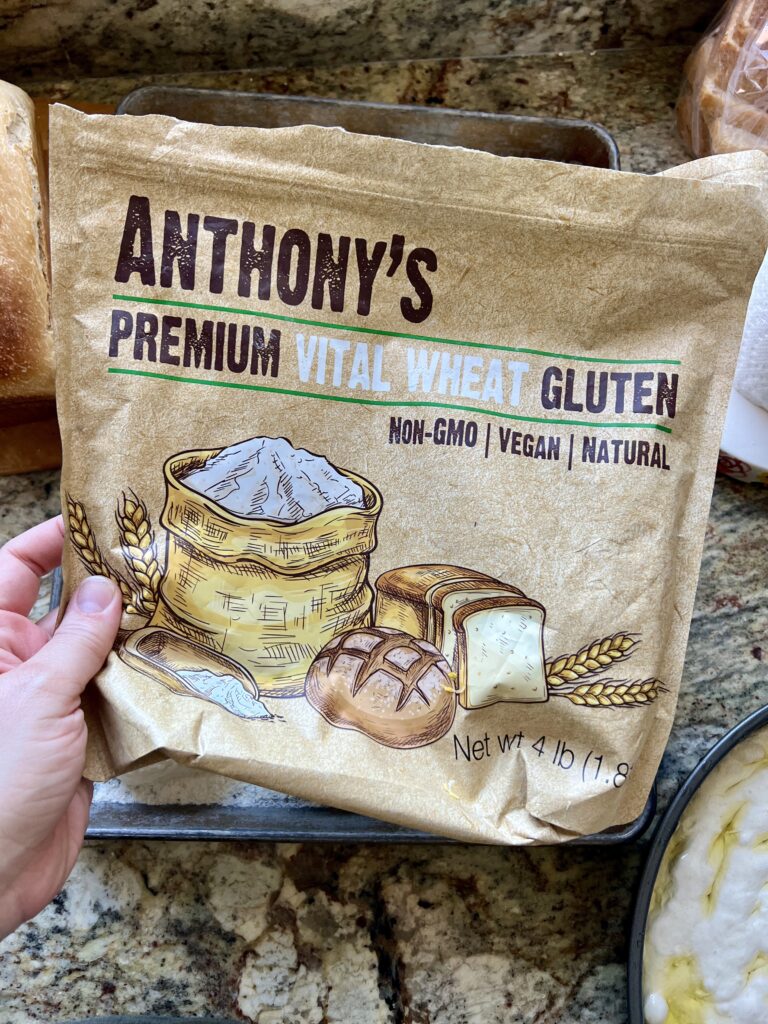
- Vital Wheat Gluten: Vital wheat gluten is an easy way to increase the protein content needed for bagels. You can use high protein flour in place of the bread flour and vital wheat gluten if desired (use 850 grams high protein flour instead).
- Diastatic Malt Powder: A small amount of this powder helps encourage fermentation, impart flavor and gives a caramelization color to the bagel dough. If you want to make bagels without it, you can leave it out.
- Salt: Salt is important to balance the flavors. Don’t leave it out.
Stiff Sweet Levain
One of the reasons I commonly advocate for making a levain instead of using straight sourdough starter is especially for cases like these easy homemade sourdough bagels. Maintaining a sourdough starter at 100% hydration makes it easy for me to create a stiff sweet levain when I need it for an enriched dough. I use a stiff sweet levain for enriched breads like this cinnamon sugar babka and these delicious red velvet cinnamon rolls. A stiff levain is a levain that mixes up to a firm consistency and is anywhere from 50%-65% hydration. It adds elasticity to dough and helps temper the acid in the sourdough which gives all the benefit of sourdough fermentation but not the tang. The sugar in the levain helps counteract the acidity and creates a more mild flavor. My picky kids are especially grateful for this! To make a stiff sweet levain:
- Use 100% hydration sourdough starter at its peak
- Add 24 grams of ripe sourdough starter to 120 grams of all purpose flour, 60 grams of water and 20 grams of sugar. Mix together.
- A stiff levain will be a little more difficult to mix together because it forms a dough ball instead of a batter. Knead the ball of dough a few times until smooth.
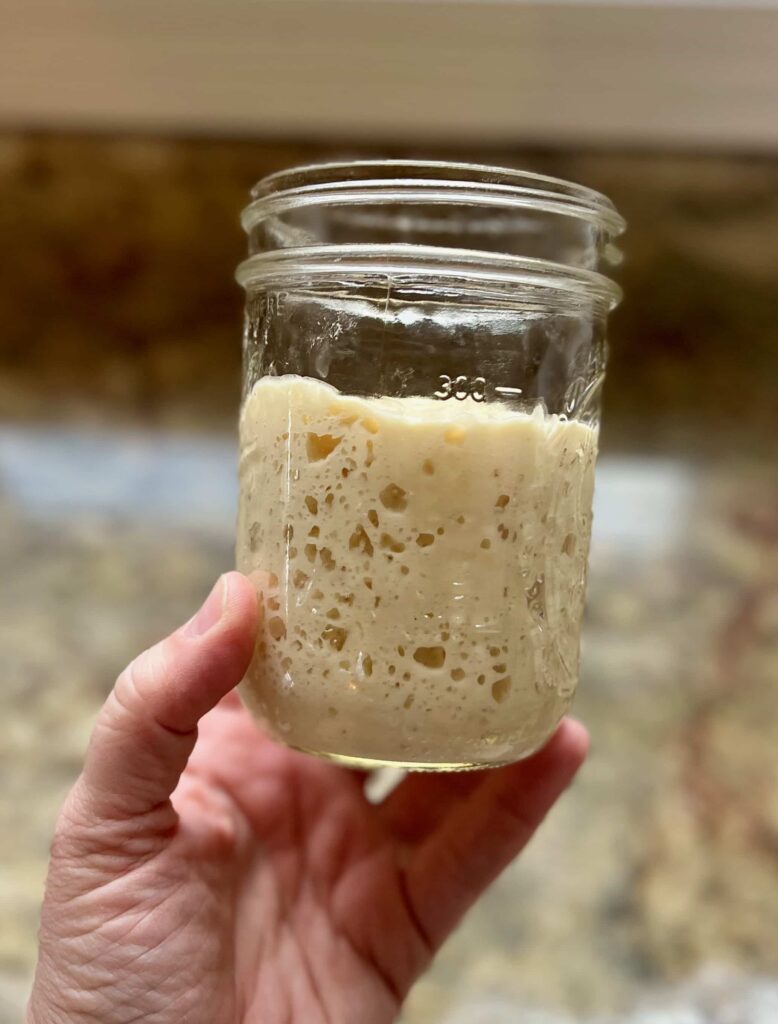
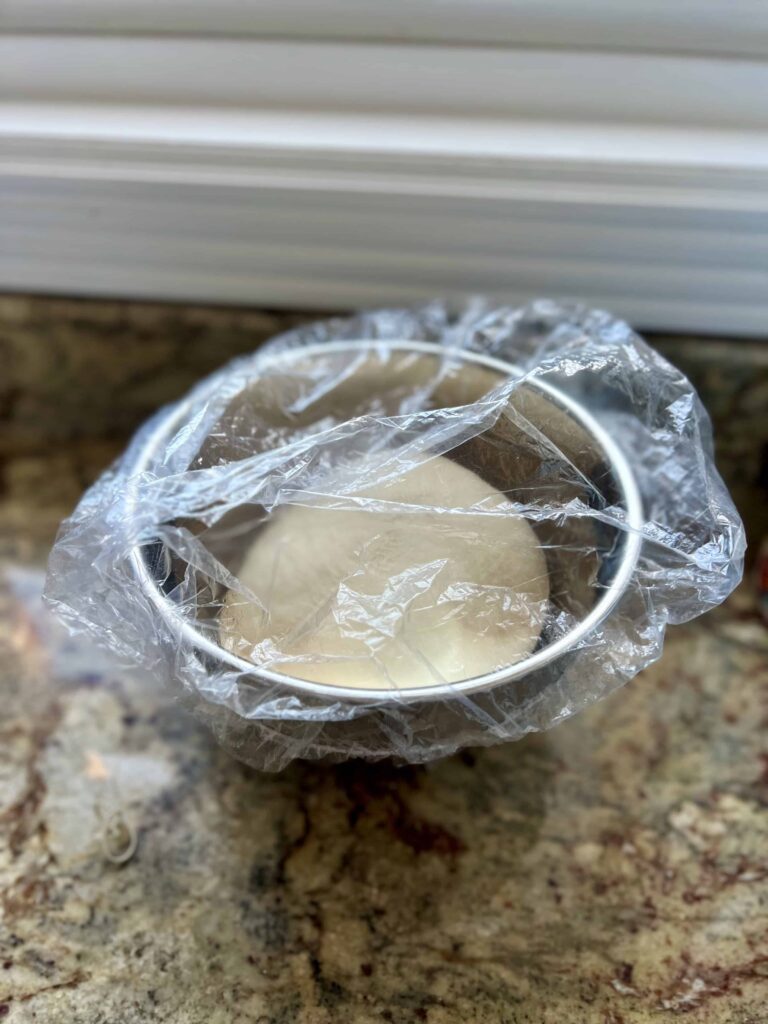
- Place the stiff sweet levain in a clear jar, cover it and set in a warm (76-78 degree F) spot for 12 hours.
- Stiff Sweet Levain is ready to use when it has doubled in size and has a rounded top. Using it right when it reaches its peak will help decrease the acidity in the dough.
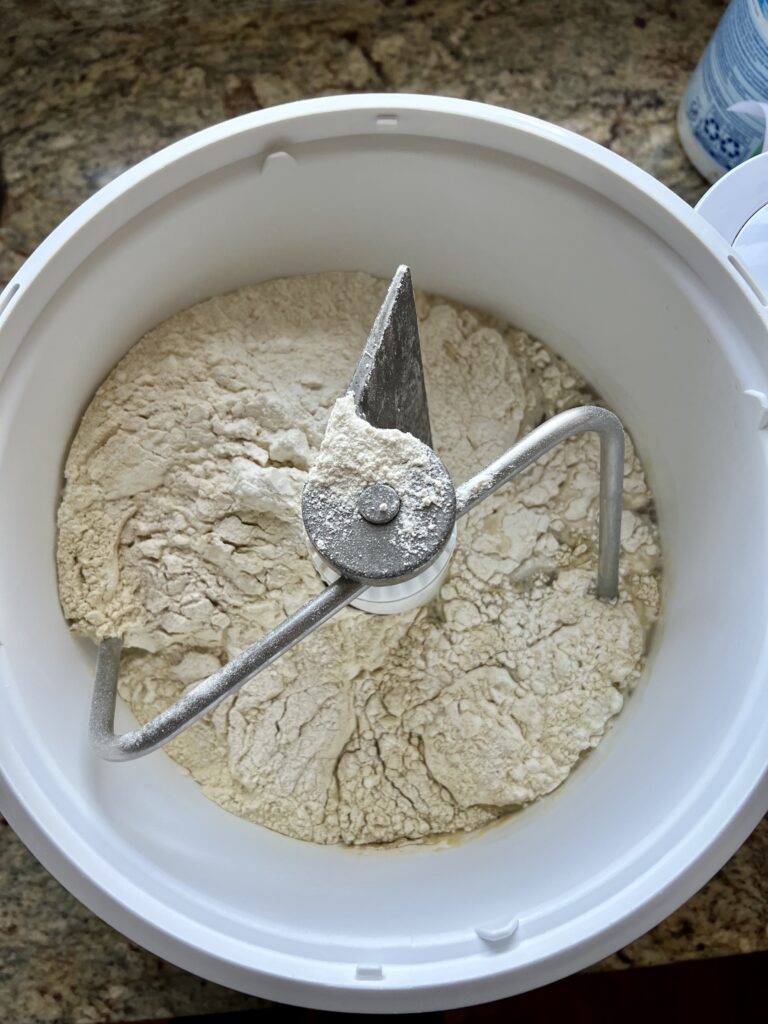
Mix Sourdough Bagel Dough
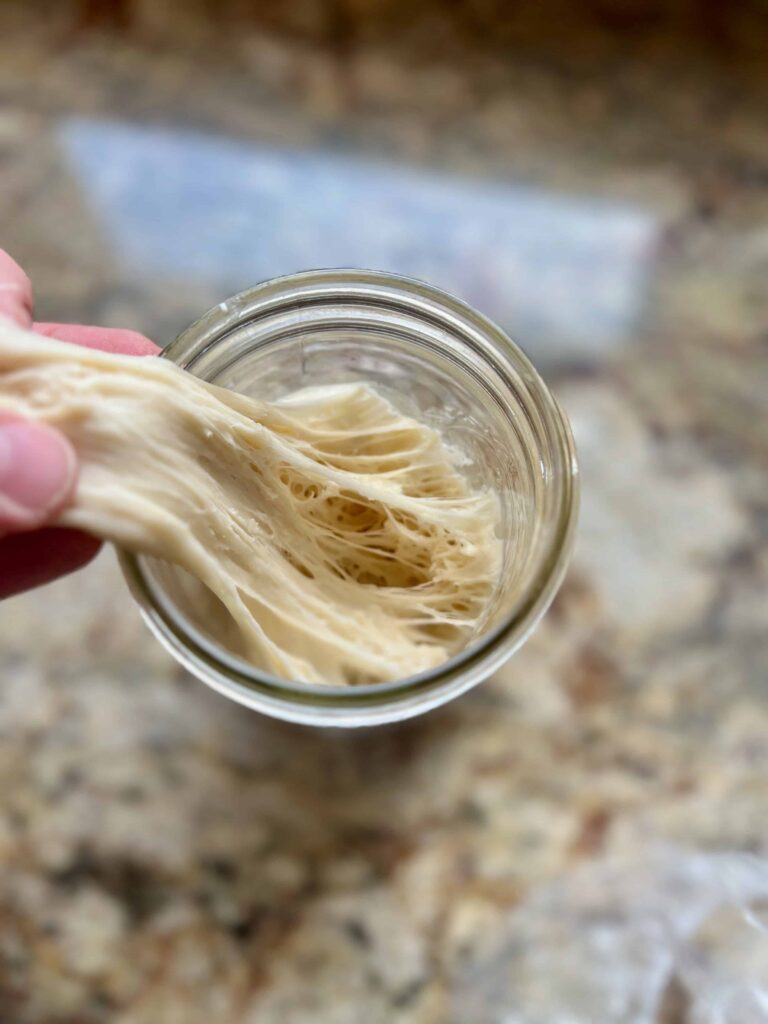
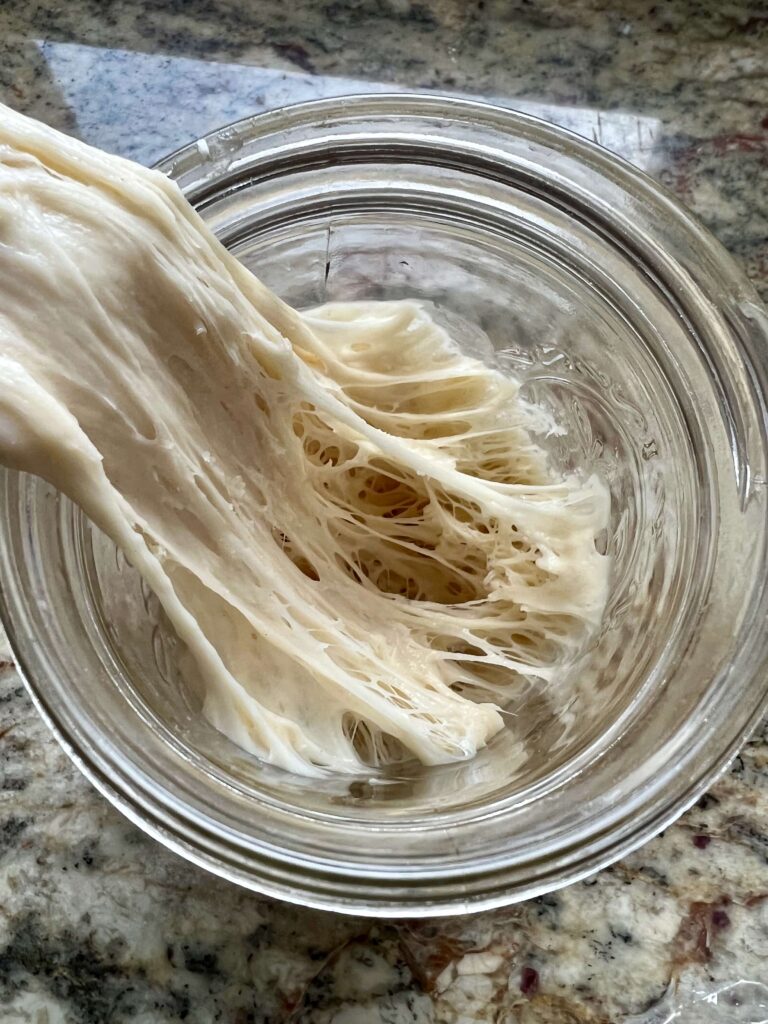
Set the bowl of a stand mixer on a kitchen scale and add the ripe levain and all the ingredients to the bowl. This bagel dough is strong, I prefer using a Bosch mixer to mix it. If you use a KitchenAid Mixer, be careful not to stress and overheat your motor. You can start it out in the mixer and then finish kneading by hand if desired. You can also knead this dough completely by hand for about 8-10 minutes until smooth. Start the mixer and knead the dough together for about 8 minutes until smooth. The dough should pass the windowpane test and be smooth before moving to the bulk fermentation.
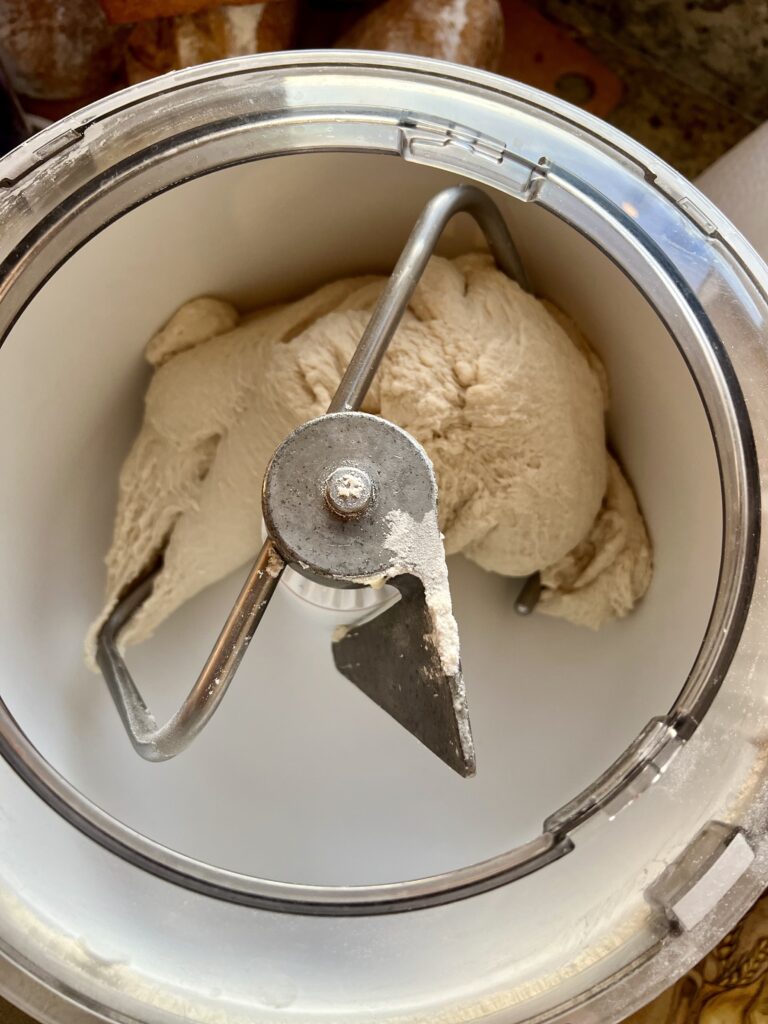
Bulk Fermentation
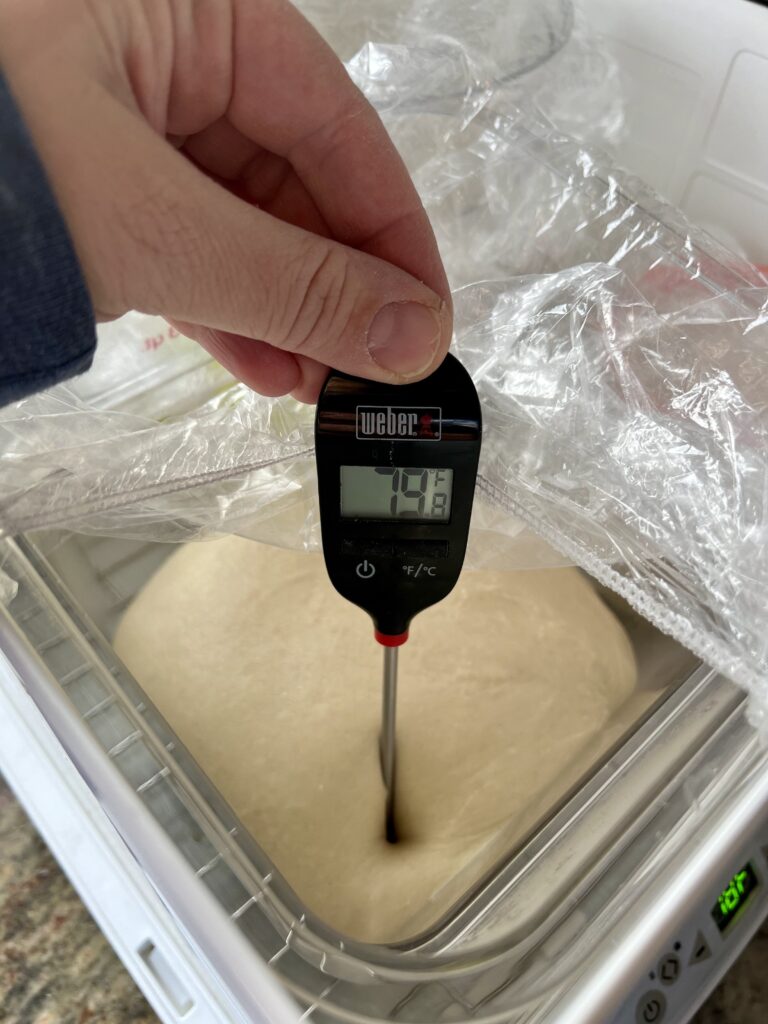
Move the dough to a container for the bulk fermentation. Do your best to keep the temperature of the dough at 78 degrees F. I use a bread proofer in the winter to help the dough develop at the right temperature. Cover the container. The entire bulk fermentation will take about 3 hours. By the end of bulk fermentation, you may have noticed the dough is more cohesive and strong. It will not have risen very much but may have expanded to fill the container.
Shaping Easy Homemade Sourdough Bagels
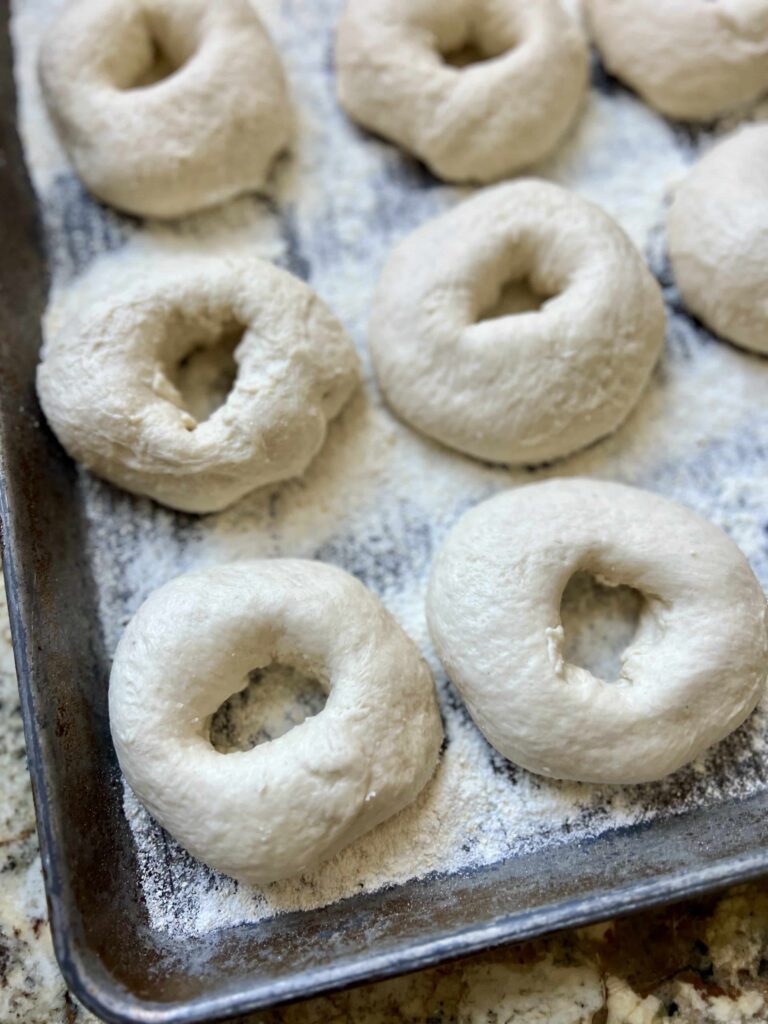
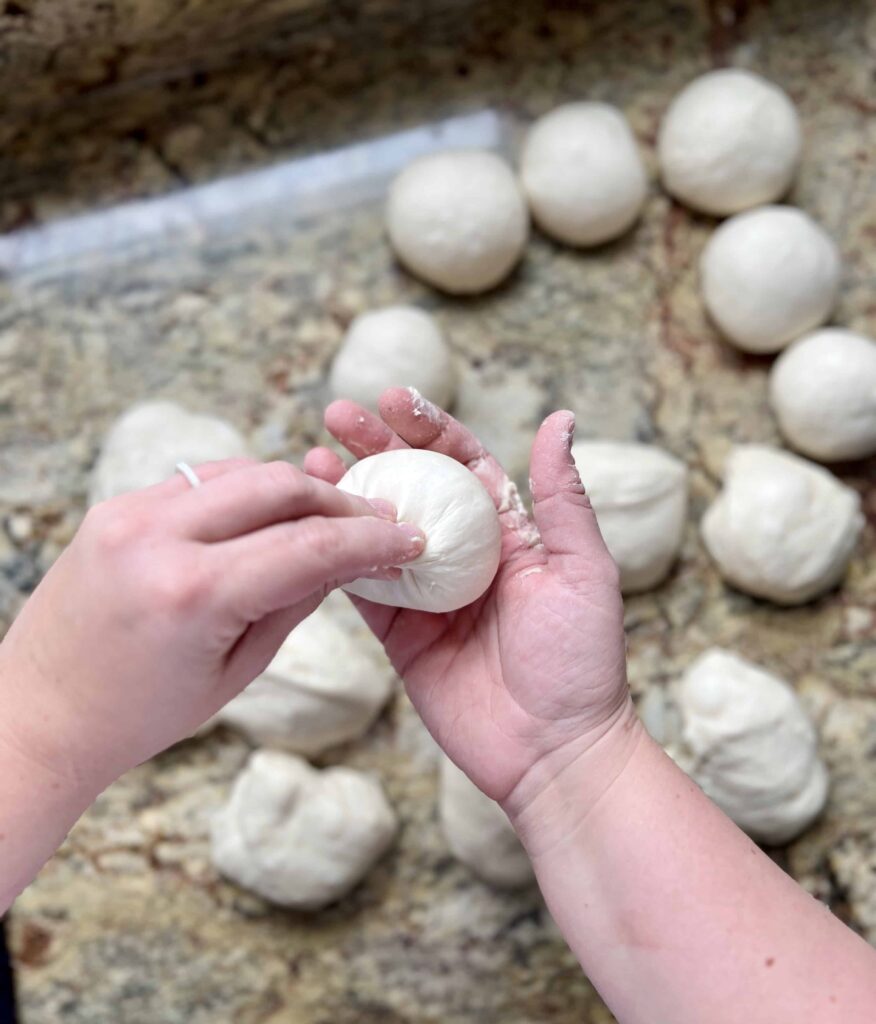
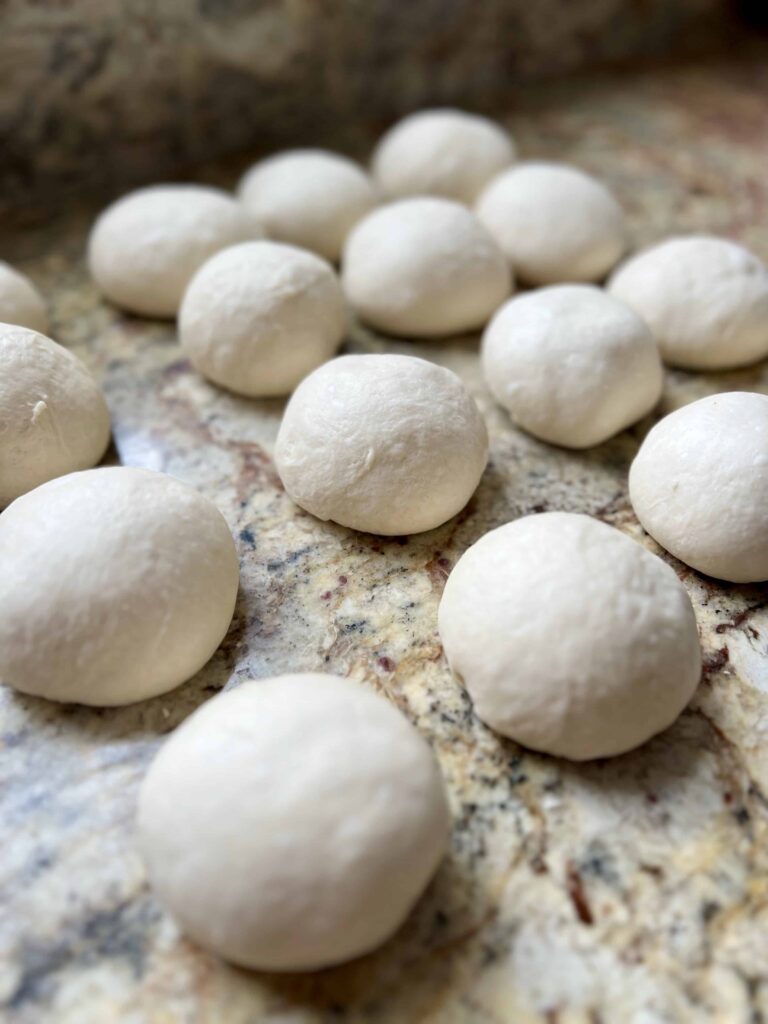
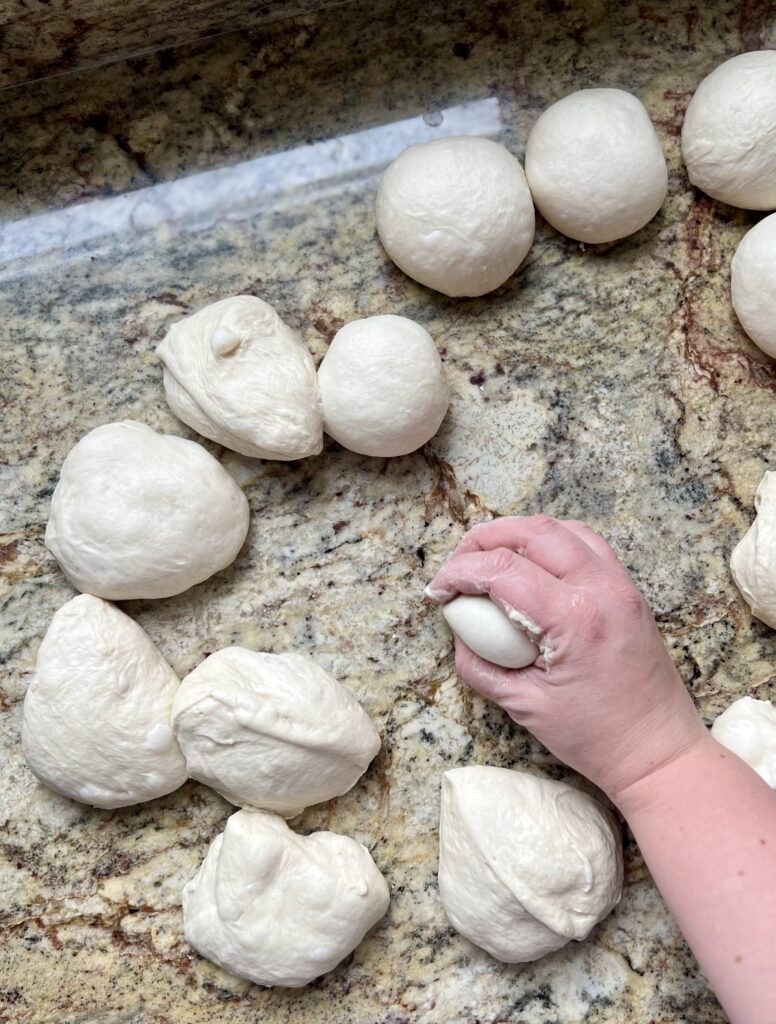
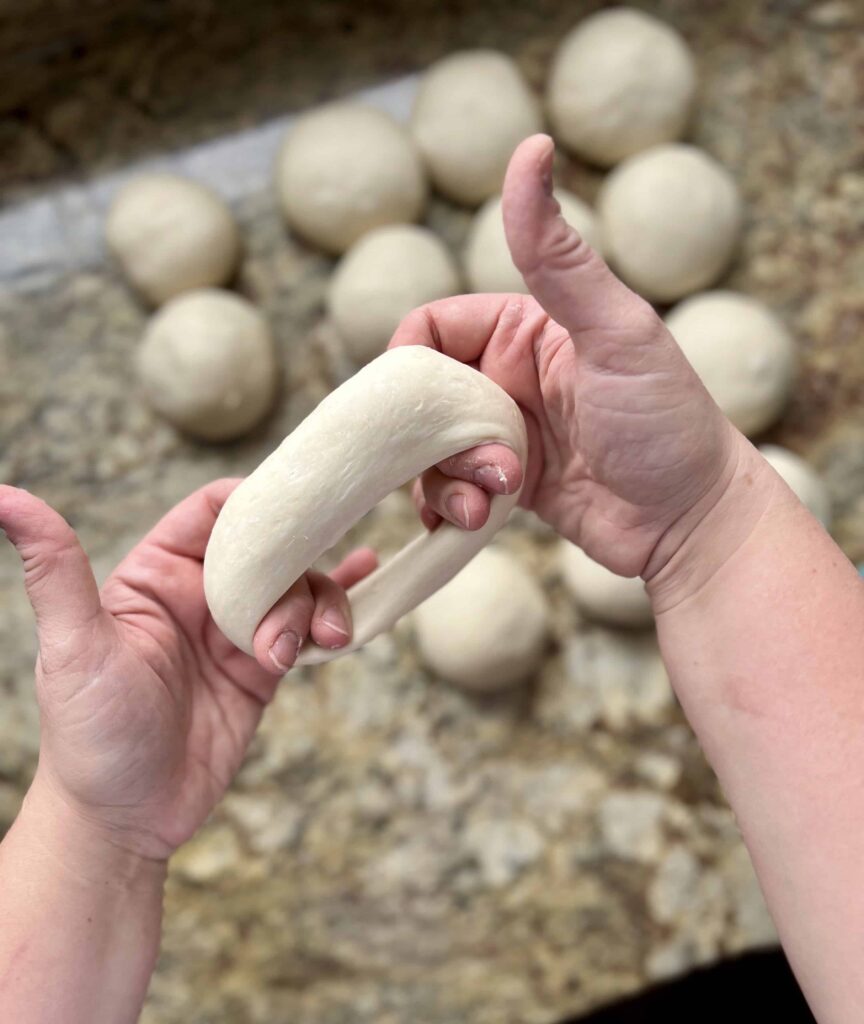
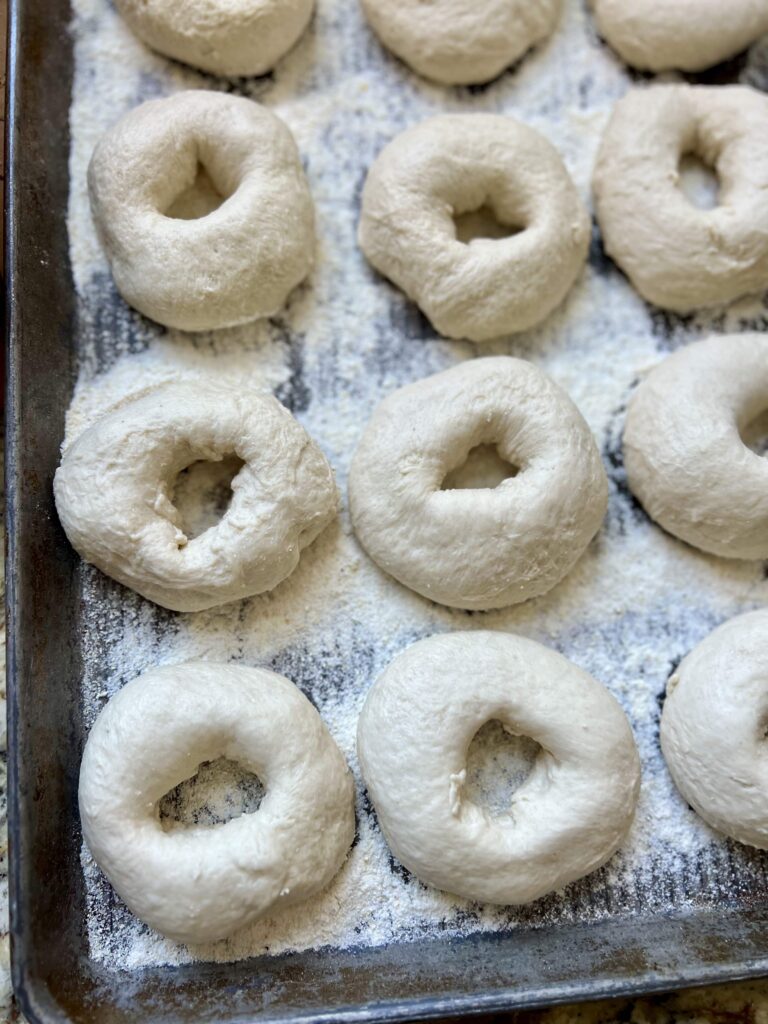
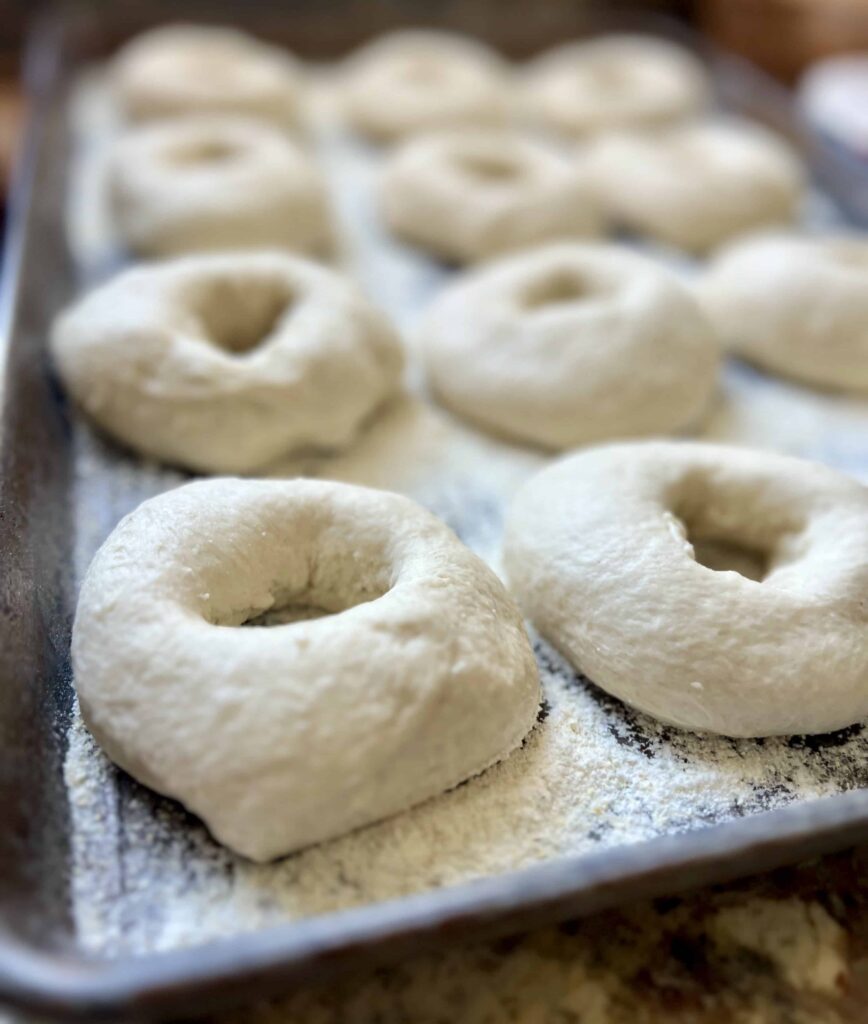
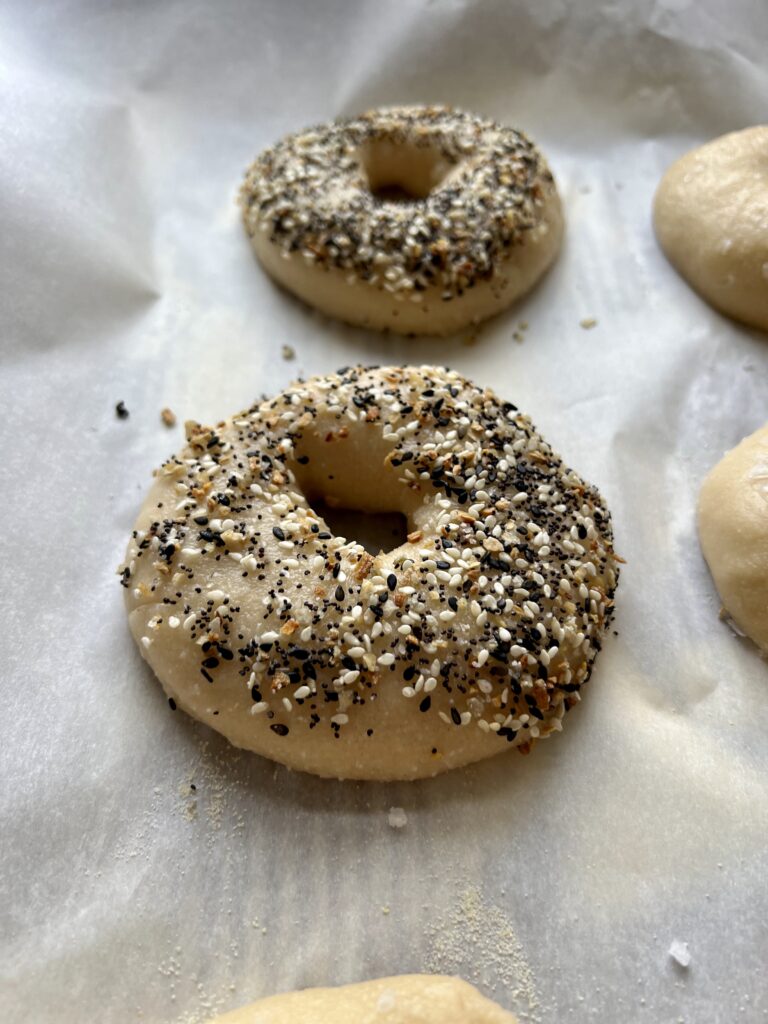
Prepare a baking sheet by sprinkling cornmeal liberally over the sheet. This will help the bagels not to stick to the pan while they rise. Separate the dough into 12 equal pieces, about 130 grams each. Take each piece of dough and pull/pinch up the sides until it forms a ball. Roll the ball on the counter using your hand in a cupping shape (see video here) to seal the balls and create tension. Let the balls rest for a minute on the countertop before shaping into bagels.
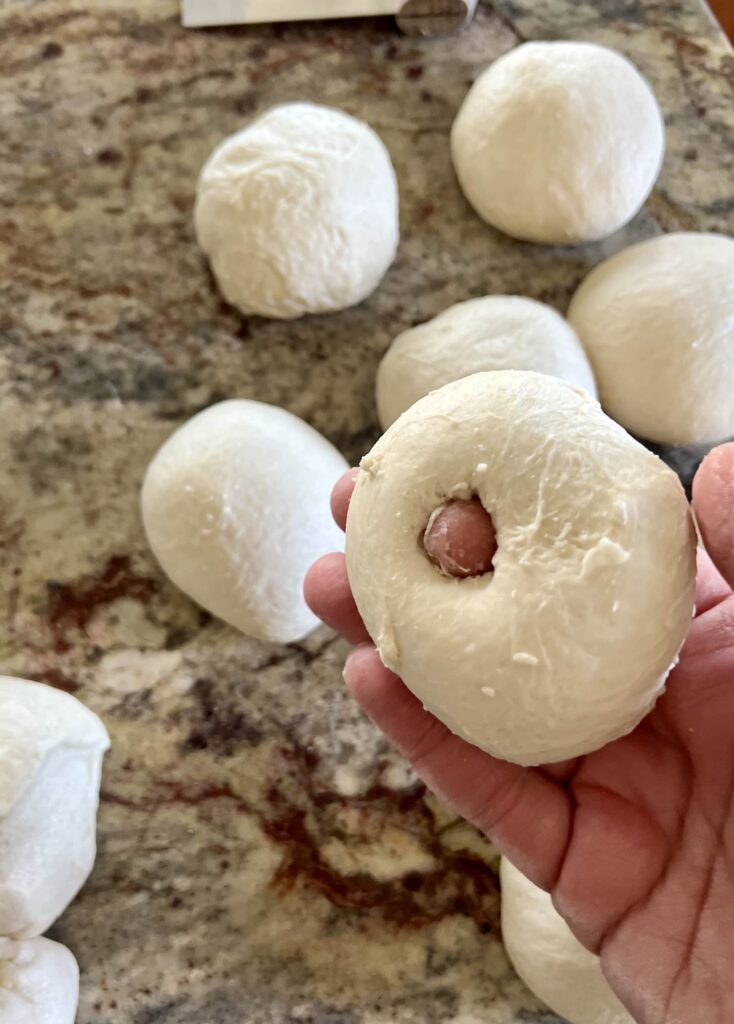
To Make Bagels: Take your finger and press it directly into the center of the ball of dough until it goes through to the other side, creating a hole. Use your fingers to widen the center hole, moving the dough around in a circle as you stretch it. Let the dough relax and repeat with the next bagel. After you’ve put holes in all the bagels, stretch them out again as desired and place on the cornmeal dusted baking sheet.


Proofing Sourdough Bagels
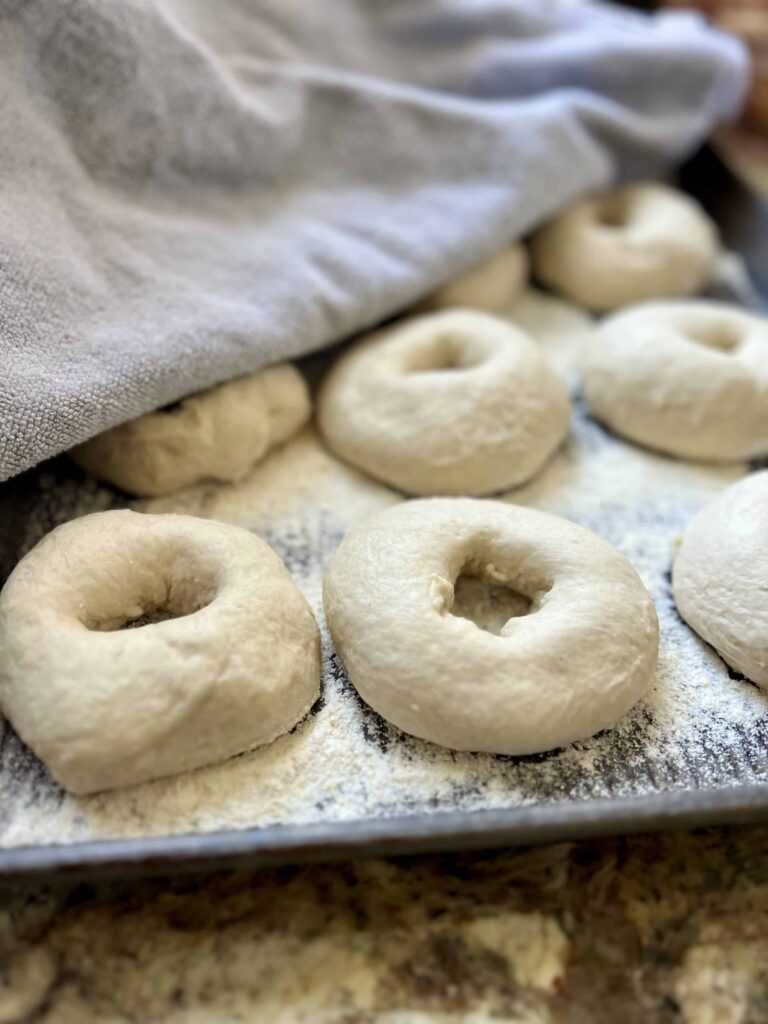
Cover the bagels with a kitchen towel and let the bagels rise on the baking sheet for about 2 hours at 78 degrees F. They will puff up a little and rise. After about 2 hours, check on the bagels. They should puff up a little and not feel dense. If they do, give them another 30 minutes to an hour and check them again. Stick the sheet of bagels into the refrigerator for a cold bulk fermentation. If you prefer to boil and bake the bagels right away, let them rise another hour or two until puffed up and very soft. Then boil and bake.
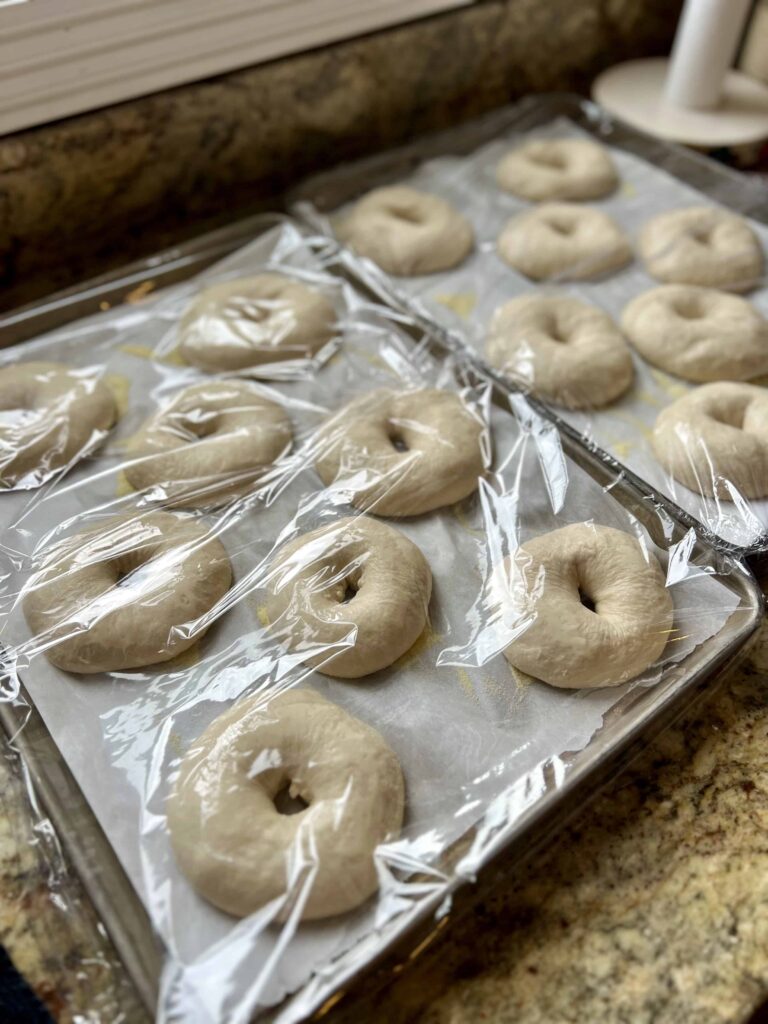
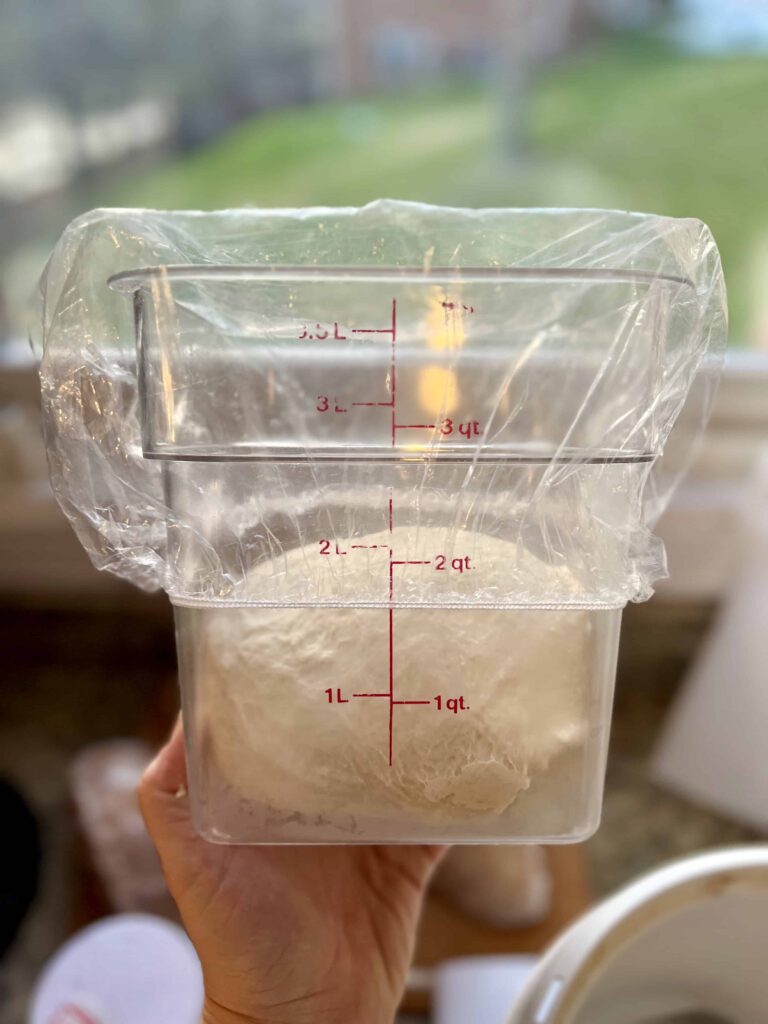
Cold Bulk Fermentation
A cold bulk fermentation allows the dough to increase in flavor and helps you plan your bake. I love using my refrigerator so I can bake things like these bagels in the morning when we want to eat them fresh and hot! Place the covered bagels in the refrigerator overnight for a cold bulk fermentation. This dough can stay in the refrigerator for up to about 20 hours, longer than that and the bagels may overproof. They’ll still taste good if you bake them but may not get quite so puffy. I typically mix up the bagel dough the day before and then place in the refrigerator overnight to bake the following morning. Works great every time!
Boil and Top Easy Homemade Sourdough Bagels
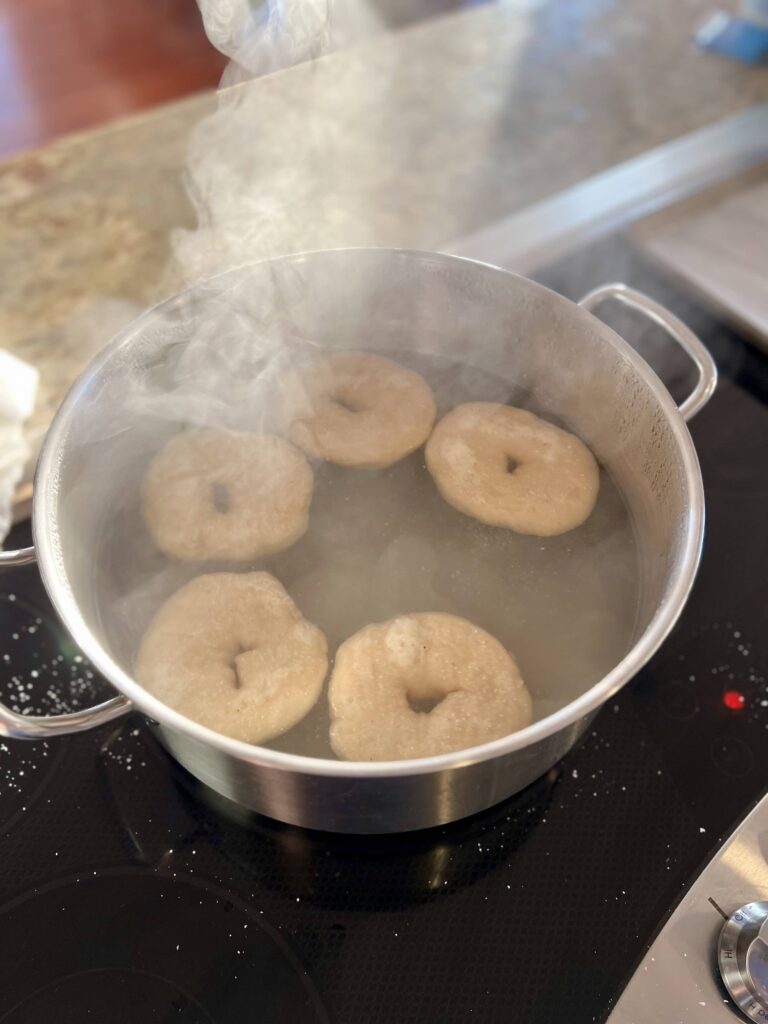
Pull the bagels out of the refrigerator while you get the oven ready and water bath boiling.
Prepare the Oven: Place a baking stone in the bottom of your oven. You can bake these without a baking stone, but they will be more susceptible to burn on the bottom. Preheat oven to 475 degrees F.
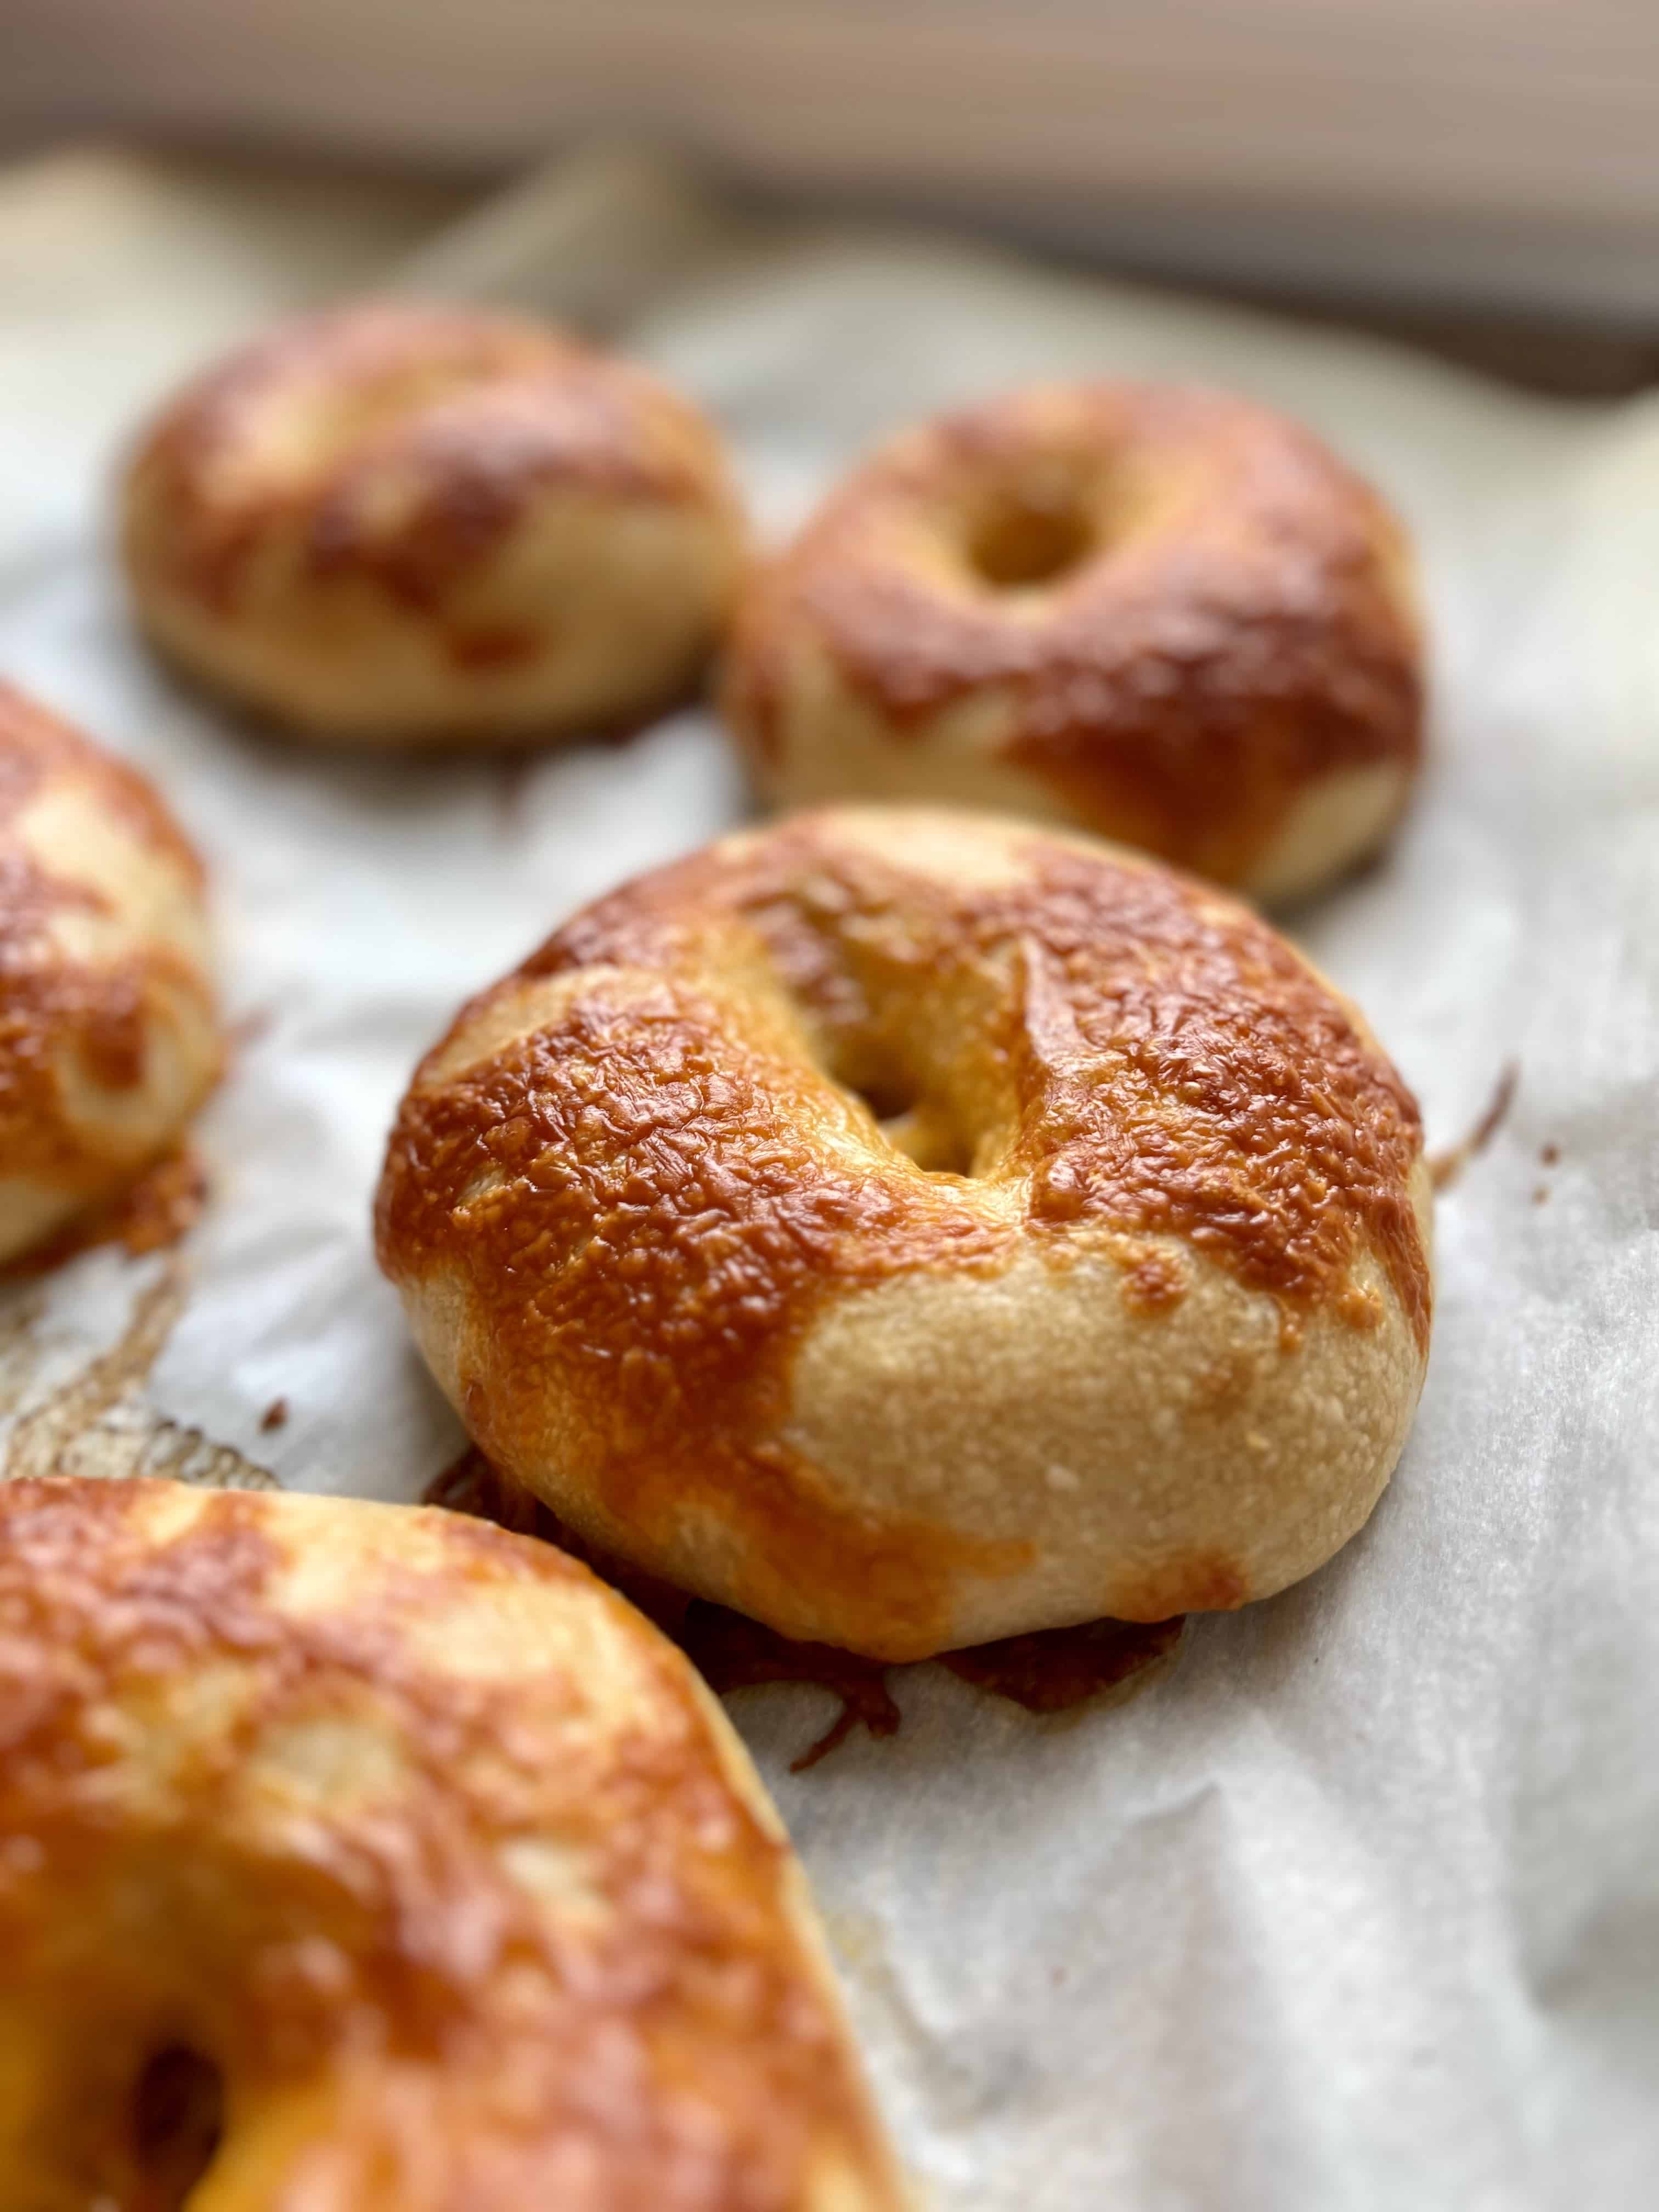
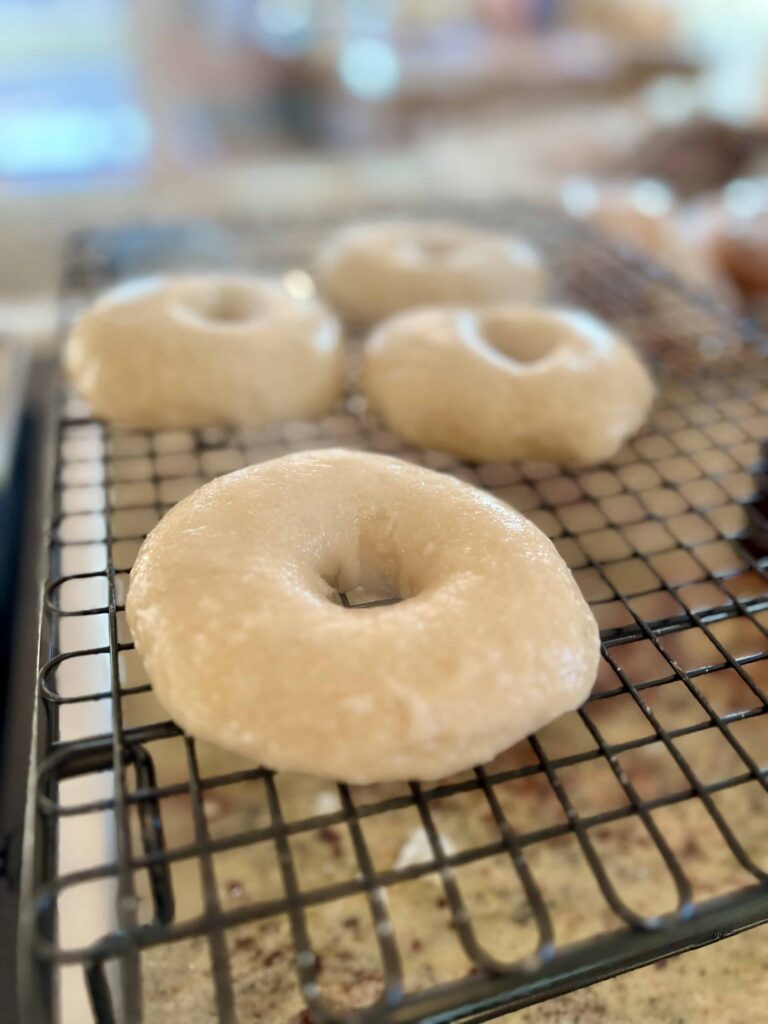
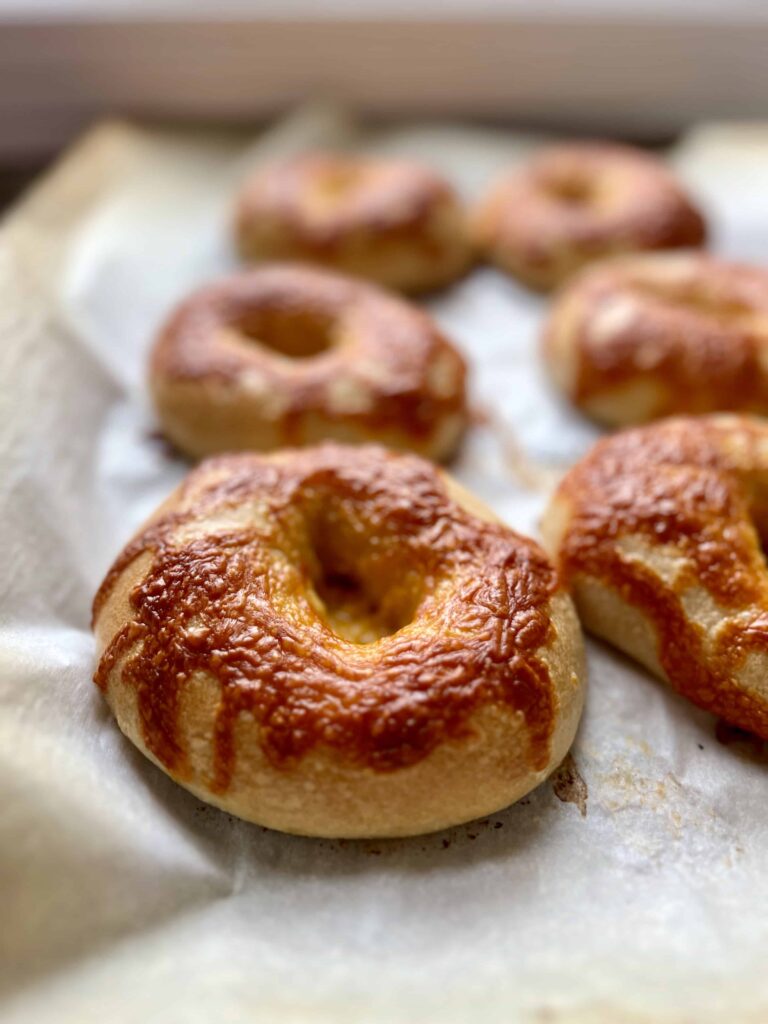
Boil: Place a large pot of water, about half full, on the stove and turn the heat to high. Have a slotted spoon ready (I often use a large spatula) and a cooling rack. As soon as the water comes to a boil, place a bagel into the water. It should float within the first 10 seconds or so of placing in the water. If it doesn’t, this is a sign of being under-proved. Allow the rest of the bagels to proof and rise a little bit longer. Add as many bagels to the pot of water as you can without stacking bagels on top of each other (they should each have a little personal space in the water). Boil for about 40 seconds per side. This will give the bagels a nice and chewy crust. Using the slotted spoon, remove the bagel from the boiling water and place on the cooling rack to drip dry for a minute before topping and placing on a baking sheet.
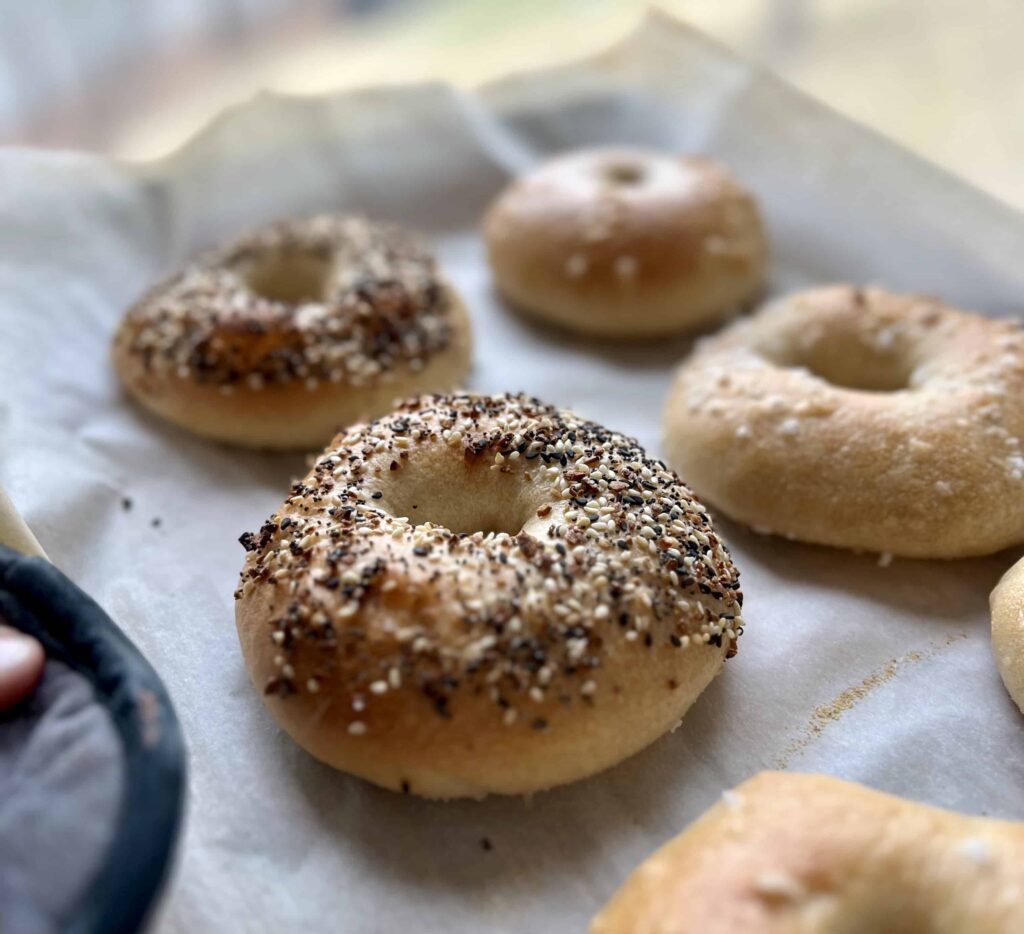
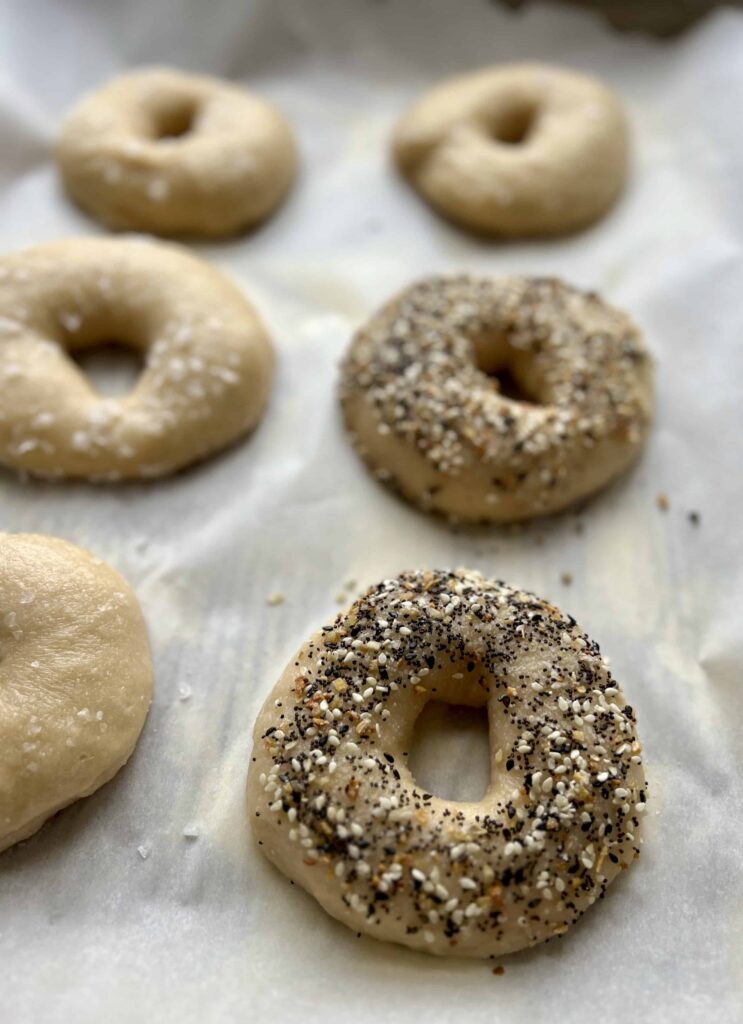
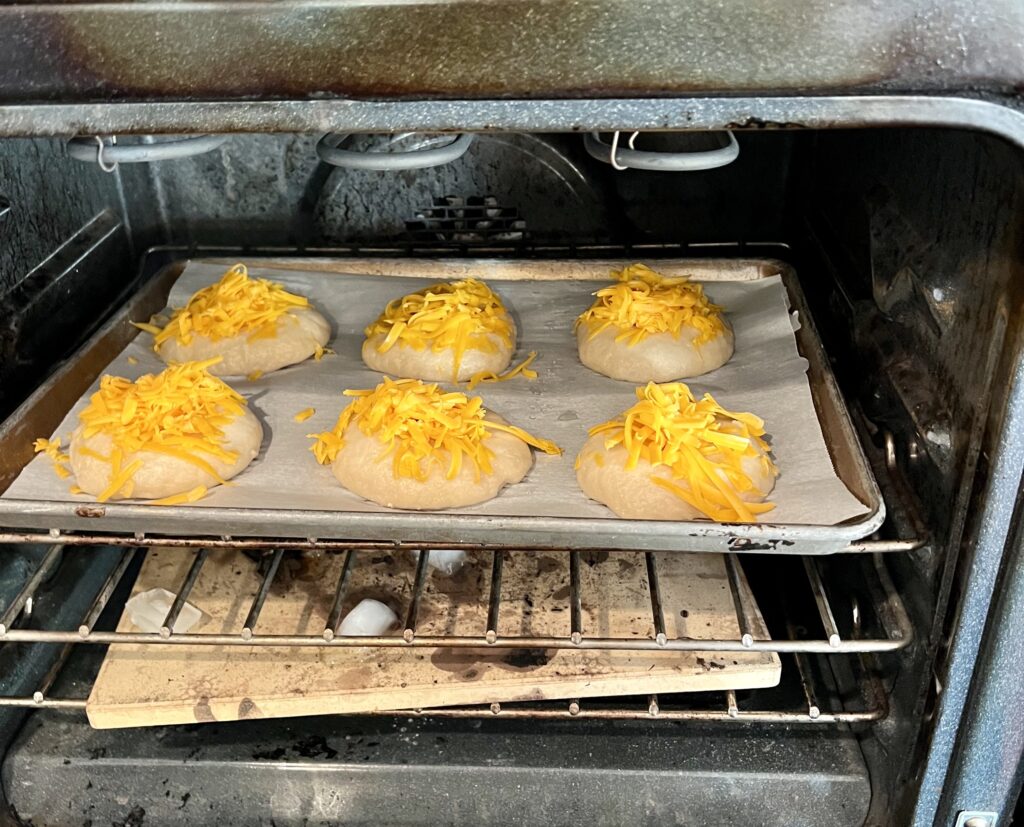
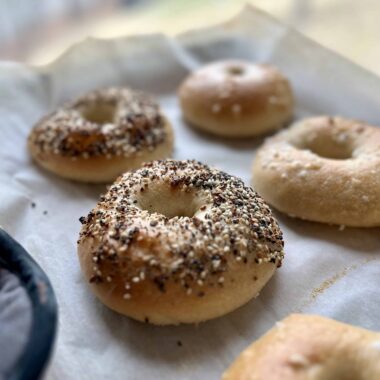
Toppings: We love topping bagels with shredded cheese, Maldon Flaky Sea Salt and of course our favorite Everything but the Bagel Seasoning. You can top them with whatever your favorite toppings are.


Baking Homemade Sourdough Bagels
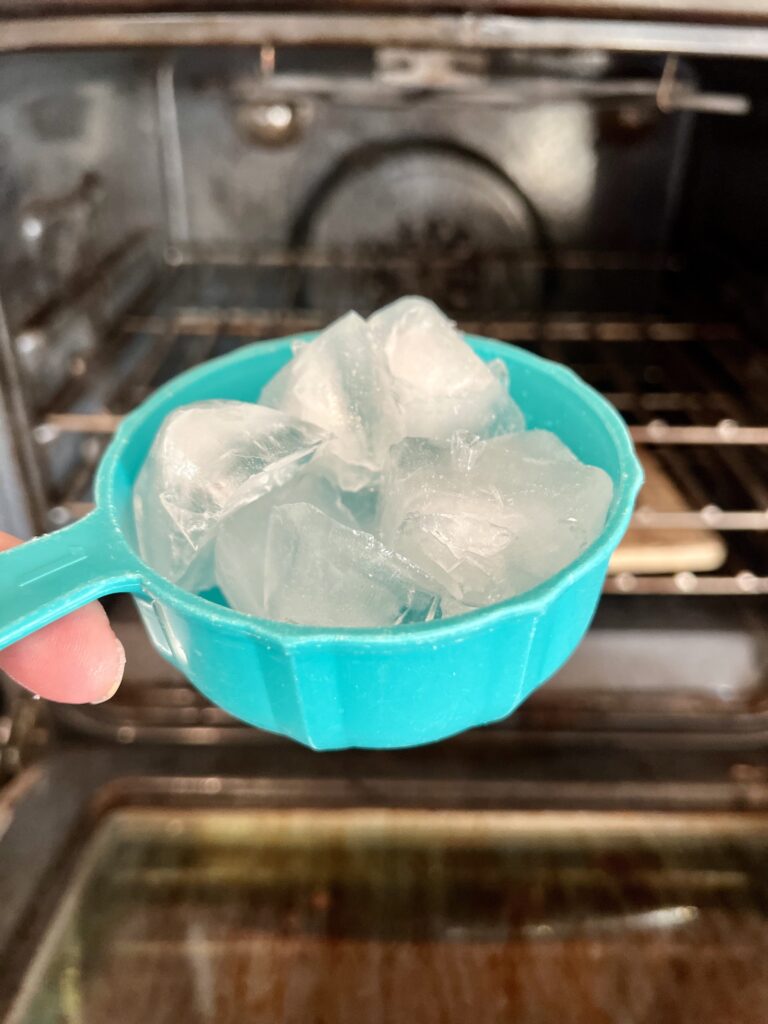
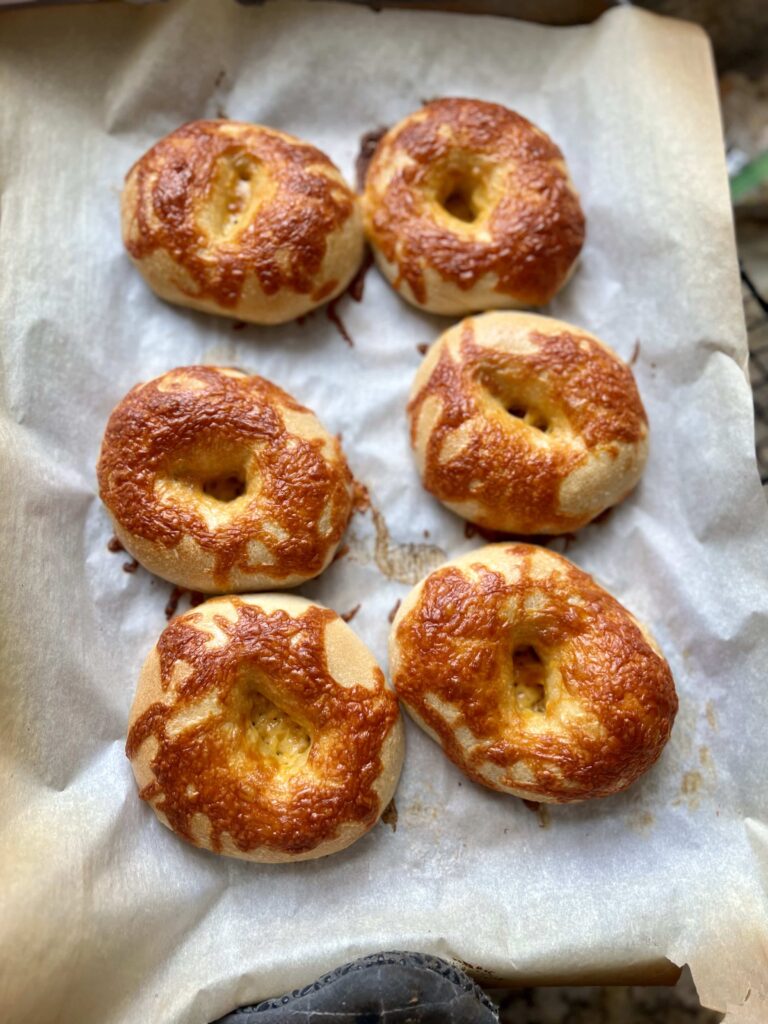
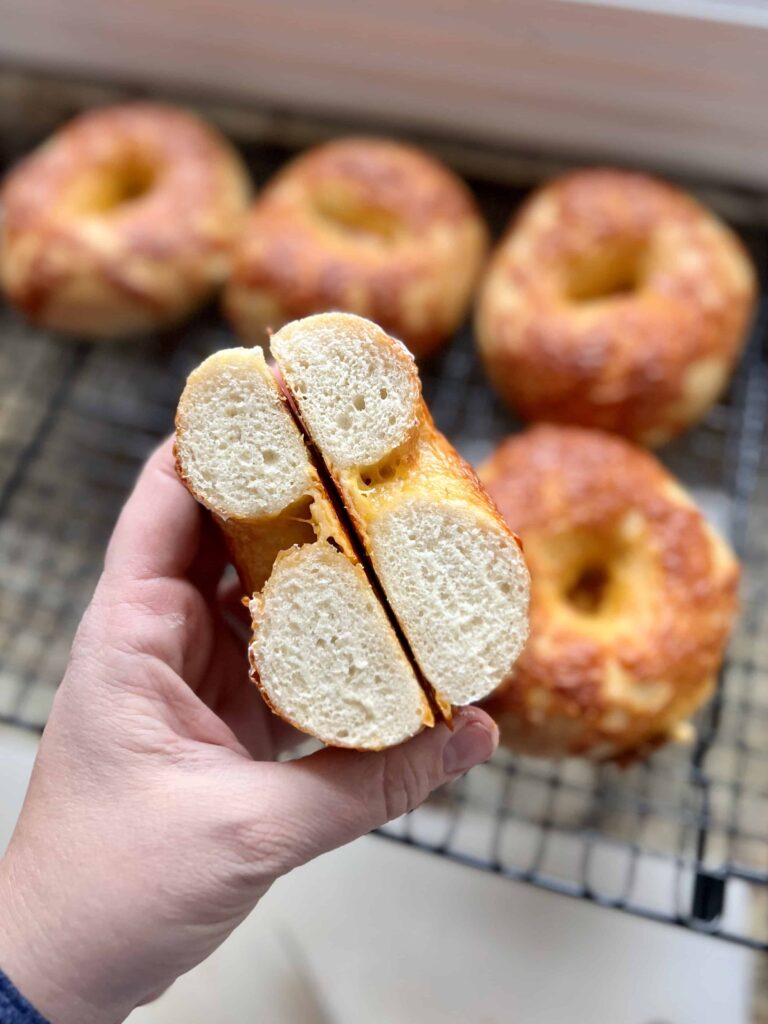
Line two baking sheets with parchment paper. Place the boiled and topped bagels about 6 to a pan to give them room to expand as they bake. Take 1/2 – 1 cup of ice cubes and put them in a baking pan. Place the baking pan on a lower rack of the oven to produce steam. Place the sheet pan of bagels directly into the oven and close the oven door. These ice cubes quickly turn into steam with the hot oven, encouraging the bagels to rise and giving a nice crispy crust to the exterior of the bagel. If you don’t want a crispy crust, you can leave out the ice cubes and bake without the steam they provide. After 10 minutes of baking, open the oven door and rotate the pan of bagels 180 degrees. Turn the oven temperature down to 450 degrees F and bake for another 10-15 minutes until the bagels are sufficiently browned and baked all the way through. Let the bagels cool for about 20 minutes before slicing and enjoying–slathered with cream cheese is my favorite.
If you liked this recipe, you’ll also like…
- Sourdough Blueberry Bagels
- Pretzel Bites with Sourdough Discard
- Soft Sourdough Pretzels
- Sourdough Pretzel Rolls
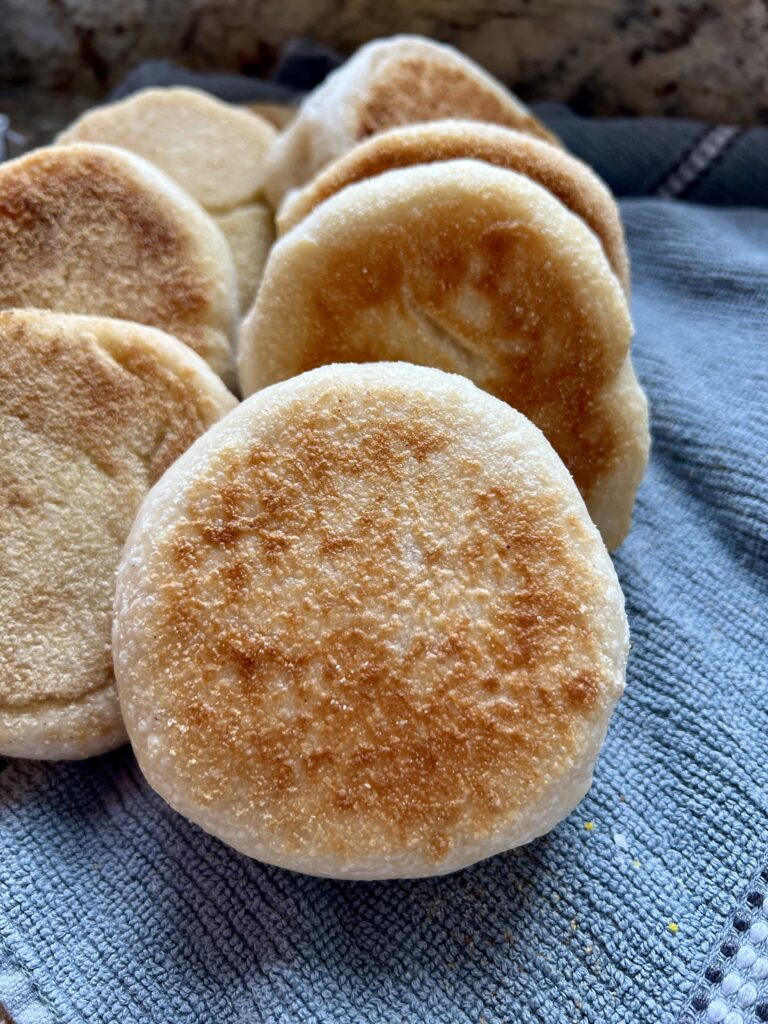
- Sourdough English Muffins
Frequently Asked Questions
This can be a sign of under-proved dough. That means your dough needed to rise a little longer. Make sure your bagel dough is puffy and soft before putting the bagels in the fridge for cold bulk fermentation. If you notice your bagel sinks, let the rest of the bagels warm up a bit and rise longer before boiling and baking.
I place them in a ziplock bag after they have cooled completely and freeze them for up to 3 months. We love pulling one out of the freezer, toasting it up and enjoying a bagel that tastes like it was just pulled out of the oven.
Yes. Use a high quality bread flour and substitute bread flour for the vital wheat gluten. You may also want to reduce the water by 20-30 grams to account for the lower protein content. OR even better use a high protein flour as a substitute for the bread flour and vital wheat gluten.
These bagels do not require anything extra added to the boiling water. The water itself gives the chewy crust to these easy homemade sourdough bagels. No sweetener required!
If you don’t like the crispier outside – decrease the oven temperature to 425ºF. Do not add the ice (steam) to the oven and bake bagels for about 20-25 minutes.
Easy Homemade Sourdough Bagels
Ingredients
Stiff Sweet Levain (peaks in about 12 hours)
- 24 grams ripe sourdough starter
- 20 grams granulated sugar
- 60 grams water
- 120 grams all purpose or bread flour
Easy Homemade Sourdough Bagels
- 200 grams ripe levain
- 475 grams water
- 30 grams pure maple syrup not pancake syrup
- 820 grams bread flour see recipe notes
- 30 grams vital wheat gluten see recipe notes
- 7 grams diastatic malt powder see recipe notes
- 18 grams salt
- cornmeal for sprinking
- any desired toppings
Instructions
Day 1: Make Levain (10-12 hours/overnight at 78ºF)
- Stiff Sweet Levain: Mix together ripe, 100% hydration sourdough starter with granulated sugar, water and all purpose flour. This will be thicker than a traditional 100% hydration levain and will require a bit of kneading to incorporate the sourdough starter. Place the freshly kneaded levain into a clear jar and cover lightly. Let it sit at 78ºF for about 10-12 hours until levain has doubled in size, is rounded on the top and full of bubbles.
Day 2: Mix/Bulk Fermentation/Cold Bulk Fermentation
- Mix the Dough (15 minutes): Set the bowl of a stand mixer on a kitchen scale. Add ripe levain and the rest of the ingredients to the bowl. Start the mixer and knead the dough together for about 8 minutes until smooth. The dough should be smooth and pass the windowpane test before moving to the bulk fermentation.You can also knead this dough completely by hand for about 10-15 minutes until smooth.
- Bulk Fermentation (3.5 hours): Move the dough to a container. Do your best to keep the temperature of the dough at 78 degrees F. I use a bread proofer in the winter to help the dough develop at the right temperature. Cover the container. The entire bulk fermentation will take about 3.5 hours. The dough will be more cohesive and strong, although it may not have risen very much.
- Prepare a baking sheet: Sprinkle cornmeal liberally over the sheet. This will help the bagels not to stick to the pan while they rise.
- Shape Bagels (15 minutes): Separate the dough into 12 equal pieces, about 130 grams each. Take each piece of dough and pull/pinch up the sides until it forms a ball. Roll the ball on the counter using your hand in a cupping shape (see video here) to seal the balls and create tension. Let the balls rest for a minute on the countertop before shaping into bagels. Take your finger and press it directly into the center of the ball of dough until it goes through to the other side, creating a hole. Use your fingers to widen the center hole, moving the dough around in a circle as you stretch it. Let the dough relax and repeat with the next bagel. After you've put holes in all the bagels, stretch them out again as desired and place on the cornmeal dusted baking sheet.
- Proof Bagels (2-3 hours): Cover the bagels with a kitchen towel and let the bagels rise on the baking sheet for about 2-3 hours at 78 degrees F. They will puff up a little and rise. After about 2 hours, check on the bagels. They should puff up a bit and not feel dense. If they do, give them another 30 minutes to an hour and check them again. Stick the sheet of bagels into the refrigerator for a cold bulk fermentation. If you prefer to boil and bake the bagels right away, let them rise another hour or two until puffed up and very soft. Then boil and bake.
- Cold Bulk Fermentation (12-24 hours): Place the covered bagels in the refrigerator overnight for a cold bulk fermentation. This dough can stay in the refrigerator for up to about 24 hours. If you go much longer than that they are prone to overpoofing.
Day 3 Boil and Bake
- Pull the bagels out of the refrigerator to rest at room temperature while you prepare the water bath.
- Prepare the Oven: Place a baking stone in the bottom of your oven. You can bake these without a baking stone, but they will be more susceptible to burn on the bottom. Preheat oven to 475 degrees F.
- Prepare the Baking Sheets: This recipe makes 12 bagels. To allow the bagels full room to expand while they bake, I use 2 baking sheets. Cover the baking sheet with parchment paper and place 6-8 bagels per baking sheet.
- Boiling: Place a large pot of water, about half full, on the stove and turn the heat to high. Have a slotted spoon and a cooling rack ready. As soon as the water comes to a boil, place a bagel into the water. It should float within the first 10 seconds or so of placing in the water. If it doesn't, this is a sign of being under-proved. Allow the rest of the bagels to proof and rise a little bit longer. Add as many bagels to the pot of water as you can without stacking bagels on top of each other (they should each have a little personal space in the water). Boil for about 40 seconds per side. Using the slotted spoon, remove the bagels from the boiling water and place on the cooling rack to drip dry for a minute before topping and placing on a baking sheet.
- Topping: Quickly top bagels with your favorite toppings. Our favorites: sharp shredded cheese, Maldon Flaky Sea Salt and Everything but the Bagel Seasoning.
- Baking: Place about 1/2 – 1 cup of ice cubes in a baking sheet or baking pan. Place the pan on the bottom rack of the oven and then quickly slide the bagels into the oven and close the oven door. This creates steam for baking the bagels. If you prefer less crispy bagels, omit this step. Bake for 10 minutes at 475 degrees F. Then rotate the pan and decrease the oven temperature to 450 degrees F. Bake for another 10-15 minutes, until bagels are golden and baked all the way through.
- Cooling: Let bagels cool for about 20-25 minutes before serving. Bagels can be stored for 24 hours at room temperature and then frozen. Enjoy!
These look delicious!! Yum!! 🥯 😋
This is by far the best sourdough bagel recipe! I just finished making these and they are the most delicious bagels I have ever had. Amy’s recipes never disappoint! I also recommend her online sourdough baking course. My understanding and skills with sourdough have improved greatly with this! I used to be so intimidated by sourdough baking until I took her course! I definitely have more confidence now!
You are so sweet! Thank you for posting your review. So glad you love these bagels and the course!
I’m wondering how I can make a cinnamon raisin bagel with this recipe?
I would probably add raisins into the dough and then do a cinnamon/sugar mixture on top. The cinnamon can negatively affect the long fermentation, you could try adding some in right before shaping the dough if you want the cinnamon in the dough. I’ll have to work on a recipe specifically for this type of bagel.
Delicious!!! I appreciate that you explain in detail and provide pictures with videos in your recipes. Easy to follow! I love the links to the products and tools that you use as well. Thank you for sharing your gift and love of baking sourdough!
Love these bagels! They turned out perfectly except for one minor user error …I didn’t read the part about putting parchment paper on the baking sheets so they stuck to the pans really badly – I won’t make that mistake again! Lol
That’s the worst! Parchment or a silicone liner will definitely help.