Sourdough Artisan Bread
Sourdough artisan bread is what sourdough dreams are made of. Crispy on the outside and soft on the inside. It toasts up to make delicious sandwiches and stays good for days. Learn the art of sourdough with this sourdough artisan bread recipe.
Ingredients
Levain (12 hours before)
- 12 grams ripe sourdough starter
- 120 grams bread flour
- 120 grams water
Sourdough Artisan Bread
- 200 grams levain
- 750 grams water 50 grams reserved for AFTER the fermentolyse
- 900 grams bread flour
- 100 grams whole wheat flour
- 20 grams salt
Instructions
Day 1: Evening, Make Levain (78 degrees)
- Mix together ripe sourdough starter, bread flour and water. Set aside to ripen for 10-12 hours.
Day 2: Mix Dough/Bulk Fermentation/Shape/Cold Bulk Fermentation (78 degrees)
- Fermentolyse: Once the levain is peaked and active (bubbly, doubled in size, milky sweet smell), mix 200 grams levain with 700 grams of water in a large bowl. Warm the water if the ingredients are too cold and cool the water if ingredients are too warm. Add the 900 grams bread flour and 100 grams whole wheat flour to the bowl and mix until incorporated and a shaggy dough forms. Let rest for 30 minutes.
- Mixing: After 30 minutes, add the reserved salt and 50 grams of water. Combine using your hands by squeezing the dough between your fingers, pinching chunks of dough and reincorporating together. The dough will break apart and then reform in the bowl through this process. Pick up one side of the dough and fold it over on itself. The dough will be sticky. Wet your hands as needed and continue to work with the dough until all the salt and water has been incorporated. This can take about 3-5 minutes until the dough is cohesive and strong. Transfer the dough to a plastic container or a glass bowl if desired.
- Bulk Fermentation: Perform 3-4 sets of "stretch and folds."
- To “stretch and fold,” wet your hand (so it doesn’t stick to the dough). Reach down to the bottom of the bowl of dough and pull the dough up and over the top of the dough. Turn the bowl 1/4 turn and repeat the stretch and fold. Turn another quarter turn and repeat. Perform one more 1/4 turn with stretching and folding the dough. Cover and set aside.
- Repeat the stretch and folds every 30 minutes for the first two hours.
- Let the dough rest in a warm place, for the rest of bulk fermentation, about 1 1/2 - 2 hours at 78 degrees. During this time the dough will puff up about 30-40%, become more aerated, start to pull away from the edges of the bowl and have a few scattered bubbles around the edges/top of the dough. If you dough is not showing these signs, make sure it's warm enough and give it another half an hour or so until it is showing those signs that it's ready to shape.
- Divide: Tip the bowl upside down, allowing the dough to fall onto a clean counter surface. Be gentle to avoid cutting and degassing the dough as much as possible. Use a bench knife to cut the dough into two equal portions.
- Pre-Shape: Wet your hands and the bench knife. Push the bench knife under the dough while using your free hand to tuck the dough under itself. Repeat this process going around in a circle until you have a tight ball of dough. Repeat with the second loaf.
- Bench Rest: Let the dough rest uncovered for about 30 minutes at room temperature. The dough will flatten a bit during this period of time.
- Shaping: After the dough has rested for about 30 minutes it is time to shape the bread into a round. Sprinkle flour on top of the dough. Using the bench knife, lift the dough up off the counter and place it on top of the countertop–floured side down. This ensures that the flour is staying mainly on the outside of the dough. Going around in a circle, pull the dough sideways towards you and then fold up to the top of the round. Move 90 degrees and repeat the same process pulling the dough sideways and then folding up to the top. As you continue this process around the dough, increase the tension as you pull. Gather the bread into a circle and use a bench knife to lift the bread and place into your lined bowl.
- Cold Fermentation: Cover the dough with plastic wrap or a reusable cover and store in the refrigerator overnight or for up to 12-24 hours. Alternatively you can let your dough rise outside the fridge for another 3-4 hours, keeping the dough at that 78 degree F temperature, and then bake your loaves the same day.
Day 3: Bake
- Pre-heat the Oven: Put a dutch oven (top and all) into the oven and preheat to 500 degrees. Allow the dutch oven to heat for about 30 minutes to an hour at 500 degrees.
- Once preheated for 30 minutes, pull your first loaf out of the refrigerator. Remove the plastic wrap (this is easy to do straight out of the refrigerator if the dough is chilled–not easy if the dough warms up) and place a piece of parchment paper on top of the bread dough. Flip the dough over so that the dough is now sitting on the parchment paper. Take off the bowl/banneton and kitchen towel.
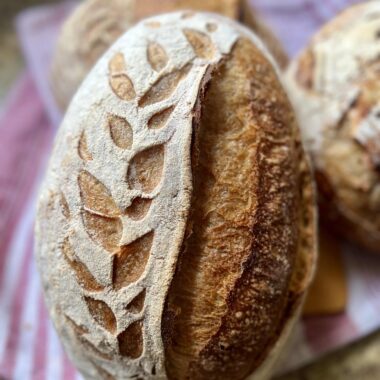
- Scoring: Smooth the flour over the top of the dough (add a little extra for more contrast if desired). Use a very sharp knife or bread lame to score the dough.
- Bake: Carefully remove the dutch oven from the 500 degree oven with hot pads. Take the top off and place your bread into the dutch oven (including parchment paper–this helps with the transfer). Be very careful not to touch the sides of the dutch oven. Put your hot pads back on before you pick up the lid of the dutch oven and place it on top of the bread. Put the whole dutch oven back into your oven. Lower the temperature to 450 degrees and bake for 25 minutes. Once 25 minutes are up, take the top off the dutch oven and continue baking for 20 minutes until the bread is a crackly deep brown. The loaf should register between 205-210℉ when it's finished baking.
- Remove the baked loaf from the dutch oven and pre-heat the dutch oven again for 15-20 minutes. Score the second loaf and bake according to the same directions. Let cool and enjoy!
Notes
This is an advanced sourdough recipe. Read through the entire article before baking for more information and answers to questions. If you are looking for a beginner version, check out this recipe here.
Same Day Baking: If you want to bake this recipe the same day and skip the cold fermentation, let the dough rise in the bannetons or bowls on the counter. Do your best to keep the dough warm, in the 78-80 degree F range. Once the dough has risen another 30-40%, pre-heat the dutch oven and bake the loaves according to recipe directions.
Tried this recipe?Let us know how it was!