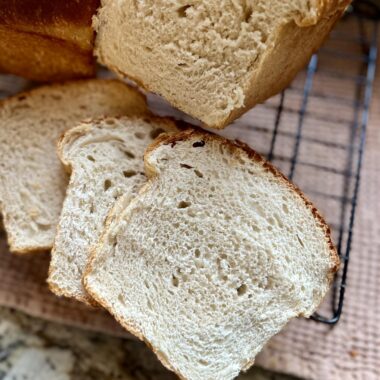
Soft Sourdough Sandwich Bread
Soft, fluffy and absolutely delicious, sourdough sandwich bread is made with 100% natural yeast and results in the most delicious tender sandwich bread. This white bread is perfect for sandwiches, french toast, toast or just to enjoy hot out of the oven. This recipe makes 2 loaves of sandwich bread.
Ingredients
Levain
- 140 grams sourdough starter bubbly and active, see recipe notes
- 140 grams all purpose flour
- 140 grams water see recipe notes
- 30 grams granulated sugar
Sourdough Sandwich Bread
- 400 grams levain about 1 3/4 cup
- 330 grams water see recipe notes, about 1 1/3 cups
- 160 grams honey about 1/2 cup
- 1 large egg about 50 grams
- 50 grams coconut oil melted, or any neutral flavored oil, about 1/4 cup
- 20 grams salt about 2 Tablespoons
- 950 grams bread flour about 6-7 cups, see recipe notes
Instructions
Levain (1:1:1, ready in 3-4 hours at 78ºF)
- Make the levain about 3-4 hours before mixing the dough.
- Take the temperature of your flour and sourdough starter. If the temperature of the ingredients are significantly below 78 degrees, use warm water (around 90 degrees) to mix the levain. If they are above 78 degrees, use room temperature water or cold water depending on how warm the ingredients are. Maintaining the temperature of around 78-80 degrees throughout the process will produce better results.
- Weigh 140 grams of active sourdough starter, 140 grams all purpose flour, 140 grams water and 30 grams of sugar. Mix together until a thick batter forms. Cover lightly and set in a warm (78 degrees) place to ferment for about 3-4 hours until bubbly, doubled in size, active and strong.
Sourdough Sandwich Bread
- Mix: To the bowl of a stand mixer, add the ripe levain, water, honey, salt, egg, coconut oil and most of the flour. I like to reserve a little of the flour (a little less than a cup) and add it in as needed. Knead for 10-15 minutes until dough passes the windowpane test. The dough should pull away from the sides of the bowl or gather all together as it kneads. It will feel tacky to the touch, but should not be overly sticky. If it is very sticky, add a little bit more flour 10-20 grams at a time until it feels tacky and workable. This dough can also be kneaded about 10-20 minutes by hand.
- Begin Bulk Fermentation: Transfer the dough to a large container and cover with a plastic shower cap (the best!) or kitchen towel. Let rest for 30 minutes. After the 30 minutes, perform a series of 3 stretch-and-folds with a half hour between each set. If you don't have time for all the stretch and folds, I've recently had success doing one or two or even leaving them out completely.
- Stretch and Fold 1: Starting on one side of the bowl, reach down and grab the bottom of the dough. Pull it up and stretch it over the top of the dough. Turn the bowl 1/4 turn and repeat the whole process 3-4 times. Cover the dough and let rest.Stretch and Fold 2: After 30 minutes, repeat the stretch and fold process, stretching and folding about 3-4 times. Notice how the dough is strengthening and starting to rise. Stretch and Fold 3: After 30 minutes, repeat the stretch and fold process for the last time, stretching and folding about 3-4 times. Cover the dough and finish the bulk rise.
- Bulk Rise: Let the dough rise until puffy and almost doubled in size for 2.5 hours (a lot of this will depend on the temperature of your dough--about 78-80 degrees is the sweet spot). The dough should rise and almost double in size during this time. If it does not, take the temperature of the dough and make sure it is warm enough. Let it continue rising in a warm spot until about doubled in size. At this point you can also stick the dough in the refrigerator after a couple of hours for a long cold bulk rise. See recipe notes.
- Divid and Shape: Turn the dough out onto the counter. Separate into two equal portions of dough. Pat one of the portions out into a rectangle. Starting at the edge closest to you, roll up the dough. Take care to press in the dough at the seam after each roll and pinch the seam closed at the end. Pinch and round the ends of the dough just a bit to get a uniform loaf. Place in a greased 8.5-by-4.5 loaf pan and cover. Repeat with remaining portion of dough. You can watch a shaping video here.
- Rise: Let the bread rise in the pan for 4-8 hours until the dough has risen over the edge of the loaf pan. Depending on time of year, temperature and how active your yeast is, the rise could be shorter or much longer. If you notice no change and no rise, put the bread in a warmer place (oven with a light on or bread proofer). Press in gently on the dough with a finger. If the dough springs back immediately, it needs a little more time to rise. If it leaves a little indentation and springs back just a little bit, it is ready to bake.
- Bake: Pre-heat oven to 350 degrees. Bake loaves of bread for 40 minutes. Spread melted butter on the tops of the loaves if desired. Let bread cool completely before slicing for sandwiches. Enjoy!
Notes
Water Temperature: The temperature of the water can have an effect on how quickly the sourdough ferments. If you are baking this bread in the summer, you will want to use cooler water to help with the ambient temperature in your kitchen. If you bake during the winter, a warmer water (nothing over 98 degrees--temperature of baby's bath) can help increase the activity and fermentation process of the natural yeast.
Sourdough Starter: This recipe needs active sourdough starter. If you are using sourdough starter from the refrigerator, pull it out a day or two before making this bread. Feed it once in the morning and once at night, making sure it doubles or triples in size. The more active your starter is, the better this bread will rise.
Overnight Refrigerated Bulk Rise: After the bulk fermentation is completed, stick the dough in the refrigerator overnight (or up to 18 hours). The next morning, proceed with the recipe by pre-shaping the dough, resting, shaping the dough, letting it rise and bake the bread loaves.
Honey/Sugar: If you substitute sugar for honey, you will use LESS flour in this recipe. I like to reserve about 1 cup of flour and add it in as I go to make sure the dough is the right consistency.
Flour: I use a 12.5% protein content bread flour in this recipe. If you use flour with a stronger protein content than this, you will want to increase the water in the recipe. I like to reserve about 1 cup of flour (around 150 grams) and add it in as I go to make sure I get the correct texture of dough. Many things can affect dough--humidity, type of flour, egg size, etc... You are looking for tacky, not overly sticky dough. Add the remaining flour and mix as you go.
Edit: Originally this recipe called for 60 grams of honey and 850 grams flour. We prefer this bread sweet from the honey and make it with the 160 grams. As I've made it over the years I've increased the flour to 950 grams and the honey to 160 grams. If you want to decrease the honey back to the original posting, it will work well too. The bread won't be quite as sweet and may have a few more sour notes.
Tried this recipe?Let us know how it was!