Affiliate disclosure: This post may contain affiliate links. Please see our disclosure policy.

Looking for the perfect way to use up some leftover sourdough discard? This Sourdough Discard Bread is just what you need. Use up leftover starter while baking a soft, flavorful loaf with a beautifully crispy crust.
This is an easy, approachable recipe that doesn’t require long fermentation or advanced sourdough skills, making it great for beginners and seasoned bakers alike. The discard adds a subtle tang and extra depth of flavor without the effort of a traditional sourdough loaf: simple, satisfying, and a delicious way to reduce kitchen waste.
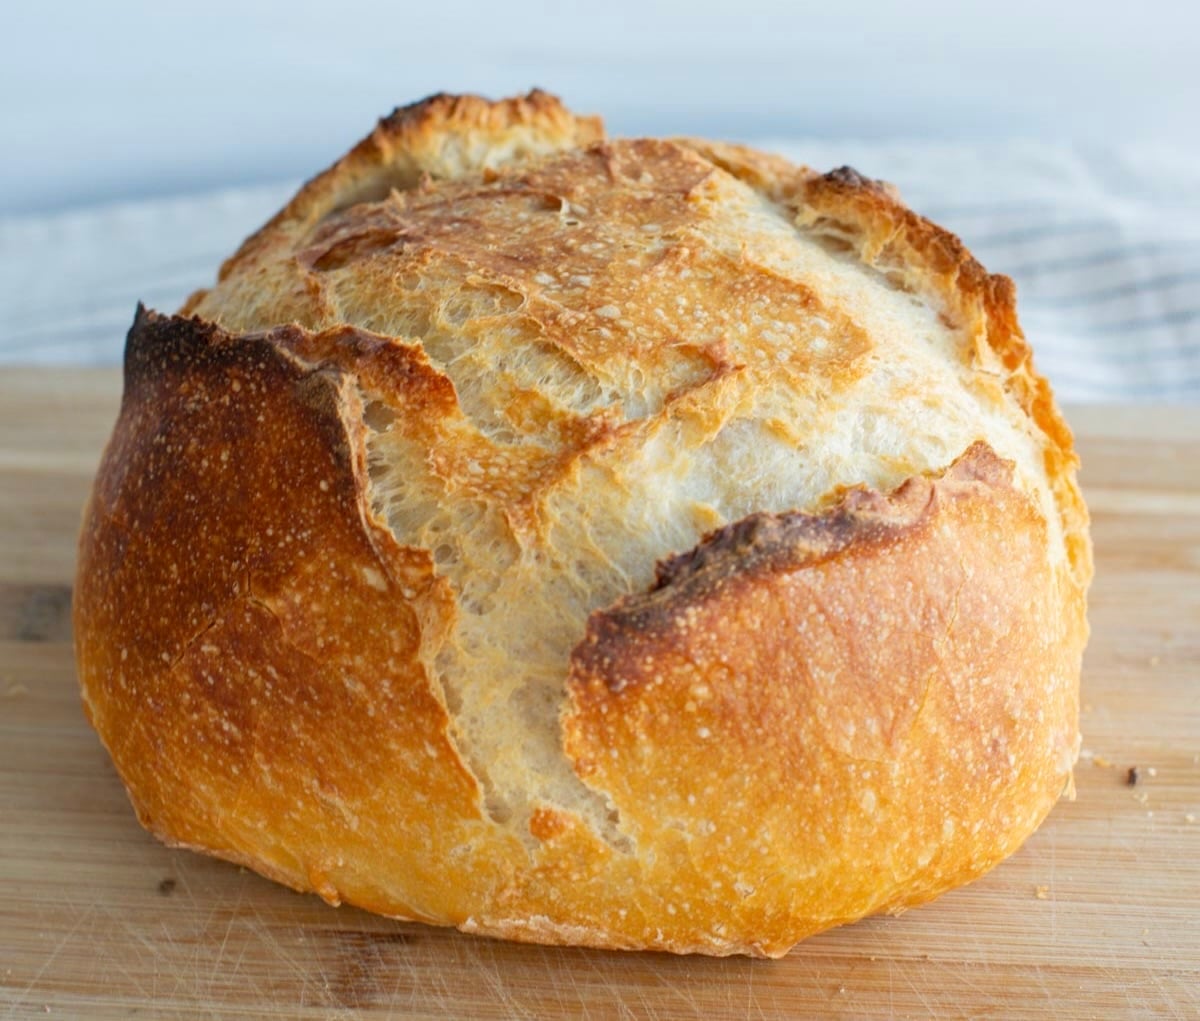
Table of Contents
- Quick Look: Sourdough Discard Bread
- Why You’ll Love Easy Discard Bread
- Ingredients For the Perfect Loaf
- Substitutions
- How to Make Sourdough Discard Bread
- How to Store Leftovers
- Amy’s Recipe Tip
- Frequently Asked Questions
- Popular sourdough Discard Recipes
- Easy Sourdough Discard Bread (No-Knead Dutch Oven Recipe)
Quick Look: Sourdough Discard Bread
- Prep Time: 20 minutes
- Rise Time: 2 hours
- Bake Time: 45 minutes
- Total Time: 3 hours 5 minutes
- Servings: 1 loaf, about 12 slices
- Calories: ~137 kcal per serving (based on nutrition panel)
- Cook Method: baked in a Dutch Oven
- Flavor & Texture: crispy outside, soft middle, slight tang from the sourdough discard
- Difficulty: Easy, beginner-friendly discard loaf
SUMMARIZE AND SAVE THIS RECIPE CONTENT ON:
Save this for later!
Why You’ll Love Easy Discard Bread
- Discard Recipe – Because of the commercial yeast added in this recipe, it is a much faster loaf of bread than a traditional sourdough loaf but with a hint of the same great flavor. If you want a 100% sourdough loaf instead, try this Beginner Sourdough Bread or my favorite Classic Sourdough Bread.
- Easy! – This recipe couldn’t be easier. With just a few basic ingredients and simple steps, this recipe is perfect for beginners. For a super simple no-knead sourdough version, try this Easy Sourdough Bread Recipe.
- Soft and Delicious – Just like my Sourdough Discard Soft French Bread, this loaf makes for the perfect side for your dinner table. It’s also delicious toasted in the morning or the perfect sandwich bread for grilled cheese too!
Sourdough Discard Tip: I keep a jar in my fridge that I continually add sourdough discard to. Discard is a by-product of your sourdough starter and there is no reason to throw it away. Instead, use it in incredible sourdough discard recipes where it adds moisture and great flavor. Use older, more tangy discard in savory recipes like The Best Sourdough Discard Sandwich Bread and young/fresh discard in sweeter recipes like these Iced Oatmeal Sourdough Discard Cookies.
Don’t worry if you see a gray liquid (hooch) on top. It’s just hungry! Unless you see pink or orange mold, it’s perfectly safe to use. (See my FAQ below for more on discard safety!)
Ingredients For the Perfect Loaf
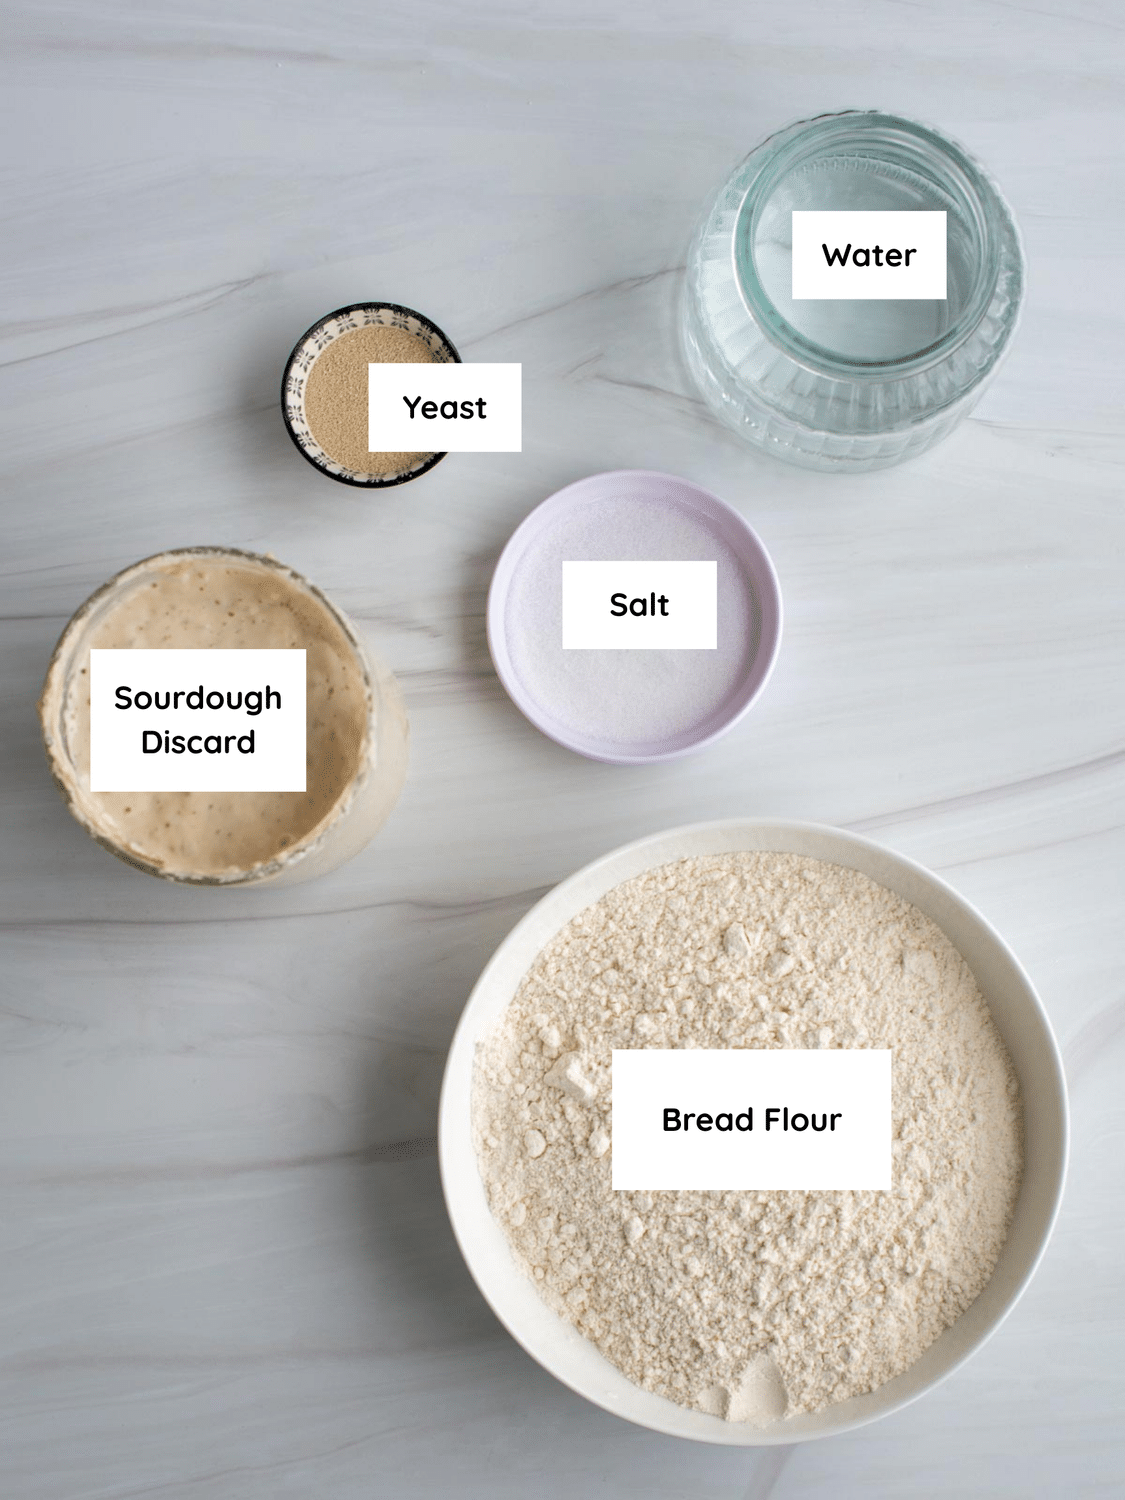
- Sourdough Discard – I use 100% hydration sourdough discard in discard recipes. You can also use fresh, bubbly, active sourdough starter or discard that’s been in your refrigerator for a week or more.
- Water – It’s important to use water that is warm (80-90ºF) when mixing this dough so that your yeast can activate and your bread will rise well.
- Instant Yeast – This is a discard recipe, so instant yeast is essential for leavening this bread.
- Salt – With so few ingredients, salt helps give flavor to this bread. Don’t leave it out.
- Bread Flour – High quality bread flour (about 12.5% protein content) makes this bread soft and fluffy.
See the recipe card for full information on ingredients and quantities
Substitutions
With so few and such simple ingredients, there aren’t many substitutions to make for this bread.
- Dry Active Yeast: Dry Active Yeast can be substittued for the instant yeast in this recipe, but it must be activated and proofed in the warm water for 5–10 minutes until foamy before adding to the dough.
- All-Purpose Flour: You can use all-purpose flour in place of the bread flour in this dough. Add a little vital wheat gluten to increase the protein content of your flour.
- Whole Wheat Flour: Substitute up to half of the bread flour with whole wheat flour if desired. The bread won’t bake up quite as tall and fluffy, but will taste delicious.
- Inclusions: This discard loaf is a great one to experiment with some inclusions. Add in Italian seasoning, roasted garlic or even some shredded cheese, chopped nuts or dried fruit to give variety to this loaf.
How to Make Sourdough Discard Bread
Mix The Dough
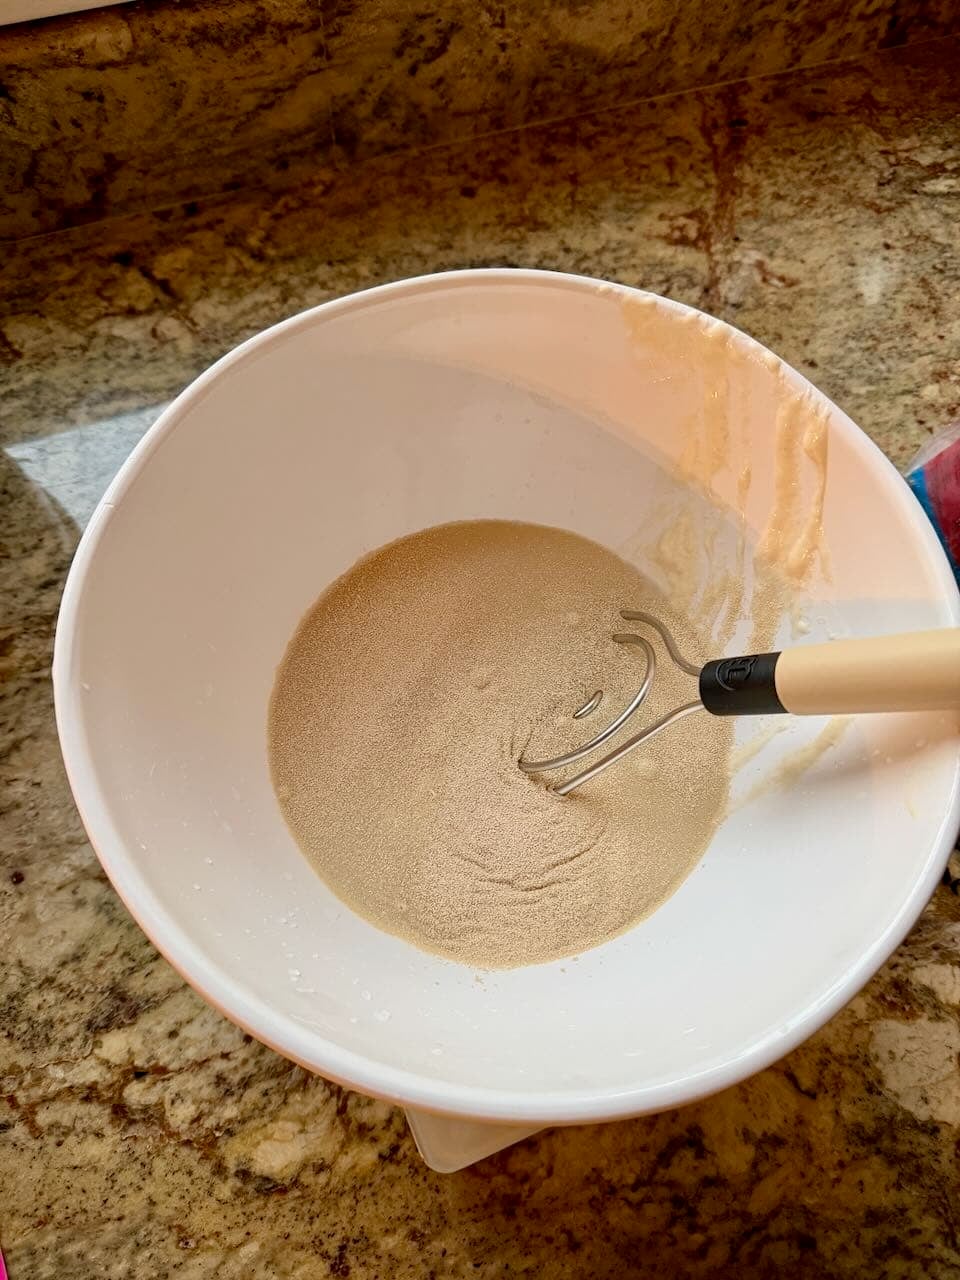
Step 1: Combine warm water, sourdough discard, and instant yeast in a mixing bowl.

Step 2: Add the salt and bread flour. Use a dough whisk, wooden spoon, or your hands to mix the dough until all of the flour is incorporated.
Activating Yeast: If using instant yeast you don’t have to wait for it to activate in the warm water before proceeding. I always like to make sure my yeast is active before adding other ingredients because it reduces the risk of rising issues later, but you can skip the wait if you prefer.
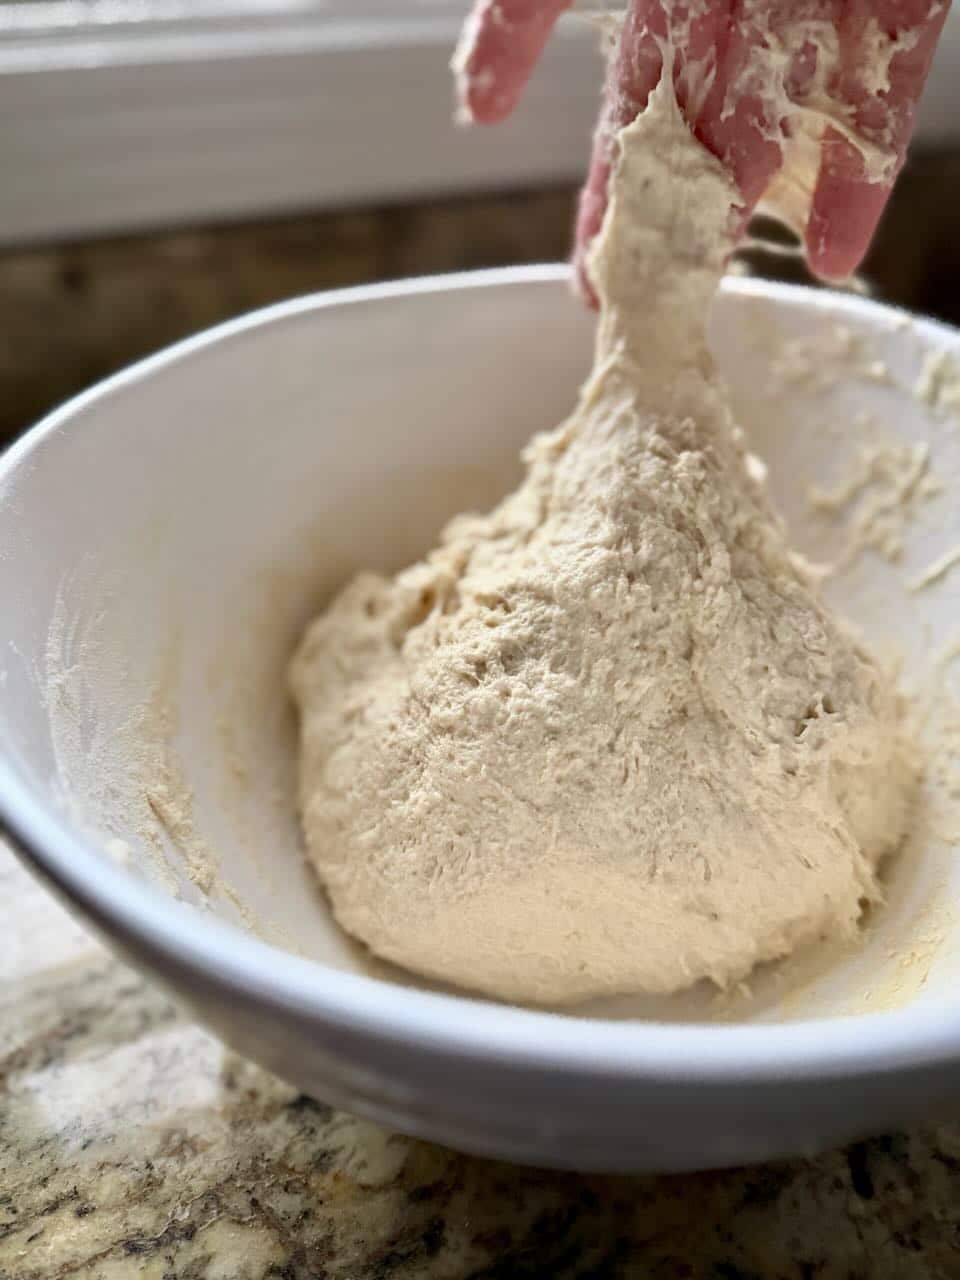
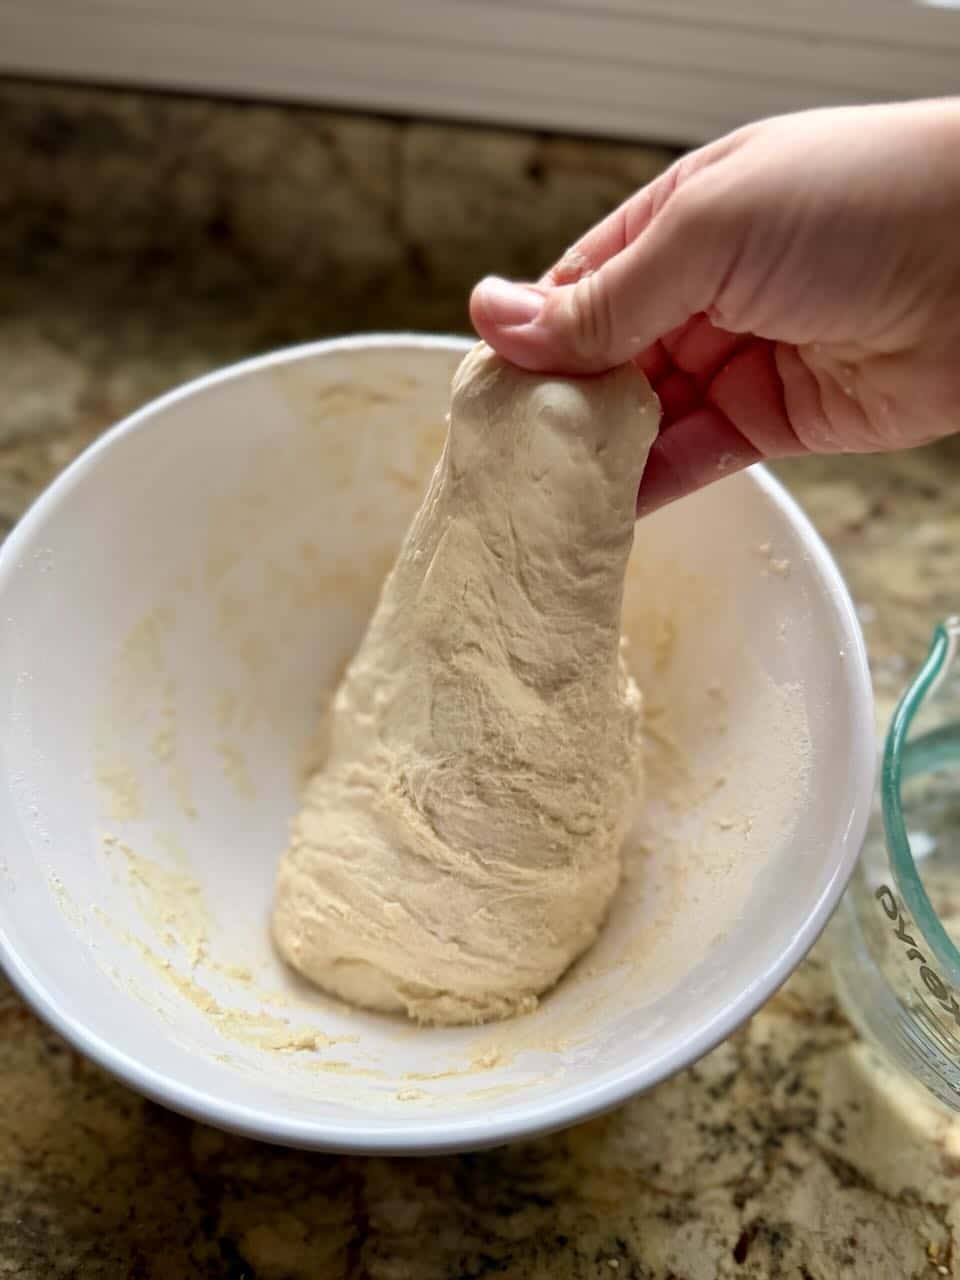
Step 3: Once your dough has been mixed together, it should form a shaggy, cohesive ball.

Cover your bowl with plastic wrap, a shower cap or a kitchen towel and let the dough rest for about 15 minutes.
Sticky Dough: Since this recipe is higher in hydration (a higher water-to-flour ratio), the dough will feel stickier than standard sandwich bread dough. Use damp hands to work with the dough and know that this is normal!
Stretch and Folds
Step 4: After your dough has rested for about 15 minutes, perform your first set of stretch and folds. To stretch and fold, gently reach under the dough and pull. Fold the dough over onto itself. Turn the bowl and repeat. Complete a total of 3-4 folds and let rest for another 15 minutes.
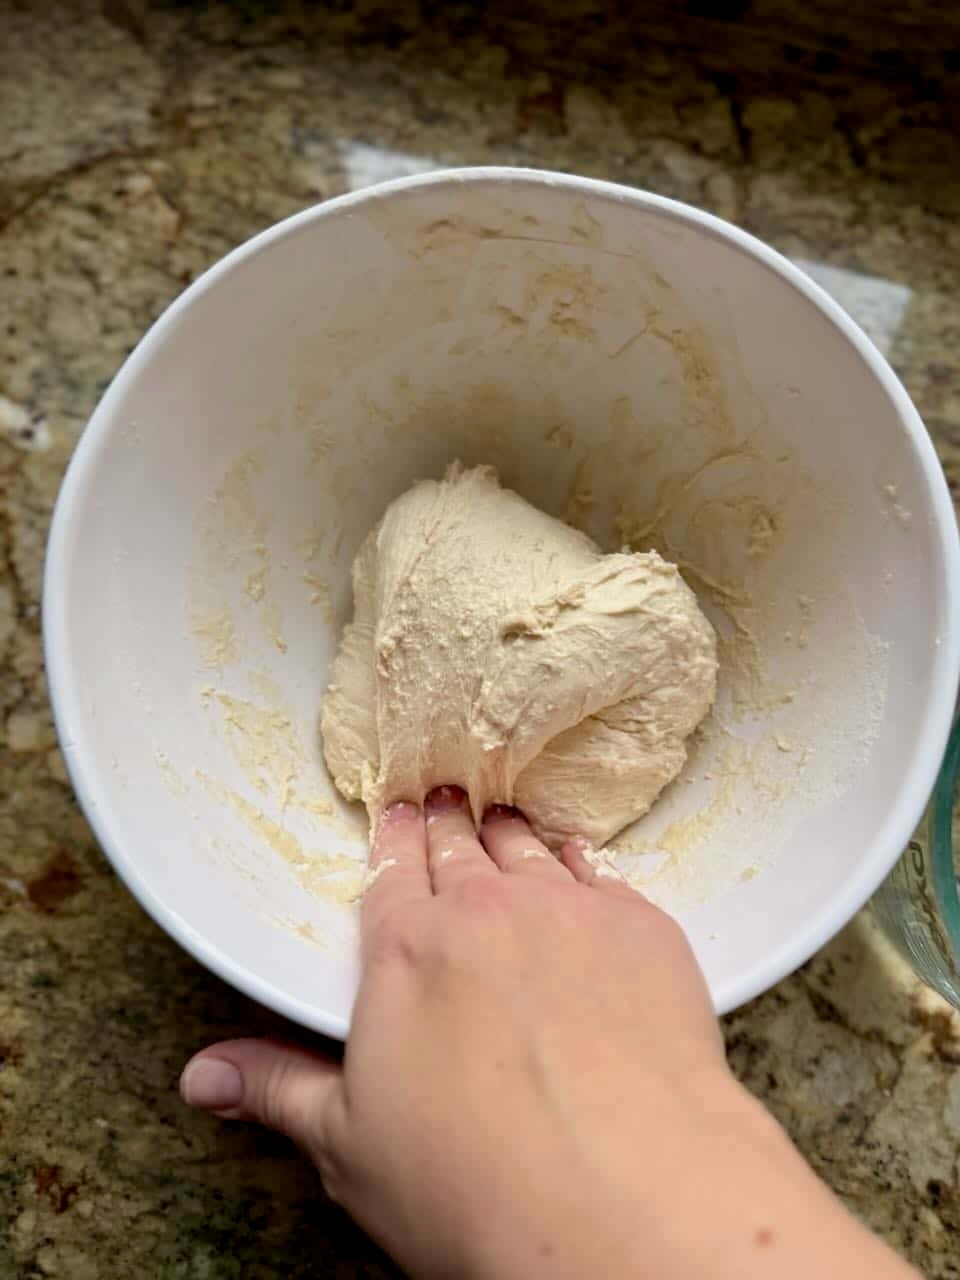
Step 5: After letting the dough rest for 15 minutes, repeat the stretch and fold process for another set of 3-4 stretch and folds. During this process your dough should begin to feel smother and stronger. Let the dough rest for another 15 minutes before performing a third set of stretch and folds. After this third round, your dough should feel smoother and stronger
Why Stretch and Folds? In many high hydration bread recipes, we use stretch and folds instead of traditional heavy kneading to develop the gluten. This process creates a stronger dough and a better internal structure.
While this usually happens over several hours in a traditional sourdough loaf, this recipe rises quickly thanks to the instant yeast. To keep up with that faster rise, we perform the stretch and folds every 15 minutes. This ensures your dough is strong and airy by the time it’s ready for the oven!
Rest & Rise

Step 6: Let the dough rest for about 30-60 minutes until it has doubled in size. The amount of time your dough needs to double in size will depend on the temperature of your kitchen.
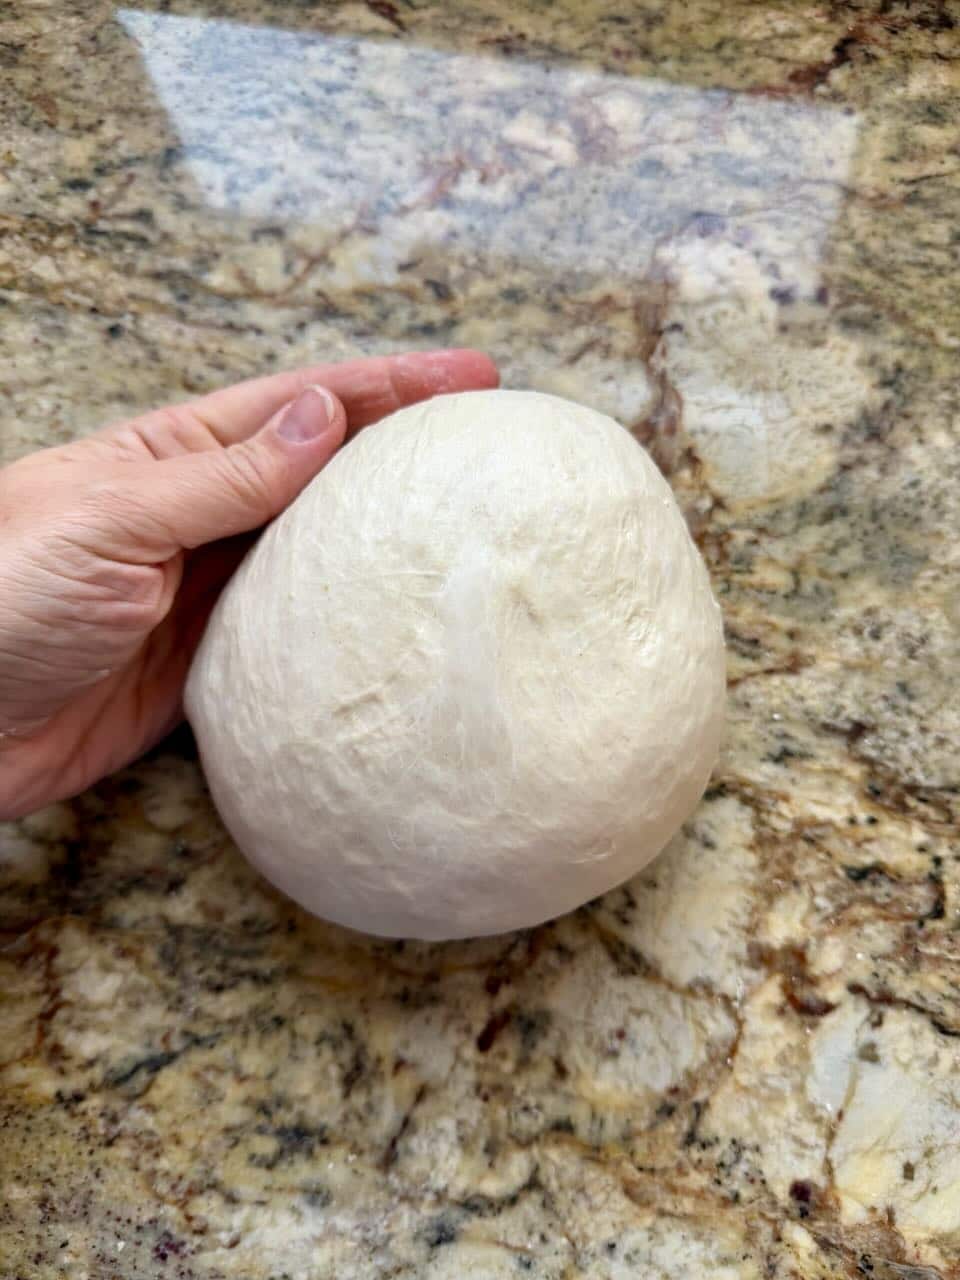
Step 7: After your dough has doubled in size, dump the dough on a kitchen counter and gently shape it into a round ball. If your dough is sticky, use damp hands to gently shape it.
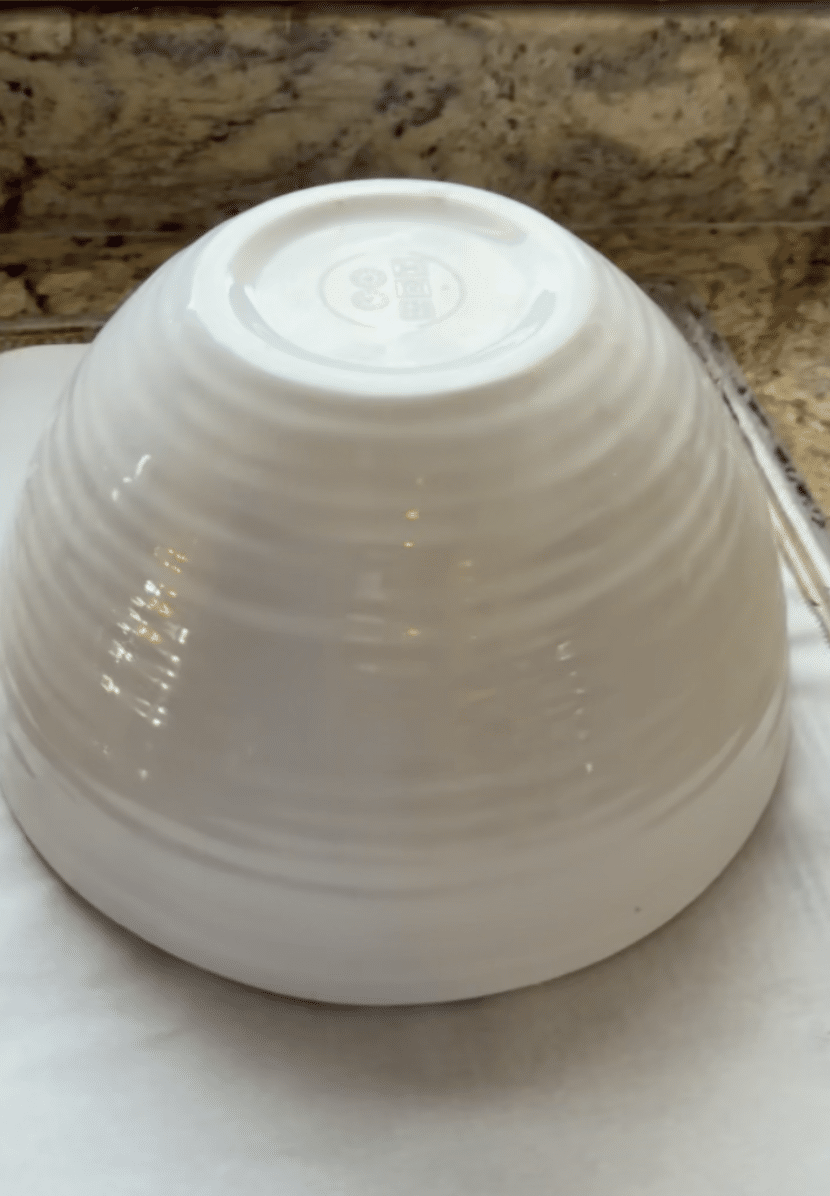
Step 8: Place the shaped ball of dough onto a piece of parchment paper. Cover the dough with a mixing bowl or a kitchen towel and let rise for 30-40 minutes.
Overnight Cold Ferment Option: This dough was meant to make a quick loaf of sourdough-style bread. However, if you want to develop a deeper flavor and a better crust color, you can let the dough rise in the refrigerator overnight. After the cold ferment, shape the dough and let it rest a little longer than usual (since it’s cold from the fridge) before baking as directed.
Bake the Bread
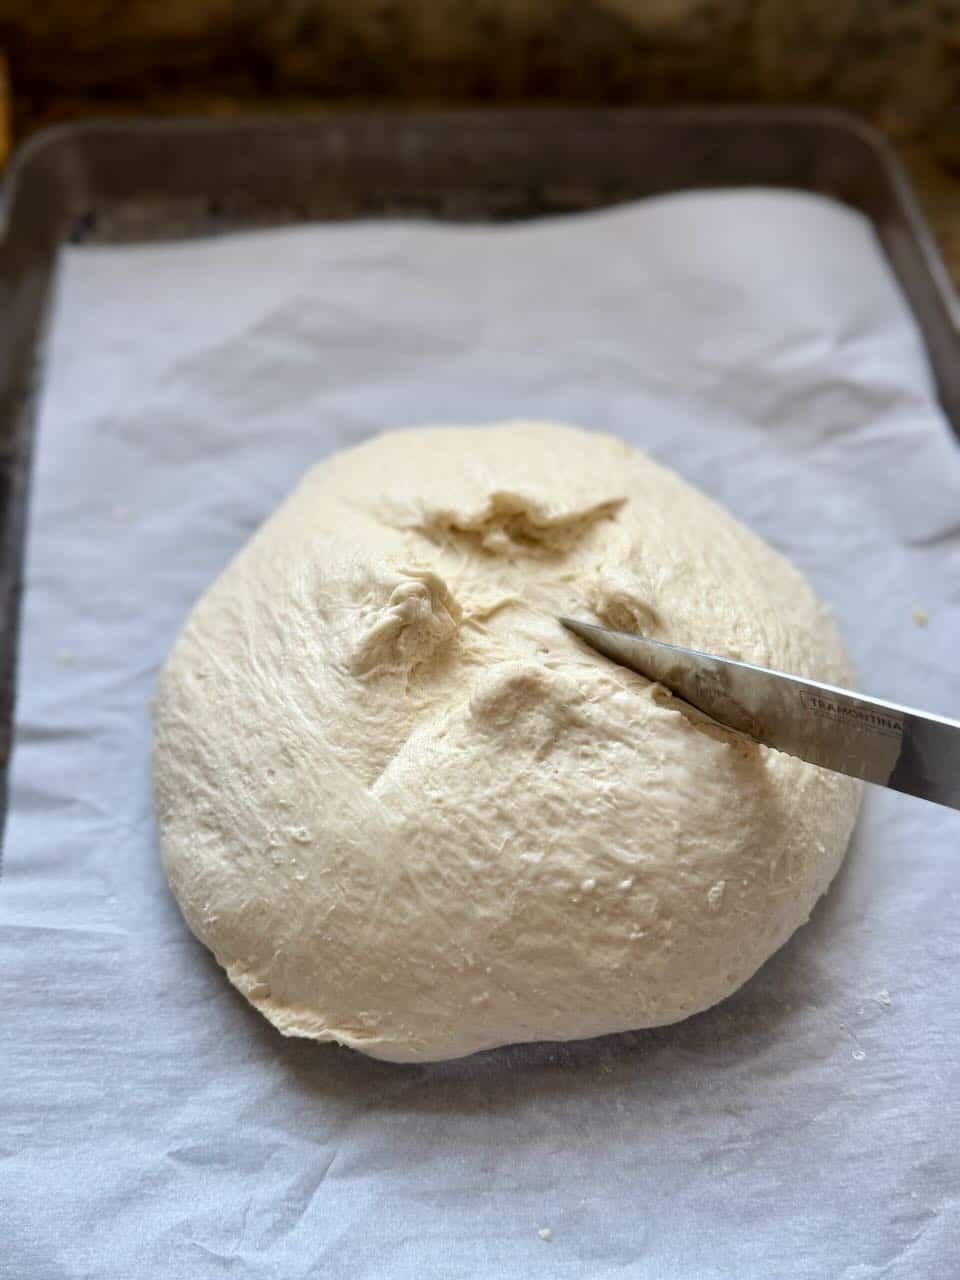
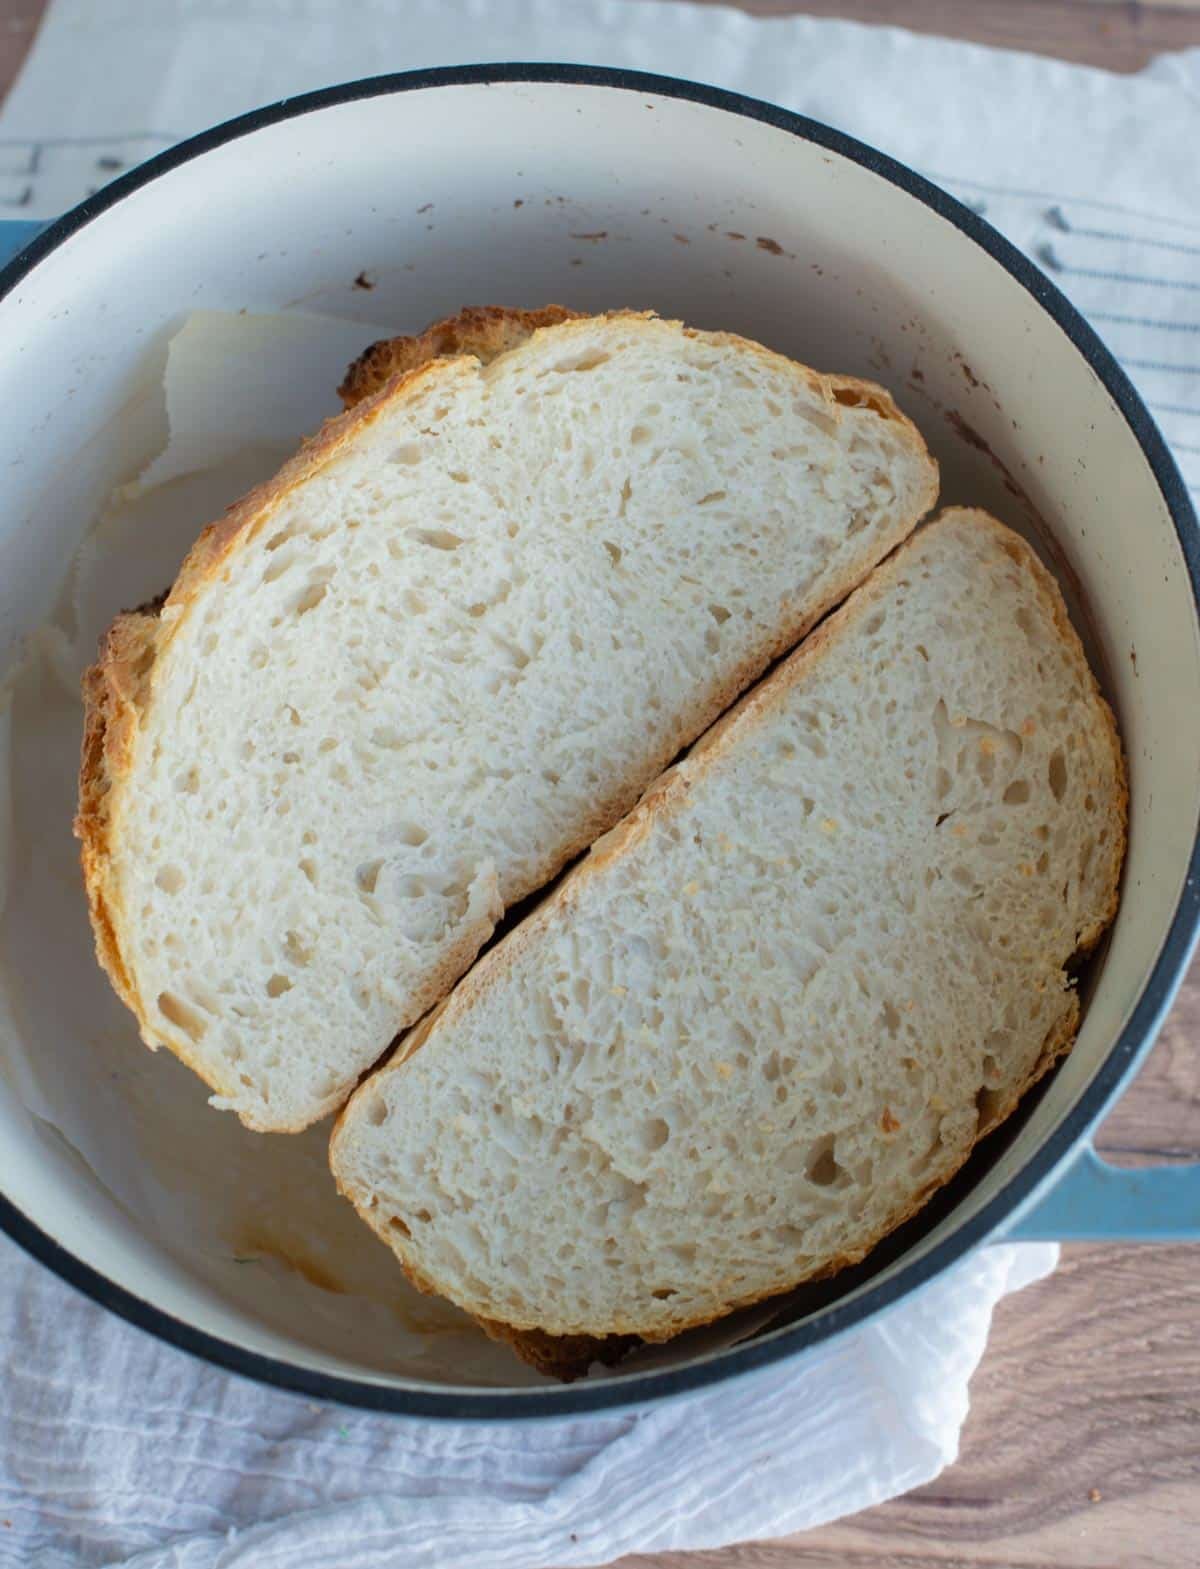
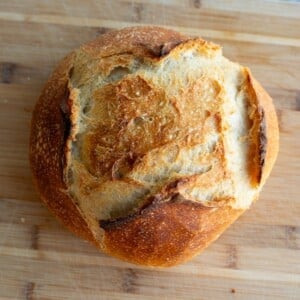
Step 9: Place a Dutch oven in the oven with the lid on. Preheat the oven to 500°F. Use a bread lame or a sharp knife to score the dough. I find a few simple slashes give the best result with this loaf.
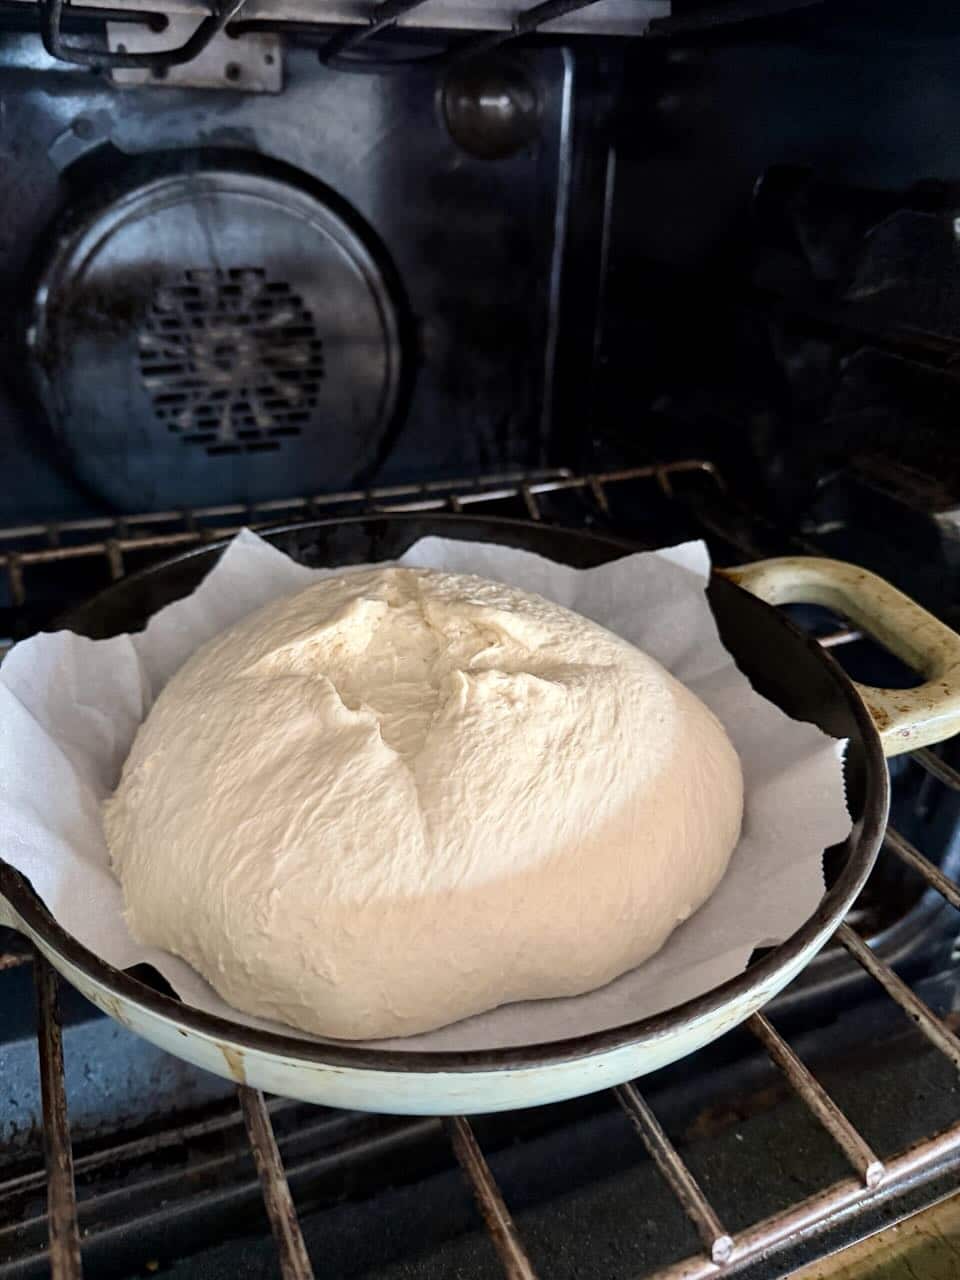
Step 10: Once the oven has preheated, use oven mitts to remove the Dutch oven carefully. Place your dough (parchment paper and all) in the Dutch oven. Reduce the oven temperature to 450°F and bake for 25 minutes.
Scoring Tip: This loaf is not meant for intricate scoring. Scoring is to help control where the bread is going to burst and expand in the oven; it’s part of the rustic beauty of this loaf. If you want a loaf specifically for decorative scoring, try my Classic Sourdough Bread recipe.
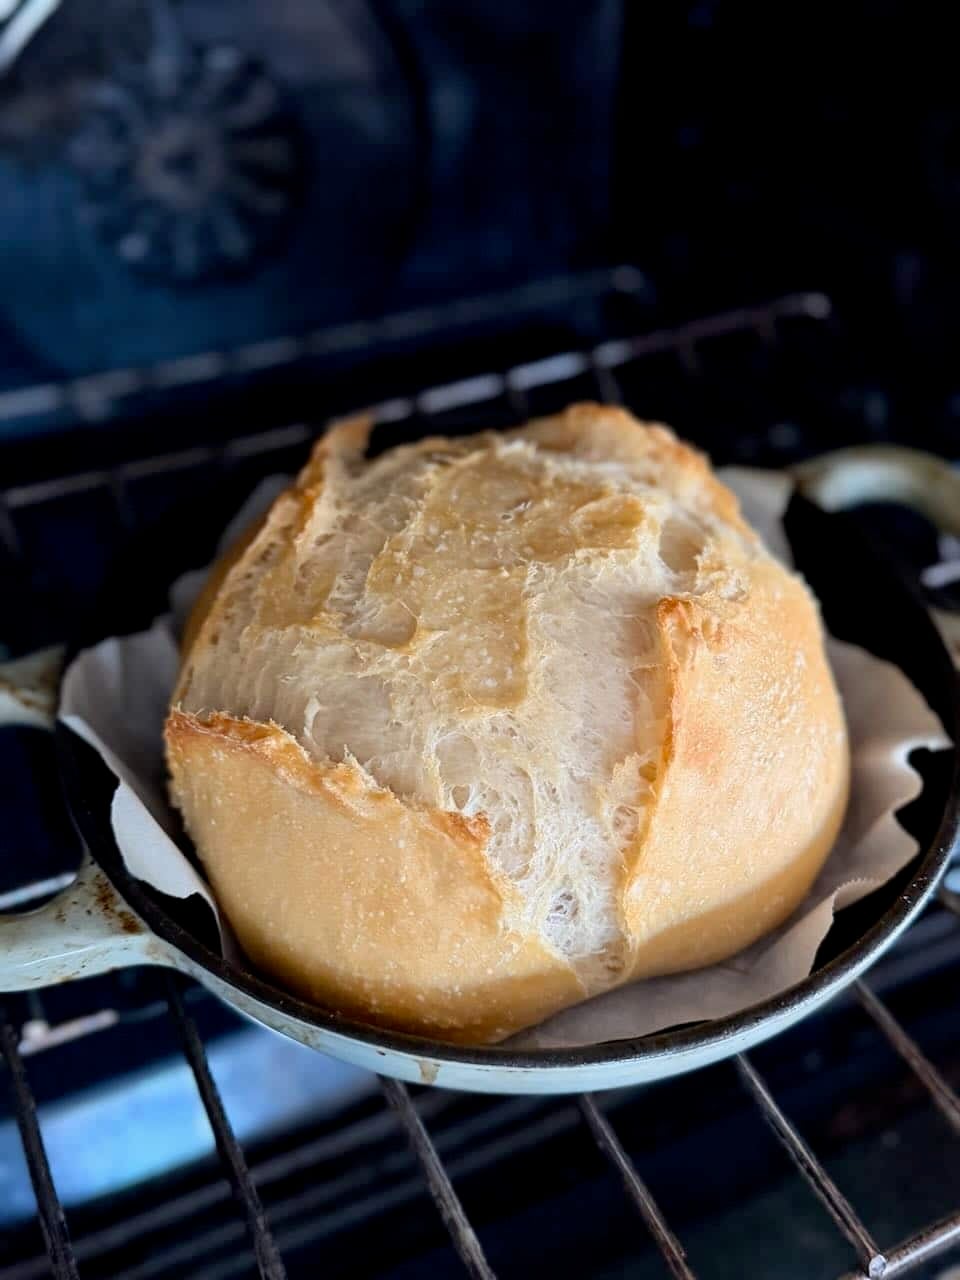
Step 11: After 25 minutes, take the top off the dutch oven and continue baking for 20 more minutes and the internal temperature reaches 205-210ºF.
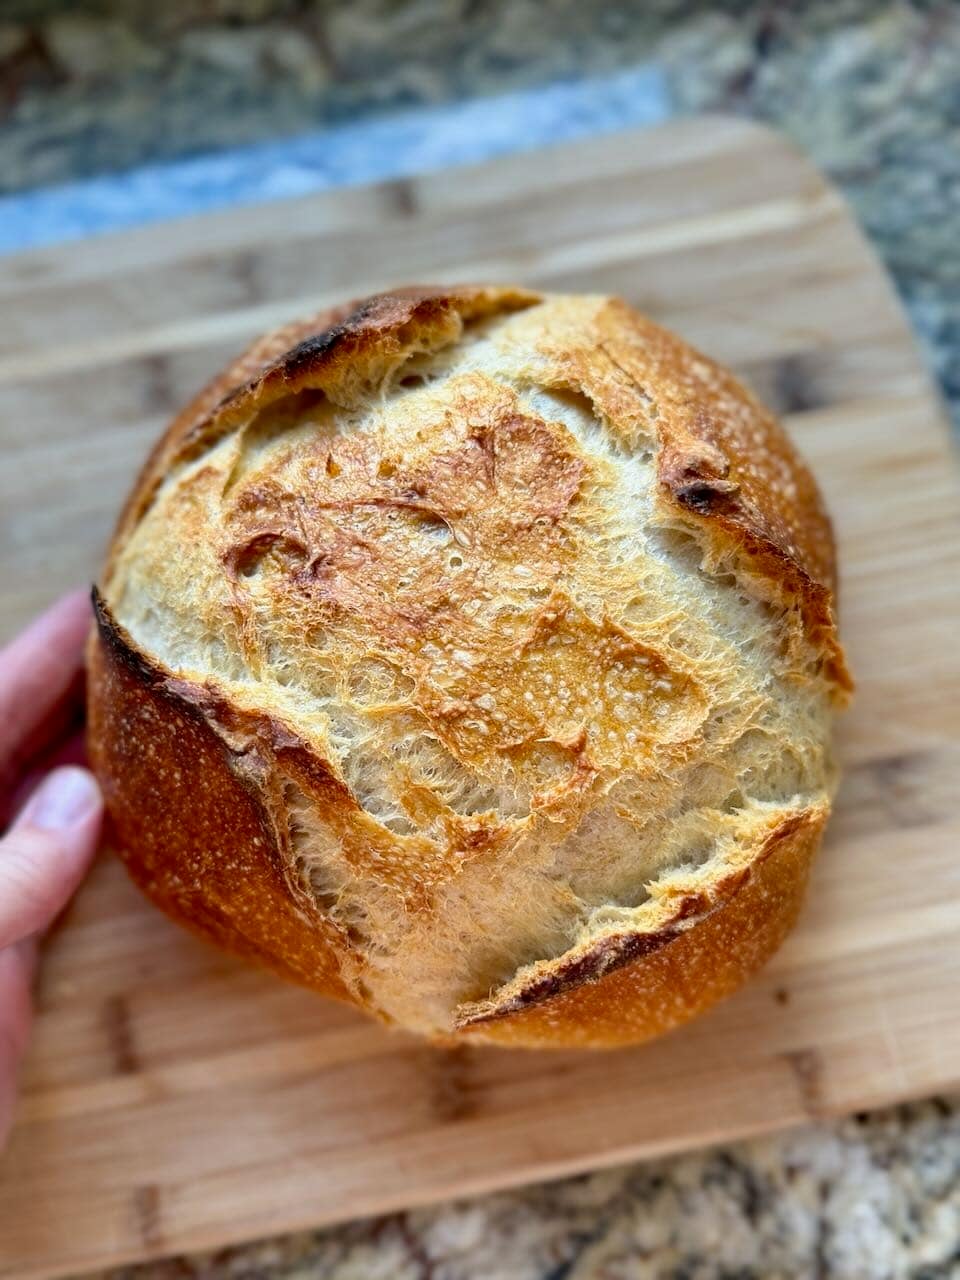
Step 12: Remove the bread from the oven and let it cool on a cooling rack before slicing and enjoying.
How to Store Leftovers
Let the bread cool completely. Then slice and store in an ziptop bag or bread bag. For freshest flavor, freeze slices of this bread for up to three months. You can place pieces of parchment paper between each slice if your bread tends to stick together in the freezer. I like to toast individual slices straight from the freezer to the toaster.
Amy’s Recipe Tip
This sourdough discard loaf is the perfect “blank canvas” for your favorite flavors. To add inclusions, gently fold them into the dough during the second set of stretch and folds, just like I add inclusions to my traditional sourdough loaves. Here are a few delicious ideas:
- Savory Herb: Add 1 tablespoon of Italian seasoning and a teaspoon of garlic powder.
- Roasted Garlic & Cheese: Fold in 4-5 cloves of roasted garlic and ½ cup of shredded sharp cheddar or parmesan.
- Jalapeño Cheddar: Add diced fresh jalapeños and shredded cheddar for a spicy kick.
- Fruit & Nut: Mix in ½ cup of chopped walnuts and ¼ cup of dried cranberries or raisins for a slightly sweet breakfast loaf.
Pro Tip: If you are adding “wet” ingredients (like olives or fresh fruit), pat them dry with a paper towel first so they don’t add too much extra moisture to your dough.
Frequently Asked Questions
Not exactly. While this loaf is a better alternative to store-bought options, it doesn’t offer the exact same fermentation benefits as a traditional sourdough loaf.
Because we use commercial yeast to speed up the process, the dough itself doesn’t undergo a long fermentation. You still get the benefits present in the sourdough discard itself, but the entire loaf isn’t “fully fermented.”
When kept in the refrigerator, sourdough discard can last for several weeks (and even months). The longer it sits in the fridge, the more acidic (sour) it becomes. Because of its high acidity, it is naturally resistant to bad bacteria. For the best flavor in this bread, I recommend using discard that is between 1 and 2 weeks old.
It can be a little un-nerving to see changes in your starter, but most of the time, it’s perfectly fine!
The Gray Liquid (Hooch): If you see a thin gray or clear liquid on top, don’t worry. This is called “hooch,” and it’s just a sign your discard is producing a lot of acid (and would like to be used or fed). You can pour it off or stir it back in for a tangier flavor.
Should it be tossed? You should only throw away your discard if you see visible mold. Look for fuzzy patches or any colors particularly pink and orange.
Yes, you can. I would follow the method for my stand mixer sourdough bread, mixing it for a few minutes initially and then giving it a 10 second mix in place of every set of stretch and folds.
A Dutch oven gives the best results because it traps steam, which helps the bread rise well and develop a light, crispy crust. If you don’t have one, you can bake the loaf on a baking sheet, but expect a thicker, firmer crust. Adding a pan of water to the oven can help create steam, though results will vary by oven. You can also bake this bread in a loaf pan. See my post for how to make artisan sourdough bread in a loaf pan.
Popular sourdough Discard Recipes


If you tried this Easy Sourdough Discard Bread or any other recipe on my website leave a 🌟 star rating and let me know how it went in the comments below. Happy Baking!
Easy Sourdough Discard Bread (No-Knead Dutch Oven Recipe)
Save this for later!
Equipment
- bench scraper
Ingredients
- 200 grams sourdough discard, heaping 3/4 cup
- 6 grams instant yeast, about 2 teaspoons
- 10 grams salt, about 1 1/2 teaspoons
- 275 grams water, about 1 cup plus 2 Tablespoons
- 400 grams bread flour, scant 3 cups
Instructions
- Mix the Dough: In a large bowl, mix together the sourdough discard, warm water and instant yeast. Even though instant yeast doesn’t technically need to bloom, I like to give it a minute or two to make sure it’s active. You should see it start to bubble slightly and smell yeasty. Add the salt and bread flour, then mix with a wooden spoon, dough whisk, or your hands until all of the flour is incorporated and a shaggy dough forms.Cover the bowl with plastic wrap or a reusable bowl cover and let the dough rest for 15 minutes.
- Stretch and Folds: After 15 minutes, uncover the bowl and perform a set of stretch and folds. To do this, reach underneath the dough, gently stretch it upward, and fold it over itself. Rotate the bowl and repeat, folding from a different side each time. Complete 3–4 folds total, stopping if the dough begins to tear. An example of this folding technique is found here. Cover the bowl and let rest for 15 minutes.Uncover the bowl and repeat another set of 3–4 stretch and folds. The dough should start to feel smoother and slightly more elastic. Stop folding if the dough resists or starts to rip. Cover the bowl again and let rest for 15 minutes.Uncover the bowl and perform a third set of 3–4 stretch and folds. By this point, the dough should feel stronger and hold its shape better. Fold gently and stop if the dough feels tight. Cover the bowl and let rest again.
- Rise: Let the dough rest for 30 minutes to an hour until doubled in size (how long this takes will depend on the temperature of your dough).
- Shape and Proof: Once the dough has doubled in size, dump the dough out on the countertop and use your hands to gently shape the dough into a round ball, dragging the dough on the counter as you shape it. Use damp hands if your dough is sticking to your hands. Place the dough ball on a piece of parchment paper and cover it with the large mixing bowl or a kitchen towel to rise again.
- Preheat Oven: Put a dutch oven into your oven with the lid on and preheat the oven to 500ºF (this usually takes 20-30 minutes).
- Score the Bread: After about 30 minutes and once the oven is fully preheated, remove the bowl from the top of the dough and score with a sharp knife, two slashes on top of the dough.
- Bake the Bread: Take the dutch oven out of the oven. Warning: This is a VERY HOT dutch oven. Keep those oven mitts on and be very careful not to burn yourself. Take the top off the dutch oven and place the dough and parchment paper into the dutch oven. Place the top back on the dutch oven and close the oven door. Immediately decrease the baking temperature to 450ºF and bake for 25 minutes. After 25 minutes, take the top off the dutch oven and continue baking for 20 more minutes. The internal temperature should be 205ºF – 210ºF when finished baking.
- Pull the bread out of the oven. Wait until cool to cut into it. Enjoy!
Notes
Nutrition
Nutrition information is automatically calculated, so should only be used as an approximation.


Swapped out the water for buttermilk – cooked it in Pullman tin & cooked from a cold oven
A-maze-ing 🤩🤩🤩🤩🤩
Thank you for a delicious (easy) recipe
A keeper 😍
Yum! Thanks for the review.
Can i refrigerate the dough once i have finished the stretches and folds and the 30-60 min rise? Then bake the next day?
I think that should work. Let me know how it turns out!
I didn’t know if it would rise because it was very sticky. I used my Pullman pan. What a gorgeous loaf!! I wish I can post my picture.
I’m glad it turned out great, and I’m glad the Pullman pan worked out well with this bake!
It was going very well until it was time to take it out and shape. It was so sticky and wet. Don’t know what I did wrong. I shaped as best as I could and put it into Pullman to keep some shape. I let it sit again then Added to the top, everything bagel. I’ll check back after it bakes.
I hope it works well!
It baked great and had a really nice rise! Yay!
Great!
Hi there! I’m excited to try this tomorrow, I’ve seen so many positive comments about your recipes.
If I want to bake this in a standard loaf pan, should I use the same measurements? Or a fraction?
Thanks in advance!
I think it’ll be a full loaf pan, but I think I would use the same measurements.
Thank you for share your recipe! I’m happy to find this easy 1 loaf recipe. I did messed up and added “Active yeast” directly without letting it bloom first. But I’m glad it still turned out awesome. I’m curious if I can add like cheese and jalapeno to it and when to do it if so.
Yes, you can do that. Just like with this Jalapeño Cheddar Sourdough Bread, I would probably add cheese and jalapeño during the stretch and folds, but you could also add them when you shape the bread.
I tried this recipe & one other one for the sourdough round loaf. My loaves go flat & don’t stay in a nice round shape (they spread out). What am I doing wrong?
Most commonly, the dough is either a little overproofed, underdeveloped (not quite enough stretch and folds), or lacking surface tension during shaping. Make sure your bulk fermentation isn’t going too long, add an extra fold if the dough feels loose, and really tighten the surface when shaping. You’re not alone—this is a super common stage in sourdough learning, and it’s very fixable!
I’ve made this two times, and my second attempt turned out better than the first. I wish I had read comments from others about their struggles with sticky dough. This made me feel better about my first attempt and not so much of a disaster. I’m still learning and hope to achieve the beautifully looking bread I see in the pictures.
My question at this point is, “What size Dutch Oven do you use with this recipe?” Mine has a 10″ diameter. I’m thinking this might be too big, and the reason why my bread spreads and turns out thinner with less rise.
Sticky dough is very common, especially with higher hydration recipes, so you’re definitely not alone. A 10″ Dutch oven is actually a great size and not too big. I use 4 & 6 qt, which are typically around 10–11″ wide. I do find that my smaller (4 qt) Dutch oven results in a higher rise than the larger Dutch oven, but I’m happy with the degree of variation I get. The spreading you’re seeing is usually more related to dough strength (gluten development), fermentation timing, or shaping tension rather than the Dutch oven size.
this is my second complete attempt at baking sourdough (the other two times resulted in a file 13 dough scenario😜). I love the simplicity of this recipe and wish I could post a picture of this beautiful loaf. Thank you so much for making your recipes accessible!
Sourdough is definitely a learning curve! I’m glad this time it worked out well!
I just made this recipe this afternoon. Wow! Three hours! And it is absolutely delicious and perfect for a quick loaf of bread for dinner. You’ve done it again! Love all your recipes. Thank you!
I’m glad it turned out great! Thanks for the review.