Affiliate disclosure: This post may contain affiliate links. Please see our disclosure policy.
I love summer. Easy living, late nights, sleepy mornings and all the in-season and fresh fruits and veggies. We love using our grill in the summertime, and while I do keep some store-bought burger buns as backup in my freezer, these quick and easy burger buns taste SO much better and only take an hour, start to finish.
They are the perfect burger bun for your next grilling party or when you want dinner to taste delicious. If you have a little more time, I love these delicious brioche burger buns, but for quick and easy these buns are my go-to recipe.

Save this for later!
How to Make Quick and Easy Burger Buns
Recipe Overview
These burger buns are quick-mixed and kneaded to develop the gluten. After kneading, shape the dough into buns and let the dough rise for about 30 minutes until they are ready to bake. All of this happens in just about an hour. If you are preparing dinner and want a quick/easy/delicious burger bun, make these first! By the time your dinner is ready, these buns will have risen and baked, leaving you with the most delicious dinner.
- 20 minute Mix/knead/rest/shape
- 30 minute Rise time
- 15 minute Bake

Sourdough Baker? Then you’ll want to try my recipes for Easy Sourdough Hamburger Buns or my Sourdough Hot Dog Bun recipe.
Mixing Quick and Easy Burger Bun Dough
To make this process quicker and easier, I like to use a stand mixer to mix the burger bun dough. For large batches of dough, I prefer using the Bosch Mixer. For smaller batches of dough and when I don’t want to clean my Bosch, I will pull out my trusty KitchenAid mixer. This recipe would do well in either of those mixers, or you could mix the dough by hand, though it will take a little longer.
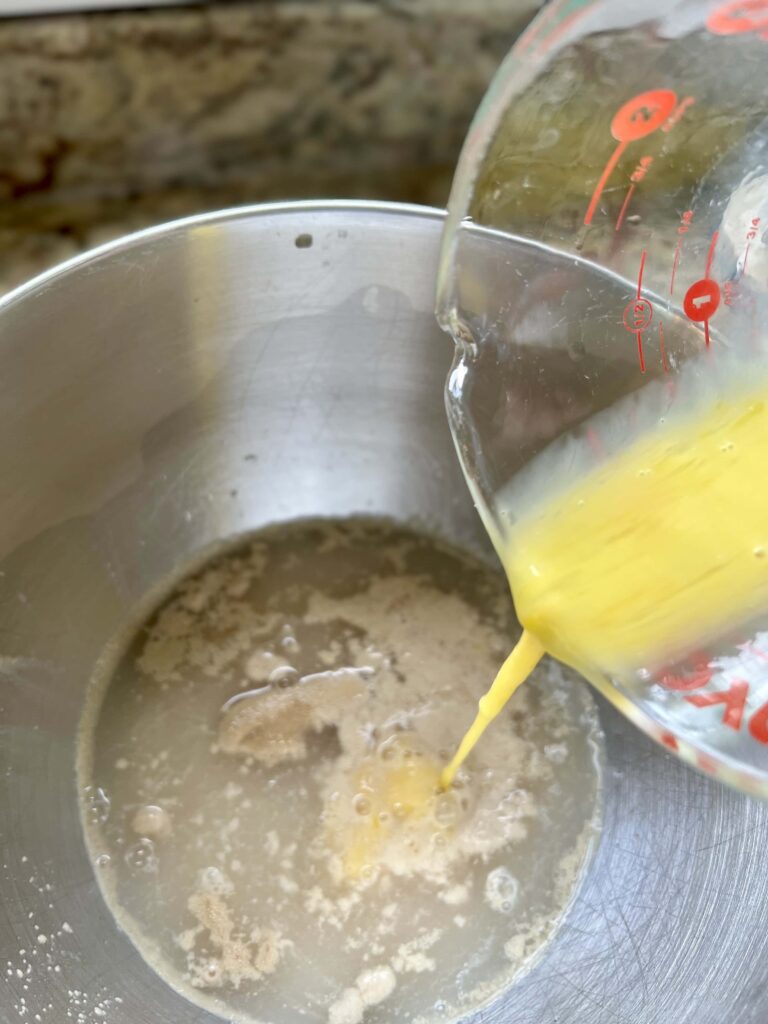
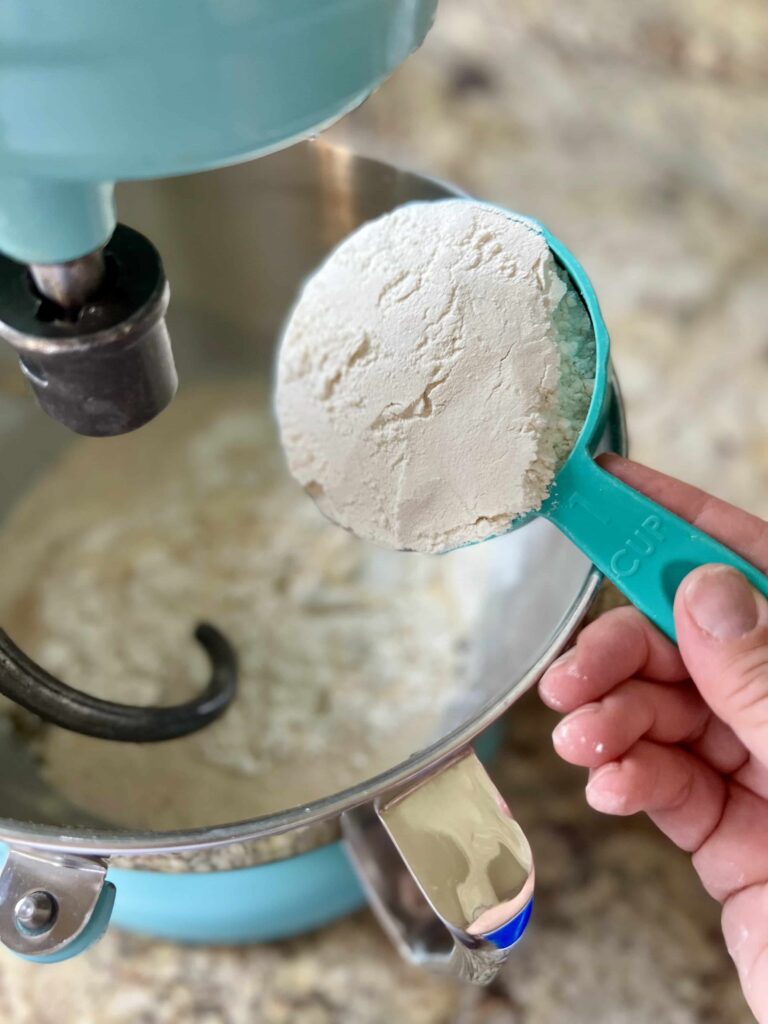
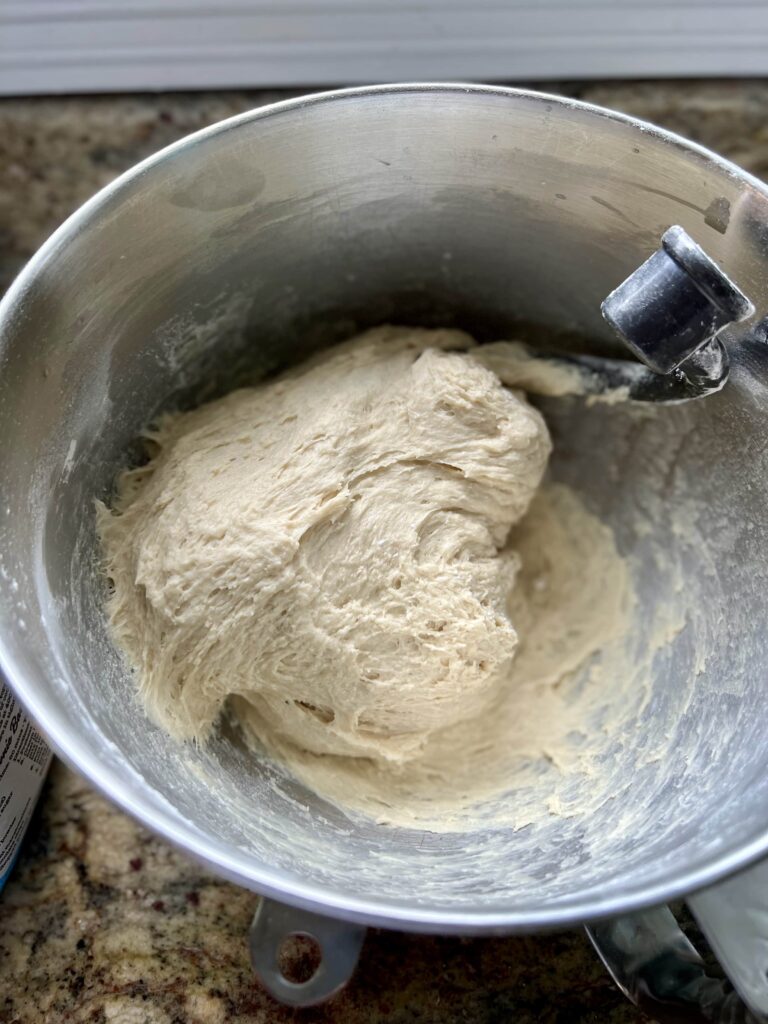
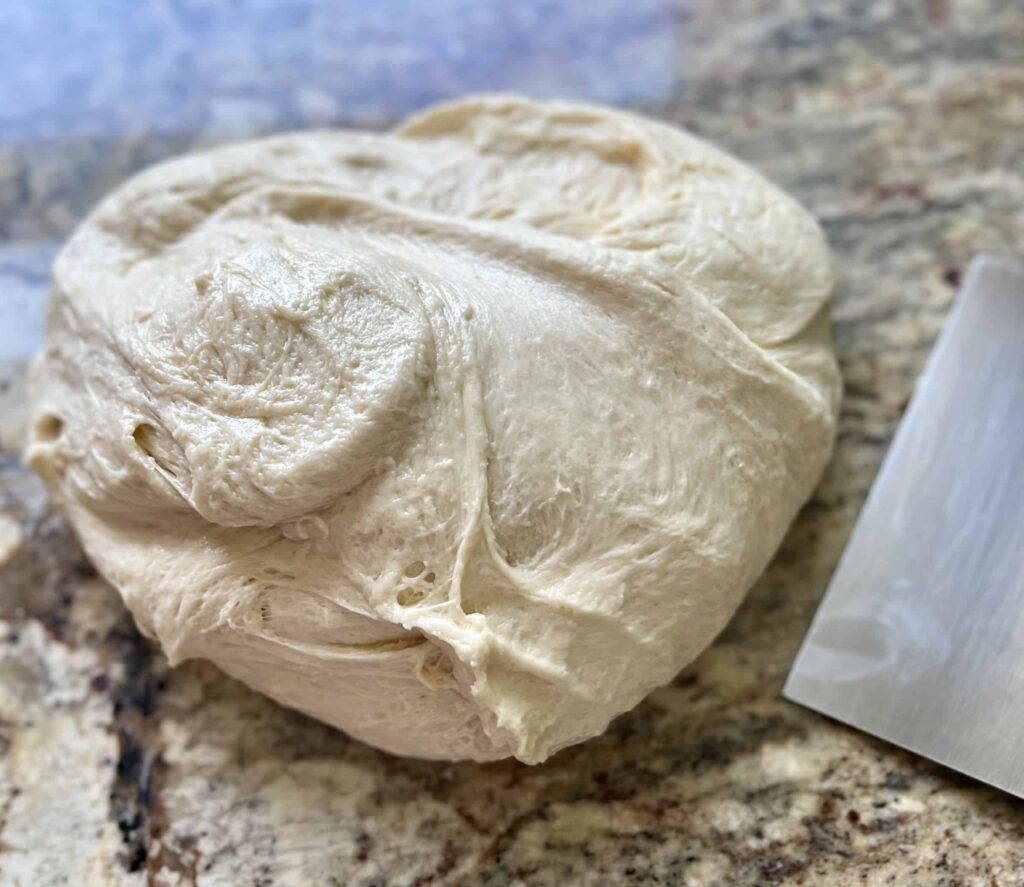
Pour the warm water, yeast, sugar, salt, egg and oil to the bottom of a stand mixer. With the dough hook running, add the flour a cup at a time. Watch as the flour incorporates into the dough and add more after it’s been absorbed. To know that no more flour is needed, pinch off a piece of dough and roll it up into a ball in your fingers. If you can form a ball with just a bit of sticky residue left, it is ready. The dough should be tacky but not overly sticky.
You can also check the sides of your mixing bowl. When the dough pulls away from the sides or is all on one side (Bosch), stop adding flour. Make sure to knead the dough for about 5-8 minutes to develop the gluten and add a little bit more flour as necessary during this process. If you choose to knead by hand, add a few minutes to the kneading process.
Does Yeast Bread Need a Bulk Rise?
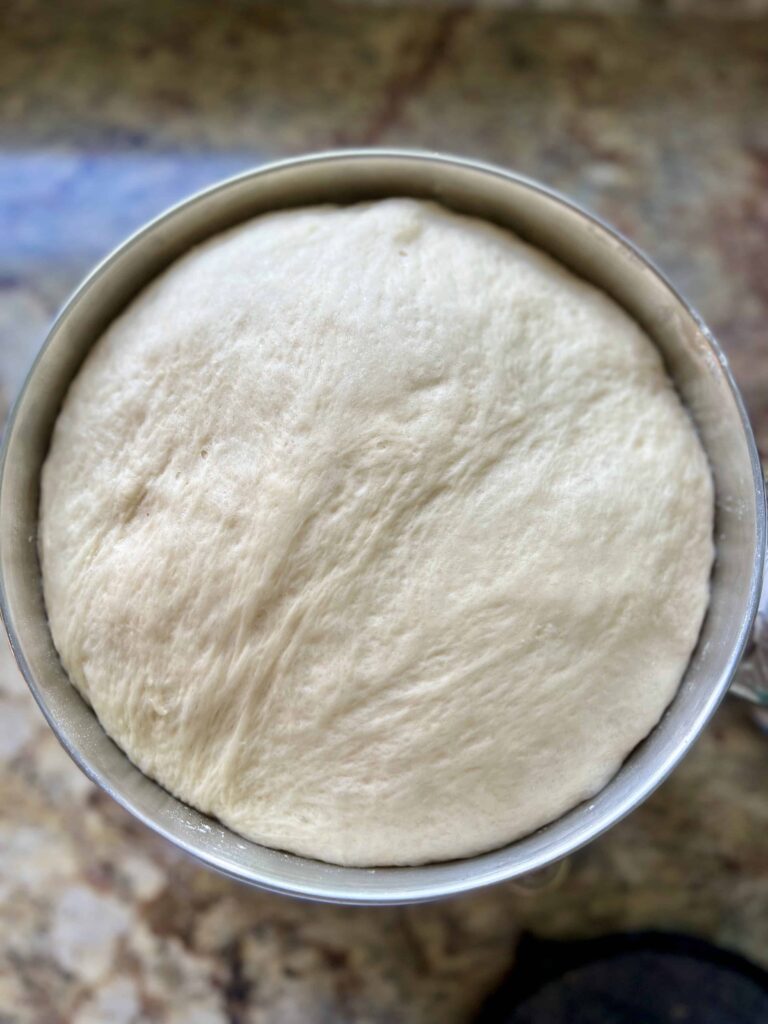
Most yeast-based recipes call for a bulk rise, or first rise before shaping the bread dough, like this easy no knead bread. This first rise is especially important if using dry active yeast or sourdough to raise bread. A first rise before shaping the dough also can help the dough to have more flavor, better gluten development and a better crumb.
The question is: how much better? For these quick and easy burger buns, we may sacrifice a tiny bit of flavor/crumb/gluten development but we get a delicious scratch-made yeast bun in about an hour. This is made possible using instant yeast. Typically, I like using a first/bulk rise in most of my bread recipes. But for burger buns, when I’m in a time crunch, I’ll take these delicious buns any day.
If you would like to add a first rise to this recipe, go ahead and splash a little oil in a bowl. Transfer the dough to the oiled bowl, cover and let rise. Then proceed with the recipe as written.
How to Shape Quick and Easy Burger Buns
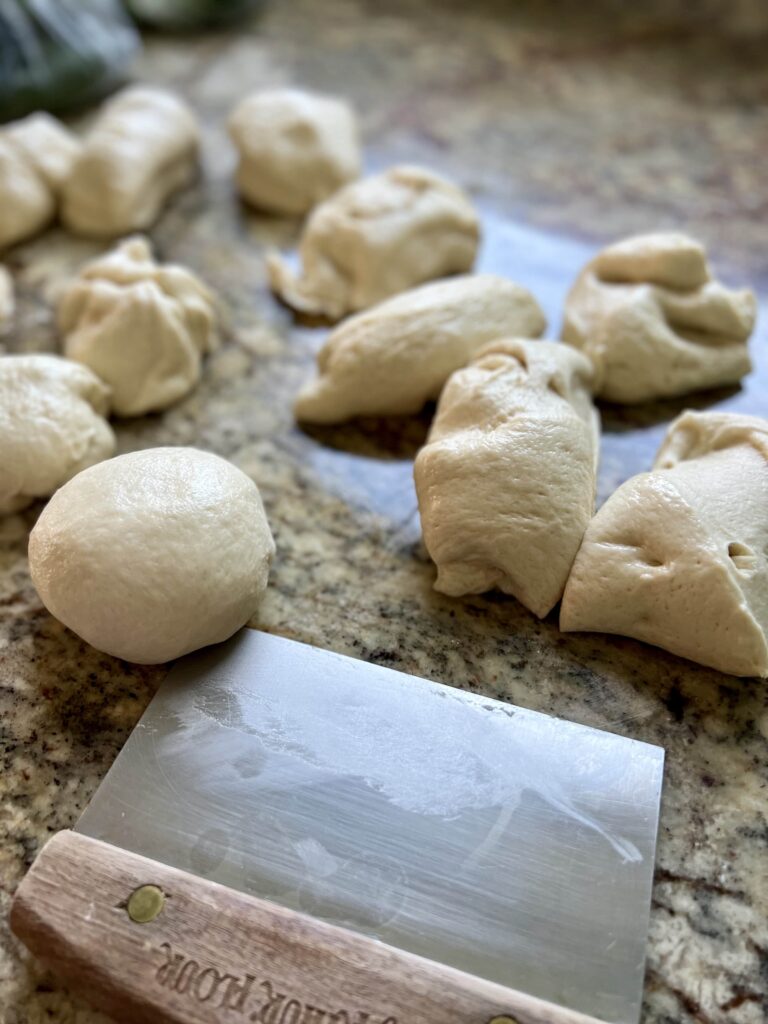
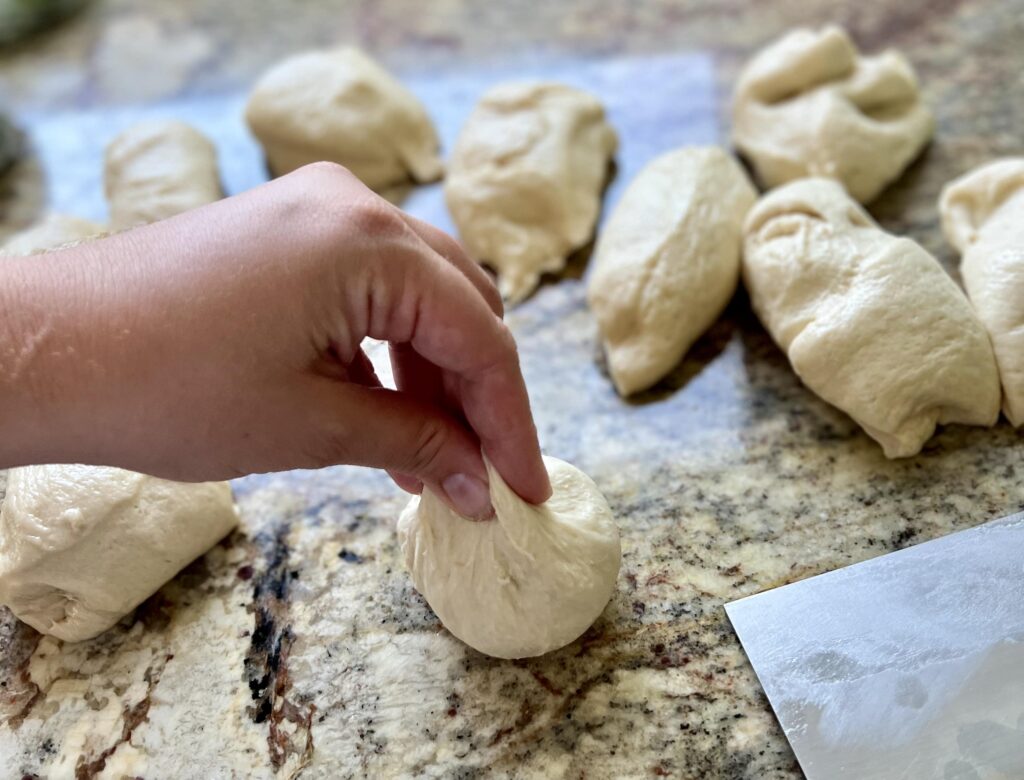
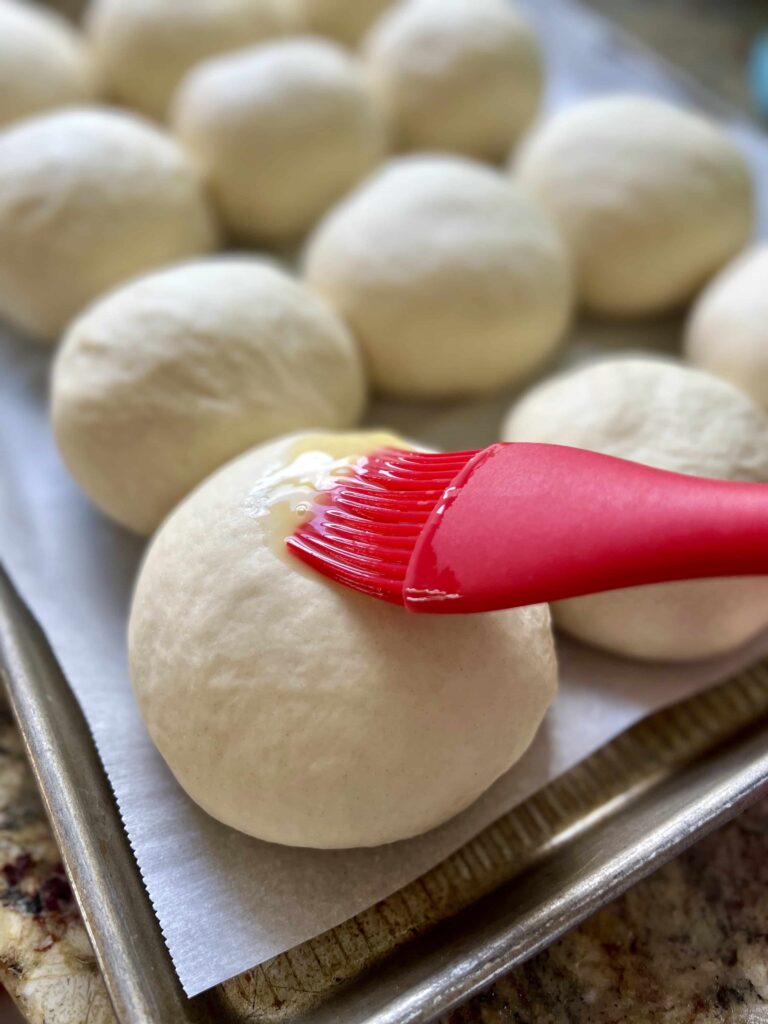
Burger buns are shaped the same way as a typical roll recipe. First separate the dough into 12 equal pieces. Take each piece of dough and pull/pinch up the sides until it forms a ball. Roll the ball on the counter using your hand in a cupping shape to seal the balls and create tension for the dough to rise.
I also like rolling the ball of dough on the countertop between my two hands to create tension. After rolling the balls and placing them on a parchment-lined baking sheet, take your hand and press down on the tops of the buns just a bit to flatten them. This will help them bake into more of a burger shape than a traditional roll. Watch a shaping video here.
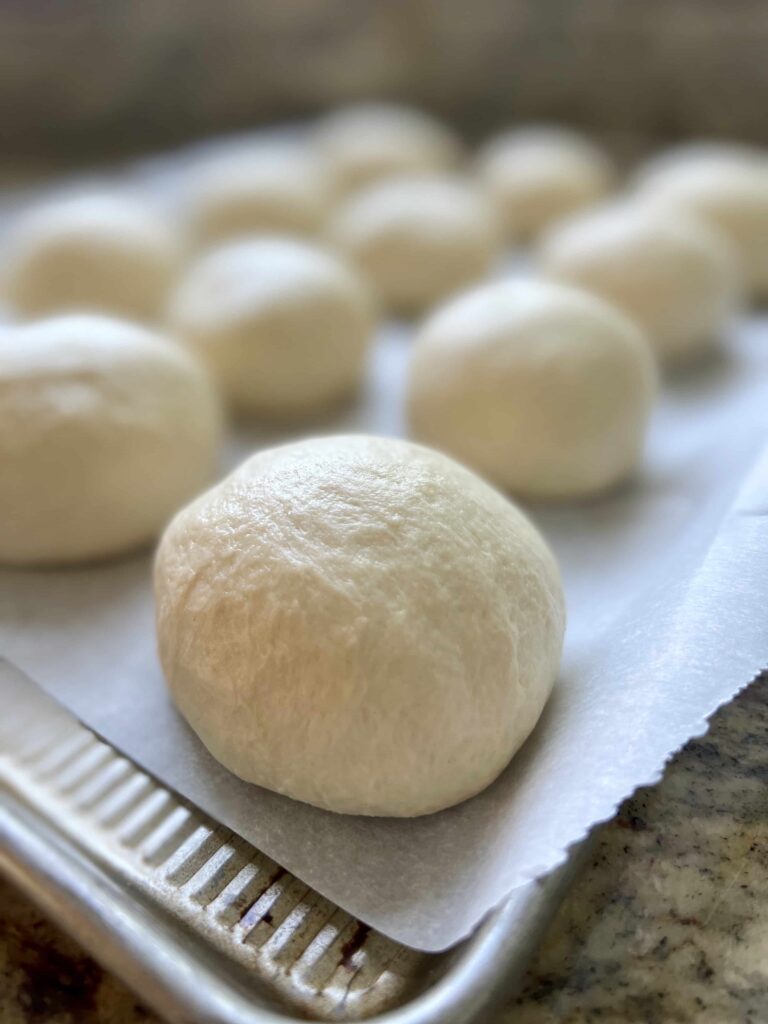
Quick, 30 Minute Rise
Allow the burger buns to rise for about 30 minutes. To accomplish a fast rise in the hot summer is easy. Cover with a dishtowel and place them out on your counter to rise. If your kitchen runs cool or you are baking them on a cold day, cover the buns and stick them in your oven with the pilot light turned on. DO NOT TURN THE OVEN ON. The heat from the pilot light and closed oven will act as a “proofing” box to help the buns to rise quickly. Once they have puffed up, remove them from the oven and egg wash before baking.

Egg Wash Burger Buns for Golden Brown Finish
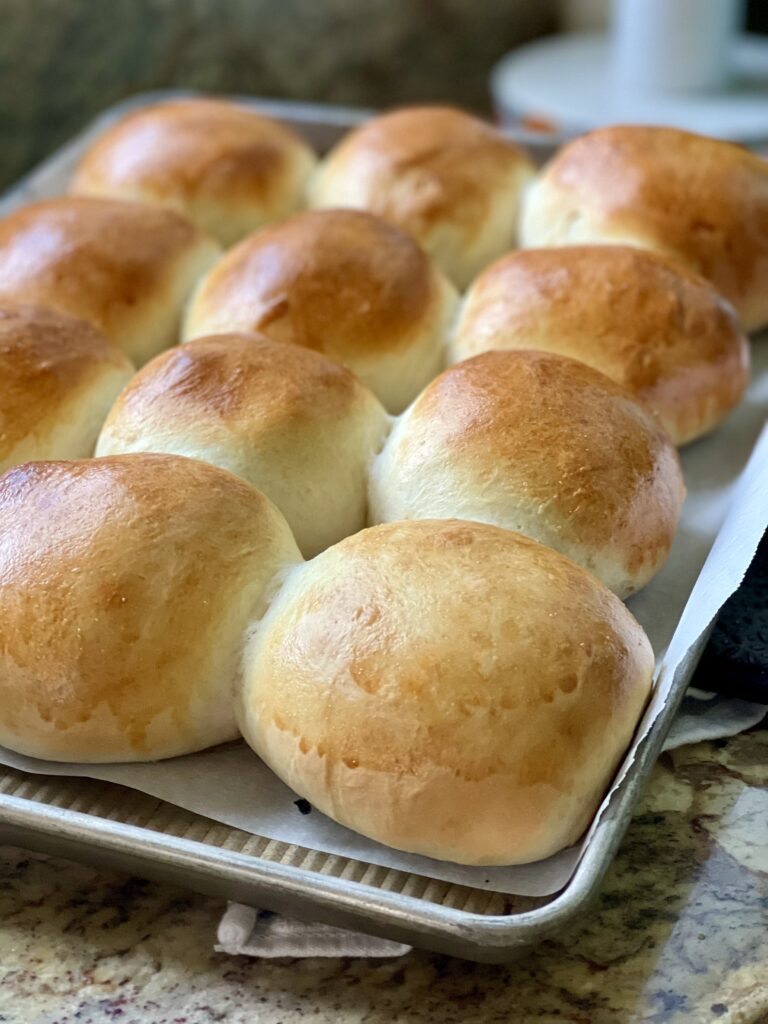
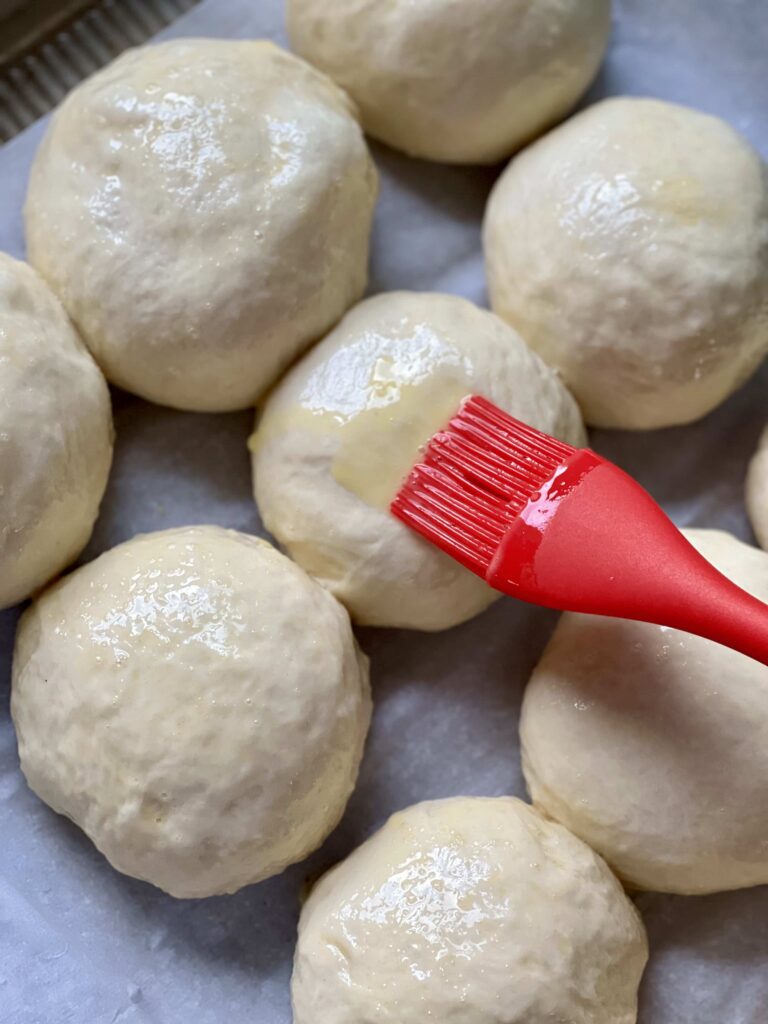
Egg wash is one of those steps that I always regret when I forget! Adding egg wash to the top of burger buns makes them look so much more professional and taste delicious. For buns that only bake for 15 minutes, they help them get the brown color you look for in a burger bun while still being soft and chewy inside. Lightly beat an egg with a fork in a small bowl. Add a splash of water and whip together with the fork. Using a pastry brush (I’ve also used a paper towel in a pinch), gently top each bun with the egg wash. Sprinkle with sesame seeds if desired.
Baking Quick Homemade Burger Buns
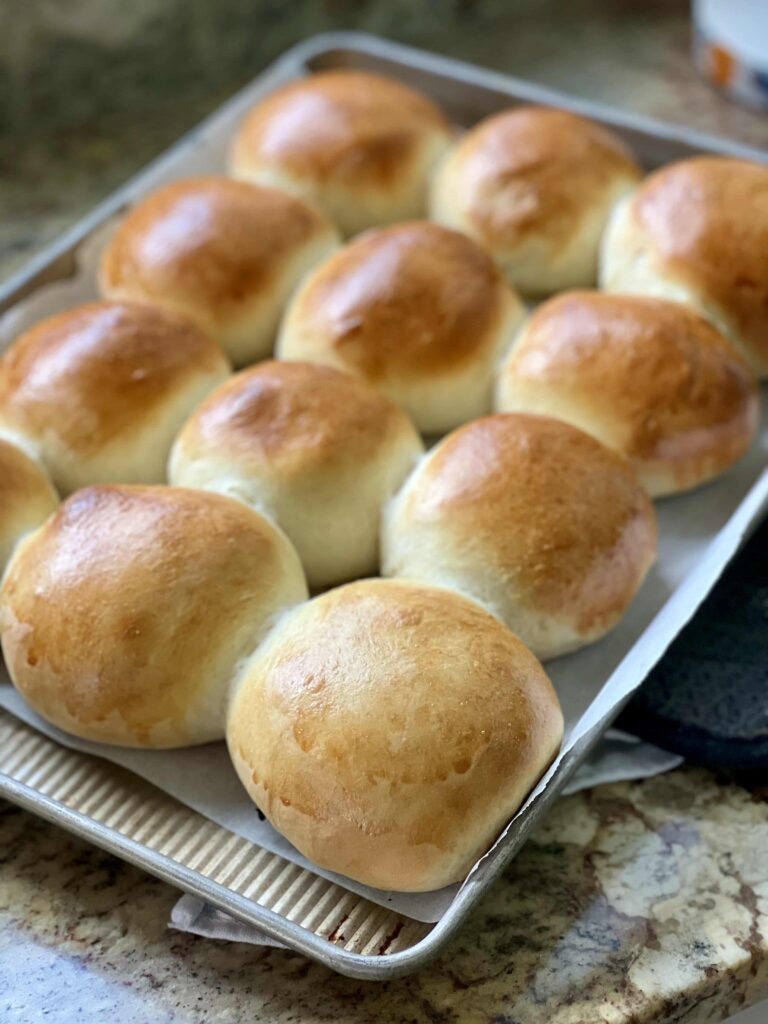
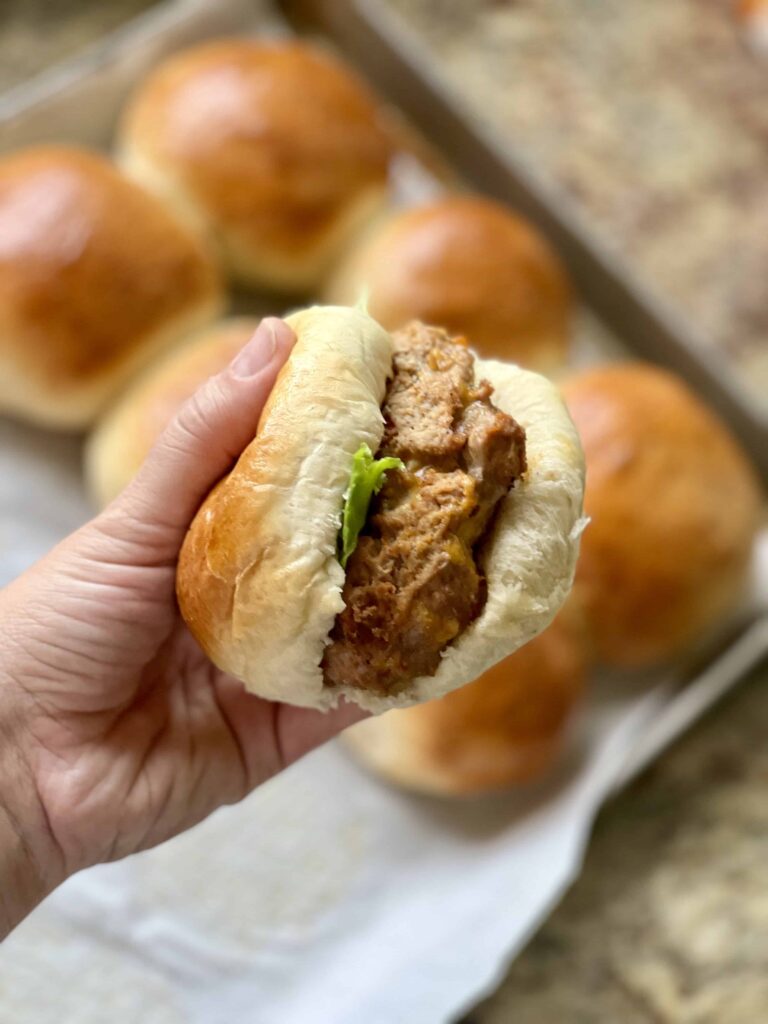
Bake the burger buns at 400ºF for about 20 minutes until golden brown on top. Let them cool completely before slicing, toasting and using for a delicious burger. These burger buns are perfect for your next summer BBQ. They hold up to ALL the toppings and make each bite of burger a little bit of heaven. I’m not sure if I like the bun or the burger better!
If you liked this recipe, you’ll also like…
Frequently Asked Questions
Typically yeast dough needs a first rise and second rise (and sometimes even a third rise!). Using instant yeast allows some yeast dough to cut out the first rise. Instead the dough is kneaded, shaped and then allowed to proof (or rise) before being baked. You may sacrifice a little on texture, flavor and gluten development but with a proper proofing and instant yeast, the difference is negligible for burger buns.
Burger buns can be left out up to 12 hours. After 12 hours, stick the leftover buns in a ziplock bag and freeze. When ready to use, pull out a bun and let it come to room temperature. Toast if desired, and use.
Cover the dough and place it in an oven with the pilot light on. DO NOT TURN ON THE OVEN. Let the dough rise in this “make-shift” proofing box until ready.
Yes. This dough is perfect for hot dog buns. Instead of rolling the dough into balls, shape them into logs and proceed with the rest of the recipe.

Quick and Easy Burger Buns
Save this for later!
Ingredients
- 480 grams water, about 2 cups, warmed to 100ºF
- 20 grams instant yeast, about 2 Tablespoons
- 60 grams granulated sugar, about 4 Tablespoons
- 20 grams salt, about 1 Tablespoon
- 1 large egg, lightly beaten, about 50 grams
- 65 grams olive oil, about 1/4 cup
- 950 grams bread flour, about 6-7 cups, see recipe notes for all-purpose flour
- 1 large egg, for egg wash
- splash of water, for egg wash
- sesame seeds for sprinkling on top, if desired
Instructions
- Add the lightly beaten egg, olive oil and salt to the stand mixer.
- With the dough hook running, add the flour a cup at a time until the dough pulls away from the sides of the bowl. Pinch off a chunk of dough. It should roll into a ball in your fingers with just a little bit of sticky residue remaining. If it doesn't, add a little bit more flour a few Tablespoons at a time until no more flour is needed. Knead the dough for 8 minutes until soft and tacky. Let the dough rest for 5 minutes to relax the gluten.
- Lightly flour a surface and turn the dough out onto your work surface. Tip: If you'd like to let the dough bulk rise, shape the dough into a ball, splash a little oil in a bowl and lightly cover the dough with oil. Cover the dough and let rise until doubled. Then proceed with the recipe as written.
- Cut the dough into twelve equal pieces, about 135 grams per piece. Shape each piece of dough into a ball. Pull pieces of the dough up into the center, forming a tight ball. You can see how I shape rolls here.
- Cover the rolls and place them in a warm place to rise for 30 minutes. Sometimes I will leave them in the oven with the pilot light on (do not turn the oven on) to encourage a good, quick rise.
- Preheat the oven to 400ºF. Note: If your oven runs hot, decrease the temperature to 375ºF.
- While the oven preheats, mix together the egg wash: crack the egg and add a splash of water. Lightly brush the egg wash over each bun. Sprinkle with sesame seeds if desired.
- Bake the buns for about 20 minutes until golden brown and they register 190-195ºF. Allow to cool completely before slicing and enjoying with your burgers.
Notes
Nutrition
Nutrition information is automatically calculated, so should only be used as an approximation.


I’m so excited to make this! I accidentally grabbed active dry yeast, not instant or rapid. Do I need to do anything differently? thank you!
For active dry yeast, you’ll want to let it activate in the warm water until it puffs and starts getting some bubbles (about 10 minutes) before continuing to add and mix the other ingredients. You may find that you need a longer rise, so I’d pay close attention to how your dough is rising and waiting until it is fully proofed to bake.
Made them today for the first time and they turned out soooo good!!
Thanks for the review! I’m glad they turned out great!
My buns turned out so good – they looked and tasted like store bought. We liked them so much, I’d like to try to do 2 loaves out of it. Have you tried this? Any recs?
I haven’t tried to make a loaf out of this, but I think you could try it!
So I did this and it was very easy and tasted great! It made 2 loaves and I’ve done it a number of times now 🙂
Great!
I have started grinding my own whole wheat flour thanks to learning from you! I love your recipes. Is this recipe suitable for whole wheat flour? I have the hard red and soft white grains.
Great! I’d start with using half whole wheat and half bread flour to see how you like it, and then move to fully whole wheat if you are happy with the results. Remember that whole wheat flour usually doesn’t yield as high of a rise, and it moves through fermentation faster.
great taste and easy to make.
Thanks for the review!
How long can you keep them in the fridge ? And can you freeze the dough ?
Thanks !
You could do either the first or second rise in the fridge (I would probably not go longer than 12-24 hours. Otherwise you risk overproofing). And yes, I would shape them and freeze prior to the second rise. Enjoy!
I love all of your recipes, this one was so easy to throw together and I love the feel of the dough, excited to have these with sloppy Joe’s tonight
I love the feel of good dough! Thanks for the review.
Easy recipe but why so much sugar? The purpose of the sugar is to be an initial activator for the yeast and accelerant for the rise, however it’s not actually necessary to have sugar in bread, as the yeast can consume the starches in the flour, the first prove just takes a bit longer. It does also add colour to the crust and some flavour but it shouldn’t dominate the flavour, 10g of sugar is sufficient for this hydration level.
Thanks for the feedback!
They’re easy to make and delicious!! I made different sizes because I wasn’t sure how big I needed them for our burgers…4oz for the win! My husband said that we’re never buying buns in the store again!
Thanks for the tip and review. It’s definitely hard to go back to store-bought after this!
Love to try these!
They are delicious!
I tried the bun for first time and thy came out so well. My family with kids loved this . I used this burger buns. But one bun was big and quite filling . We generally 2 store bought buns . Next time I would just half of the size in the recipe and make smaller buns.
Thanks for the review – I’m glad they turned out great. They do make pretty big buns. You can definitely adjust the size to meet your needs! Happy baking.