Affiliate disclosure: This post may contain affiliate links. Please see our disclosure policy.
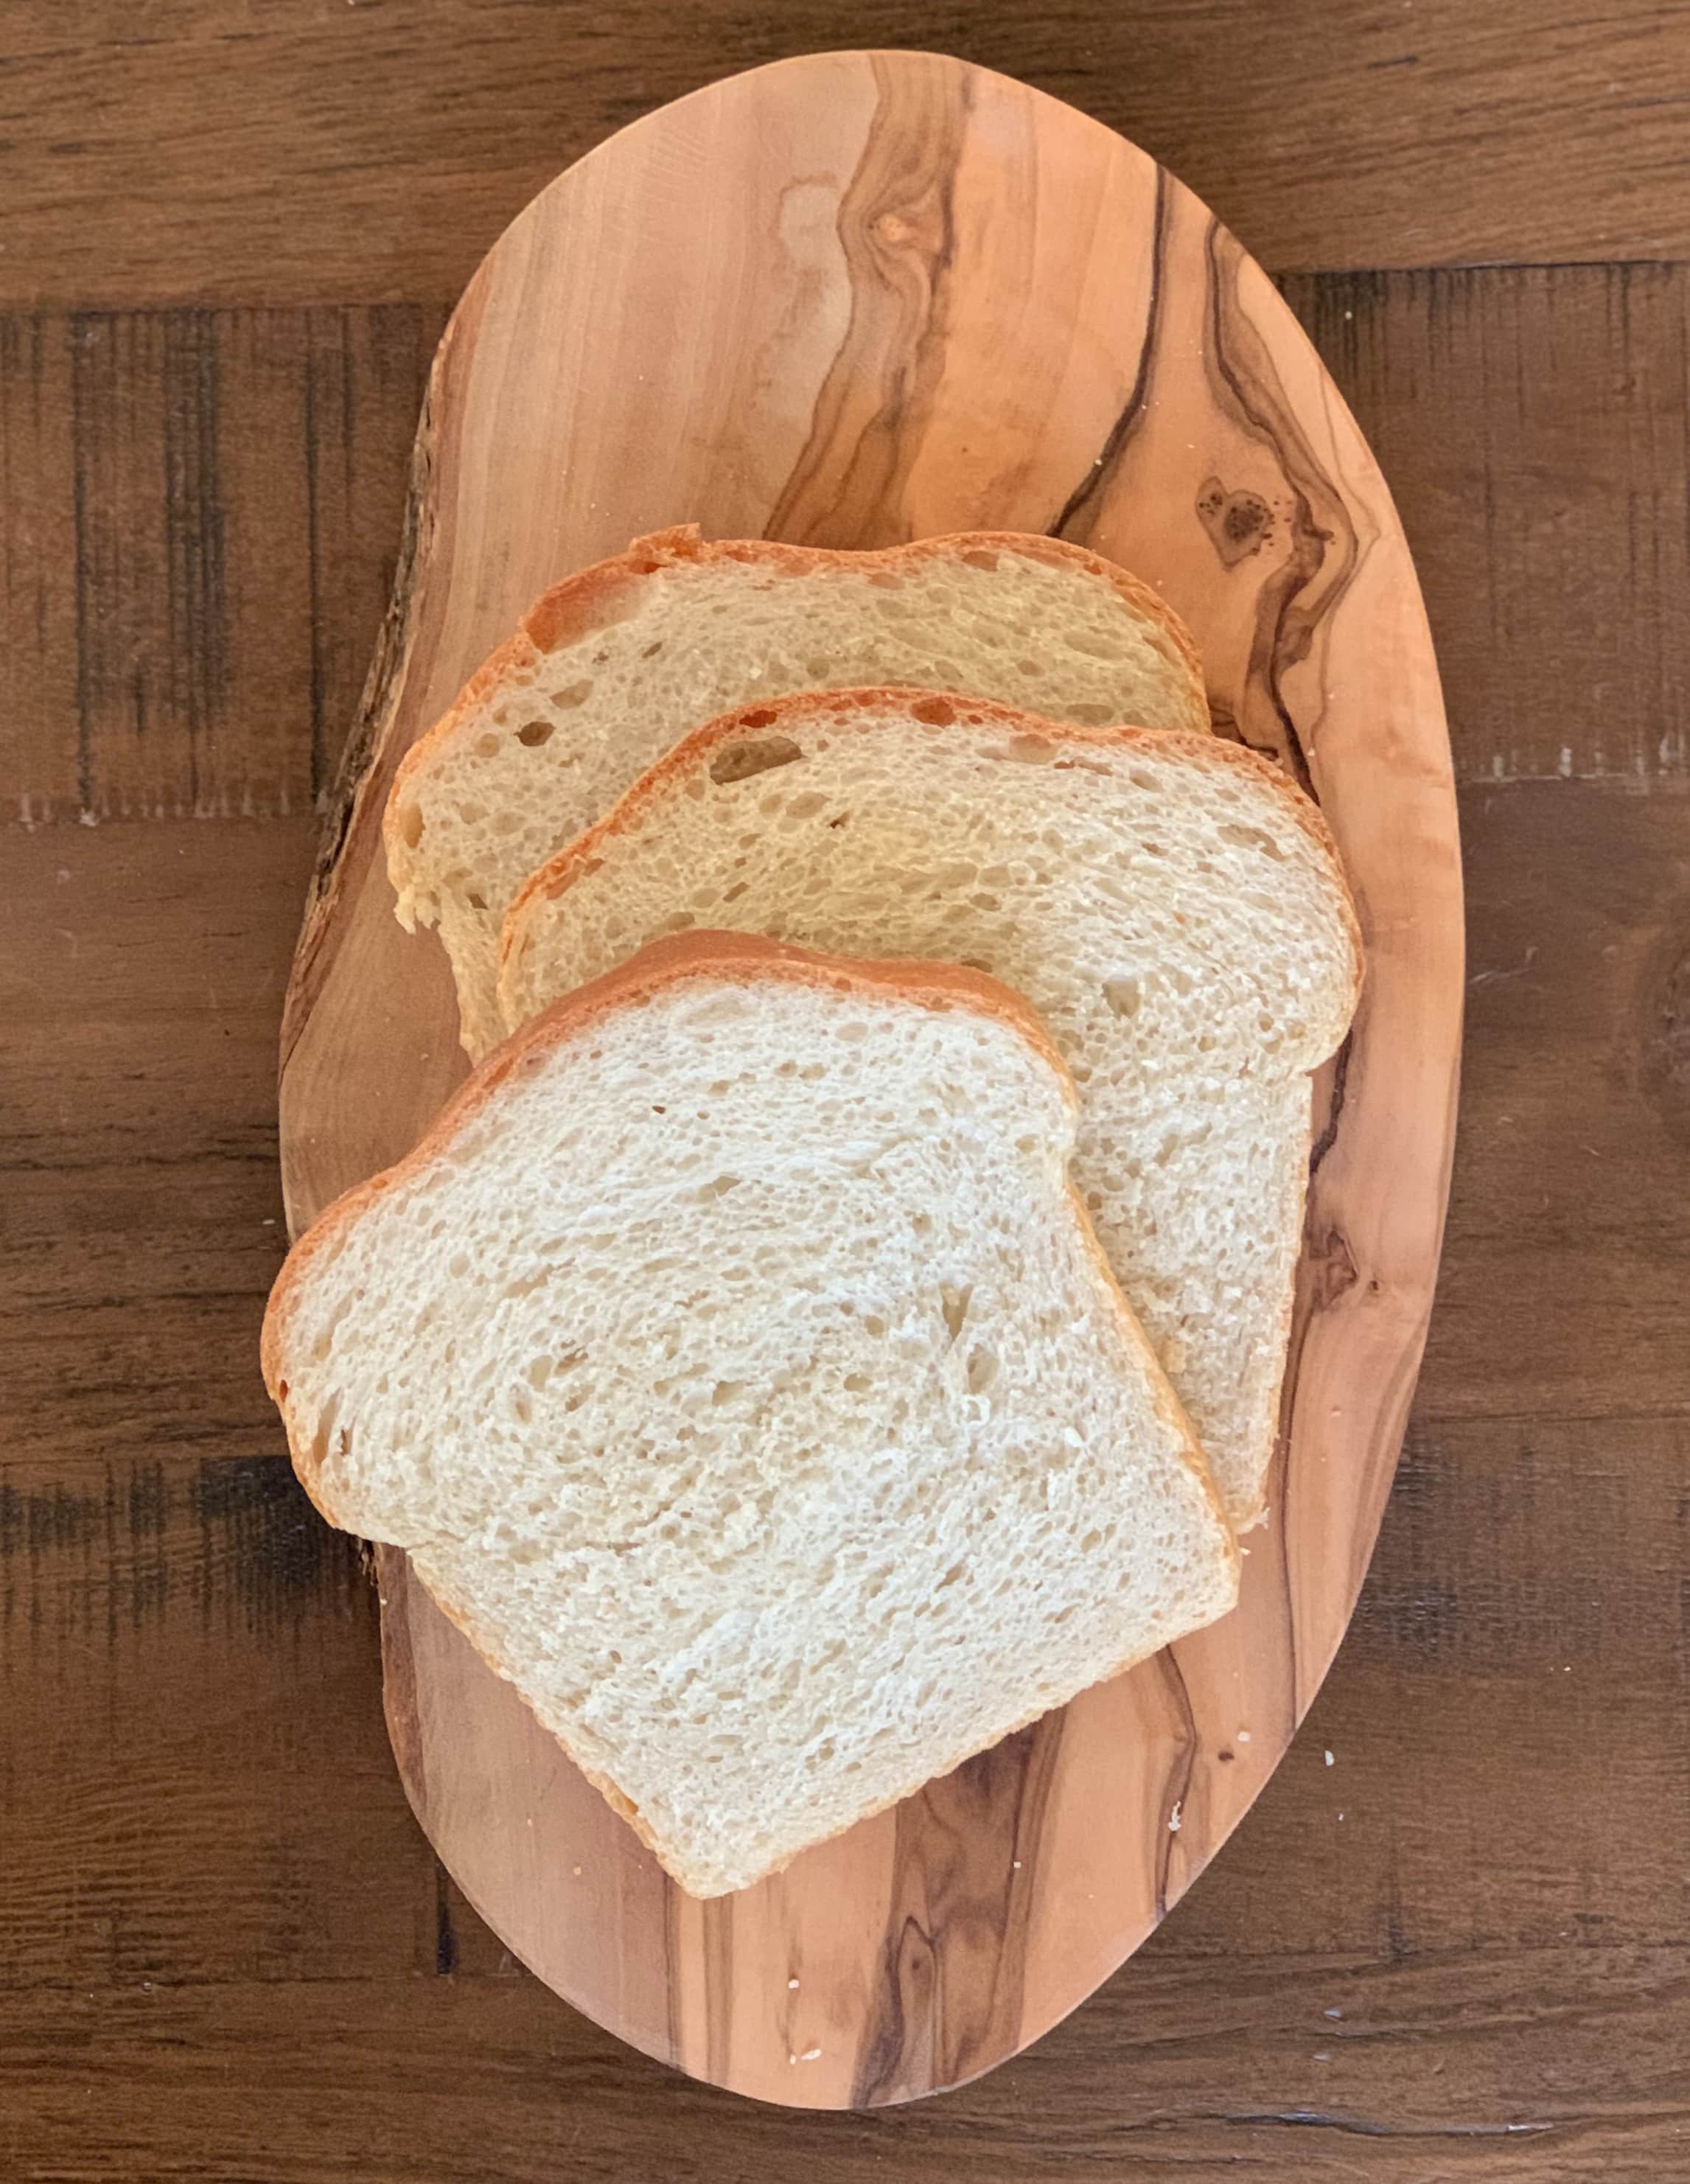
This is an older version of white sandwich bread on my website. I have perfected my favorite light and fluffy white sandwich bread which is the recipe I use most in my home, but am leaving this one on my website for those who enjoy this old favorite.
A delicious loaf of white bread is a treat for my family. We usually eat whole wheat bread around these parts using this favorite recipe but sometimes when I’m feeling extra nice I’ll surprise my kids with some white bread that I’ve made. With bare shelves at grocery stores and not wanting to leave my house other than once every two weeks or so, I’ve been grateful to pull this recipe out and make some bread with the six easy ingredients I have on hand. It seems like I’ve been letting the little things go more these days (rationing my whole wheat flour is one of them) and my kids are not complaining about the increase of white sandwich bread in our house.
Save this for later!
Bread Flour or All Purpose Flour?
Most of the time I keep all purpose flour on hand because it works well for just about any recipe. This bread recipe works with a basic 10-11% protein all purpose flour from the grocery store, but it is at its absolute best when you use bread flour (11-13% protein) or add some vital wheat gluten to compensate for the all purpose flour. I also sometimes will substitute 1 cup of the bread flour for 1 cup of whole wheat flour if I want to increase the whole grains my family is consuming.

Kneading Dough
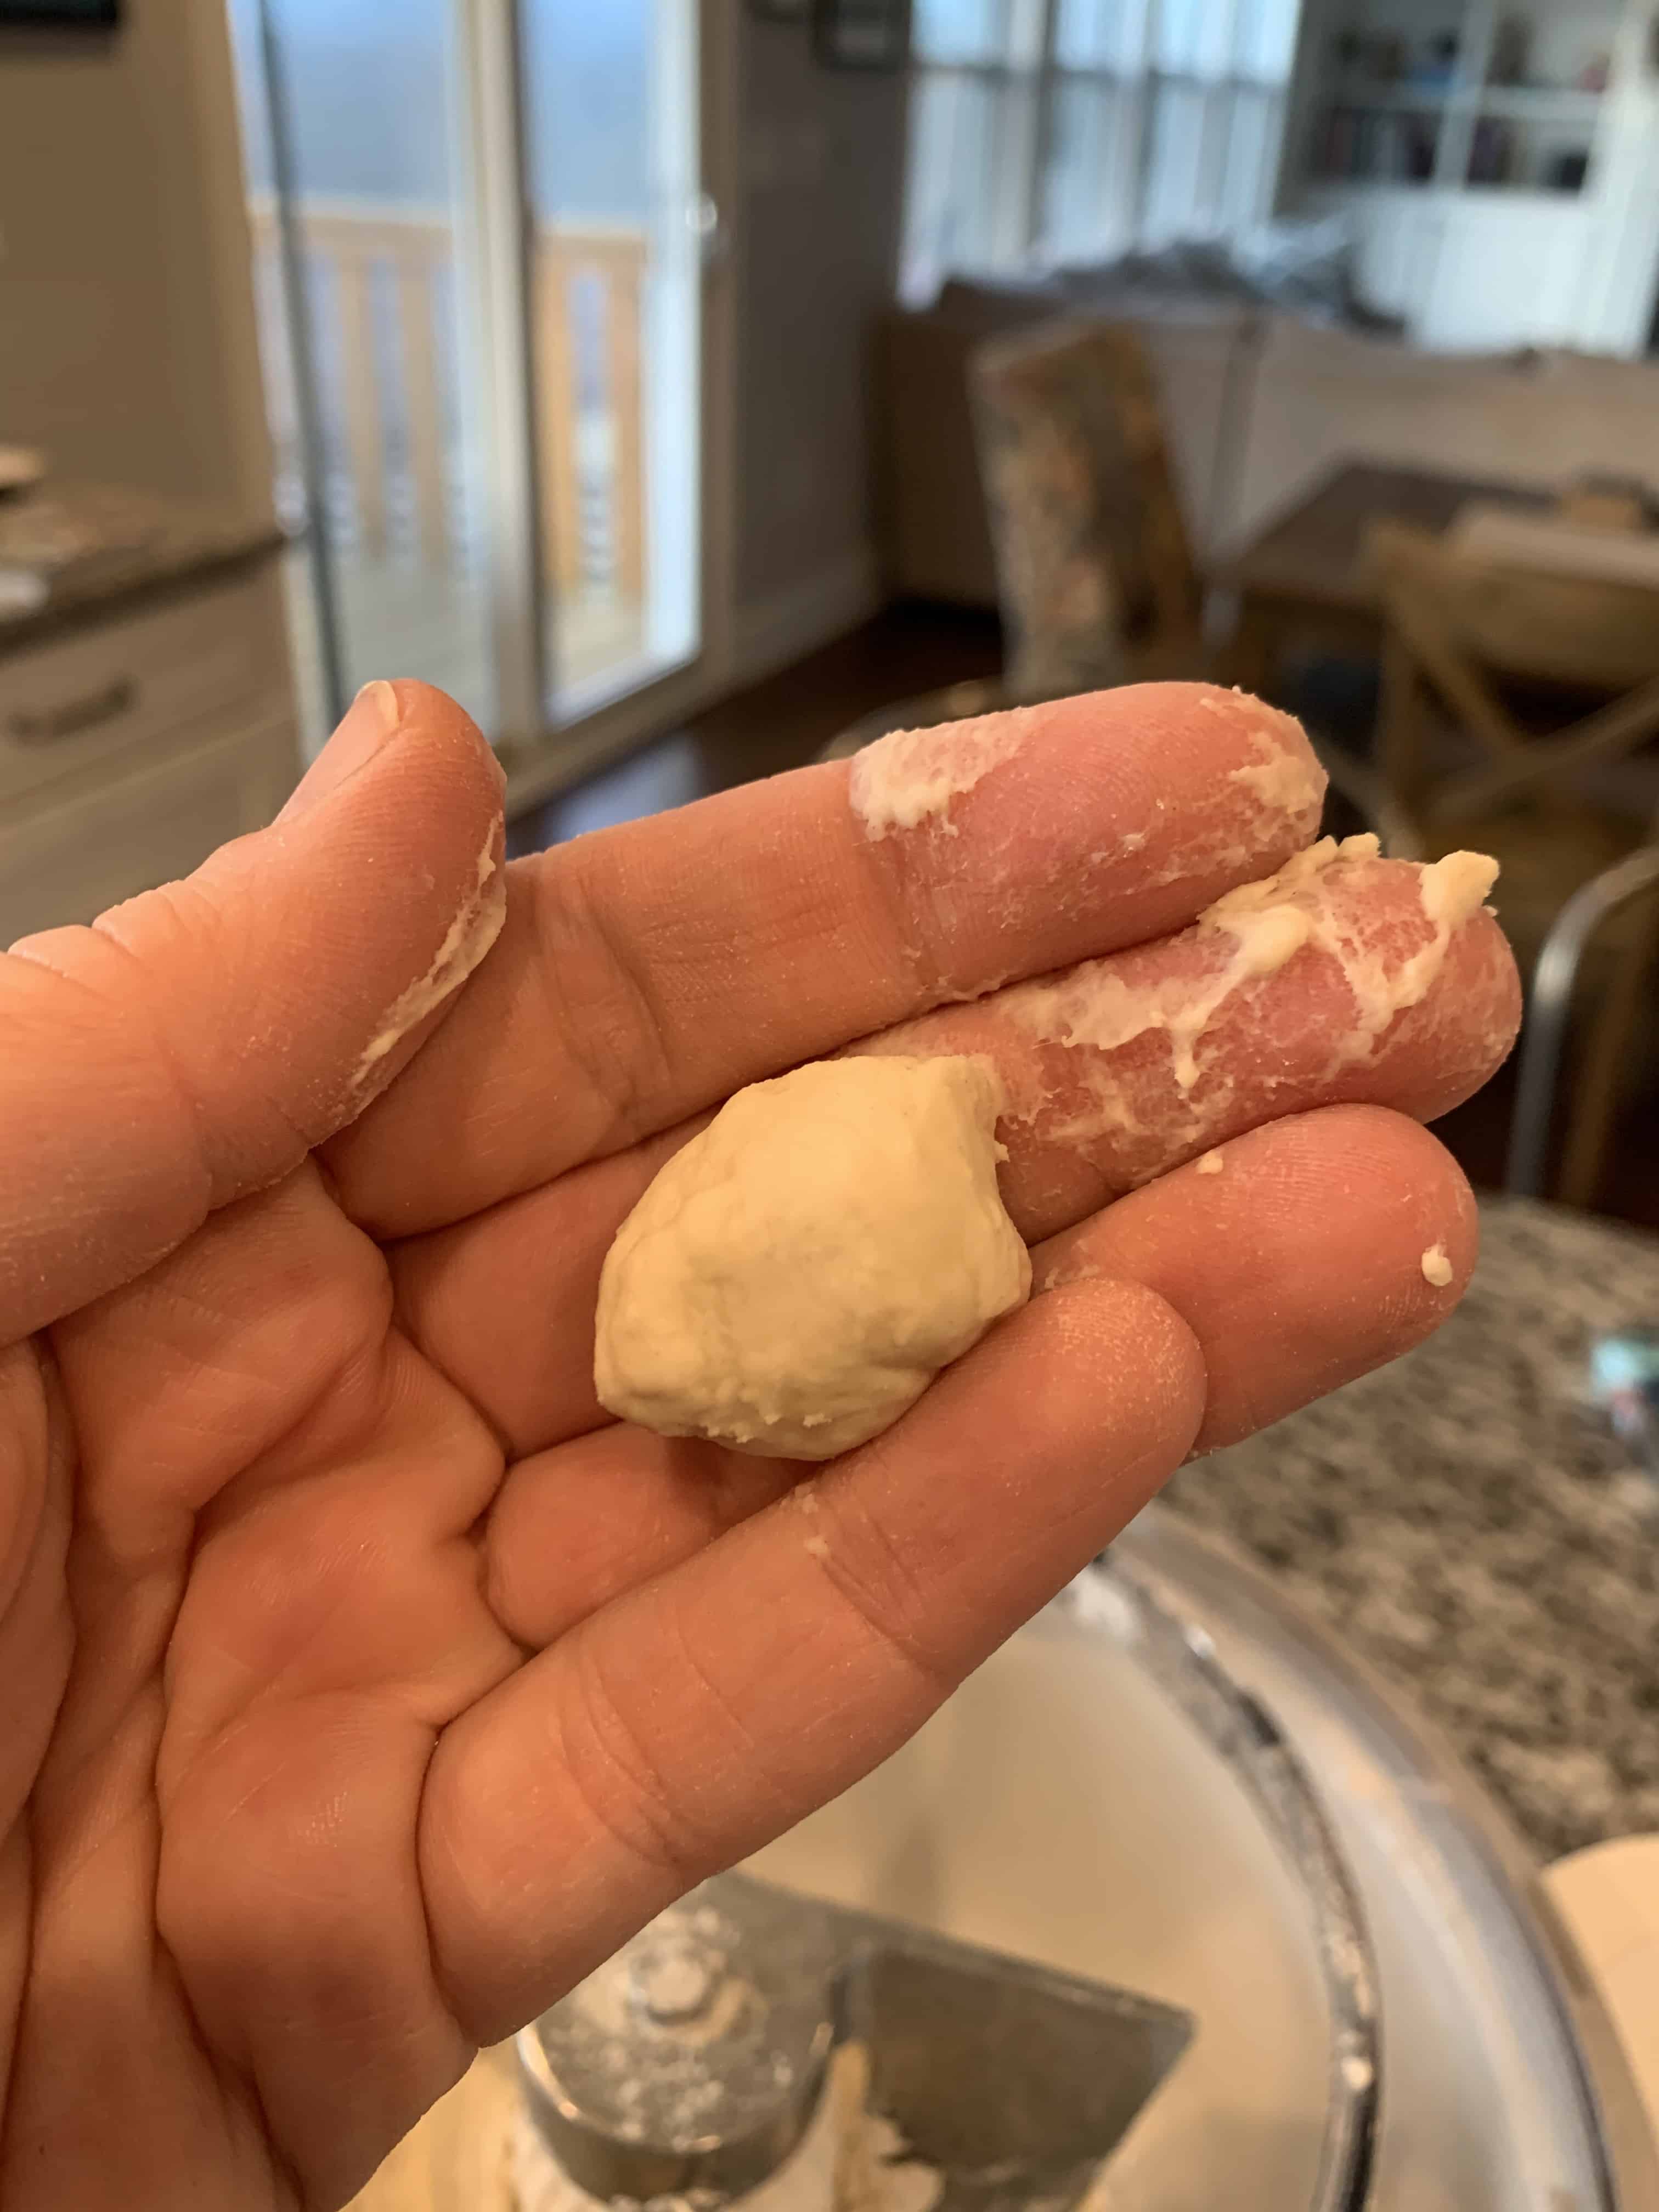
I prefer using a stand mixer to mix bread dough. For smaller batches I like using a KitchenAid. For larger batches I use a Bosch Mixer. I add all the ingredients to the stand mixer except for the flour. The way flour is measured and scooped can have an effect on your bread. I always subtract about half a cup of flour from the lowest flour range given in a recipe and begin there. For this recipe I start with 2 1/2 cups of flour and then as the dough kneads, I add the rest of the flour about 1/4 cup at a time. I don’t want to over-flour my dough which results in tough bread. The bread flour you use may have a different protein content than the flour I use which can effect the amount of flour that needs to be added to the dough. Always check signs of readiness for the dough: Can you roll the dough up into a ball in your fingers with only a little bit of sticky residue? Does the dough clear the sides of the bowl (it’s okay if it’s sticking a bit to the bottom)? Check out this post for more information about kneading dough. Once the flour has been added, knead the dough for about 8 minutes. I like to set a timer and just let the dough knead! This is important in developing the gluten strands which will form a beautiful crust and structure. After those eight minutes you can transfer the dough to an oiled bowl and let it rest and rise.
Shaping Dough
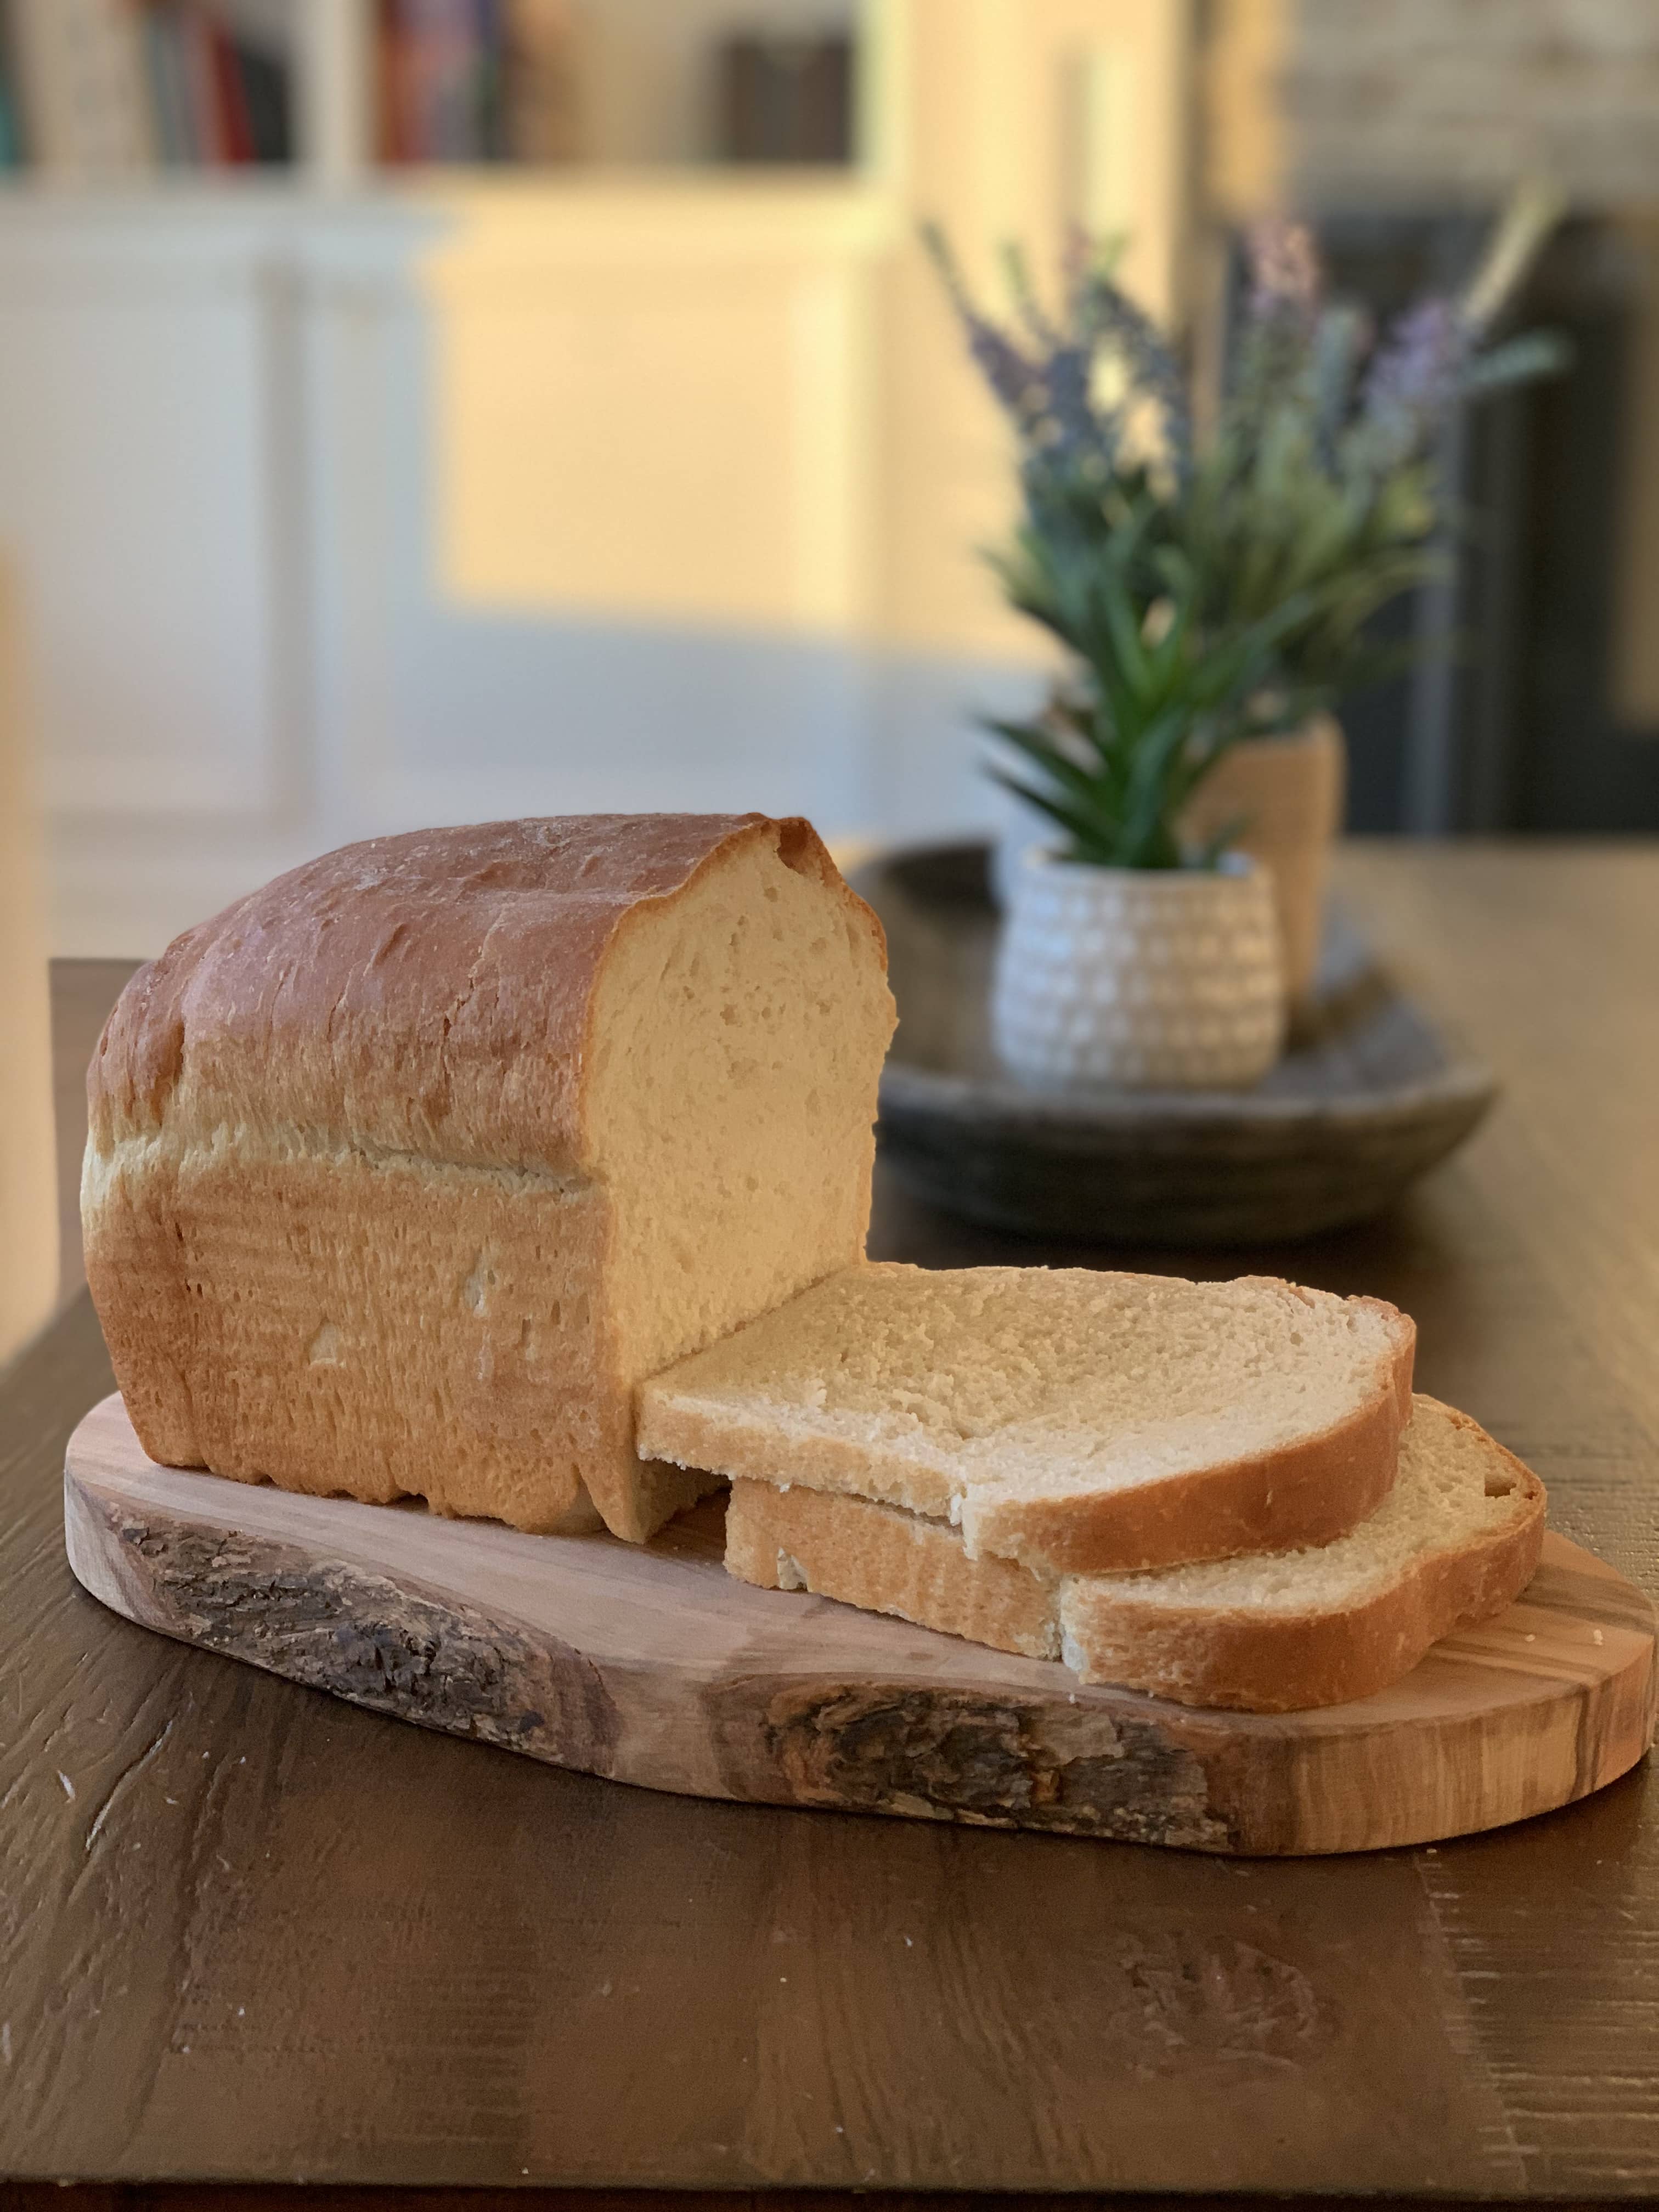
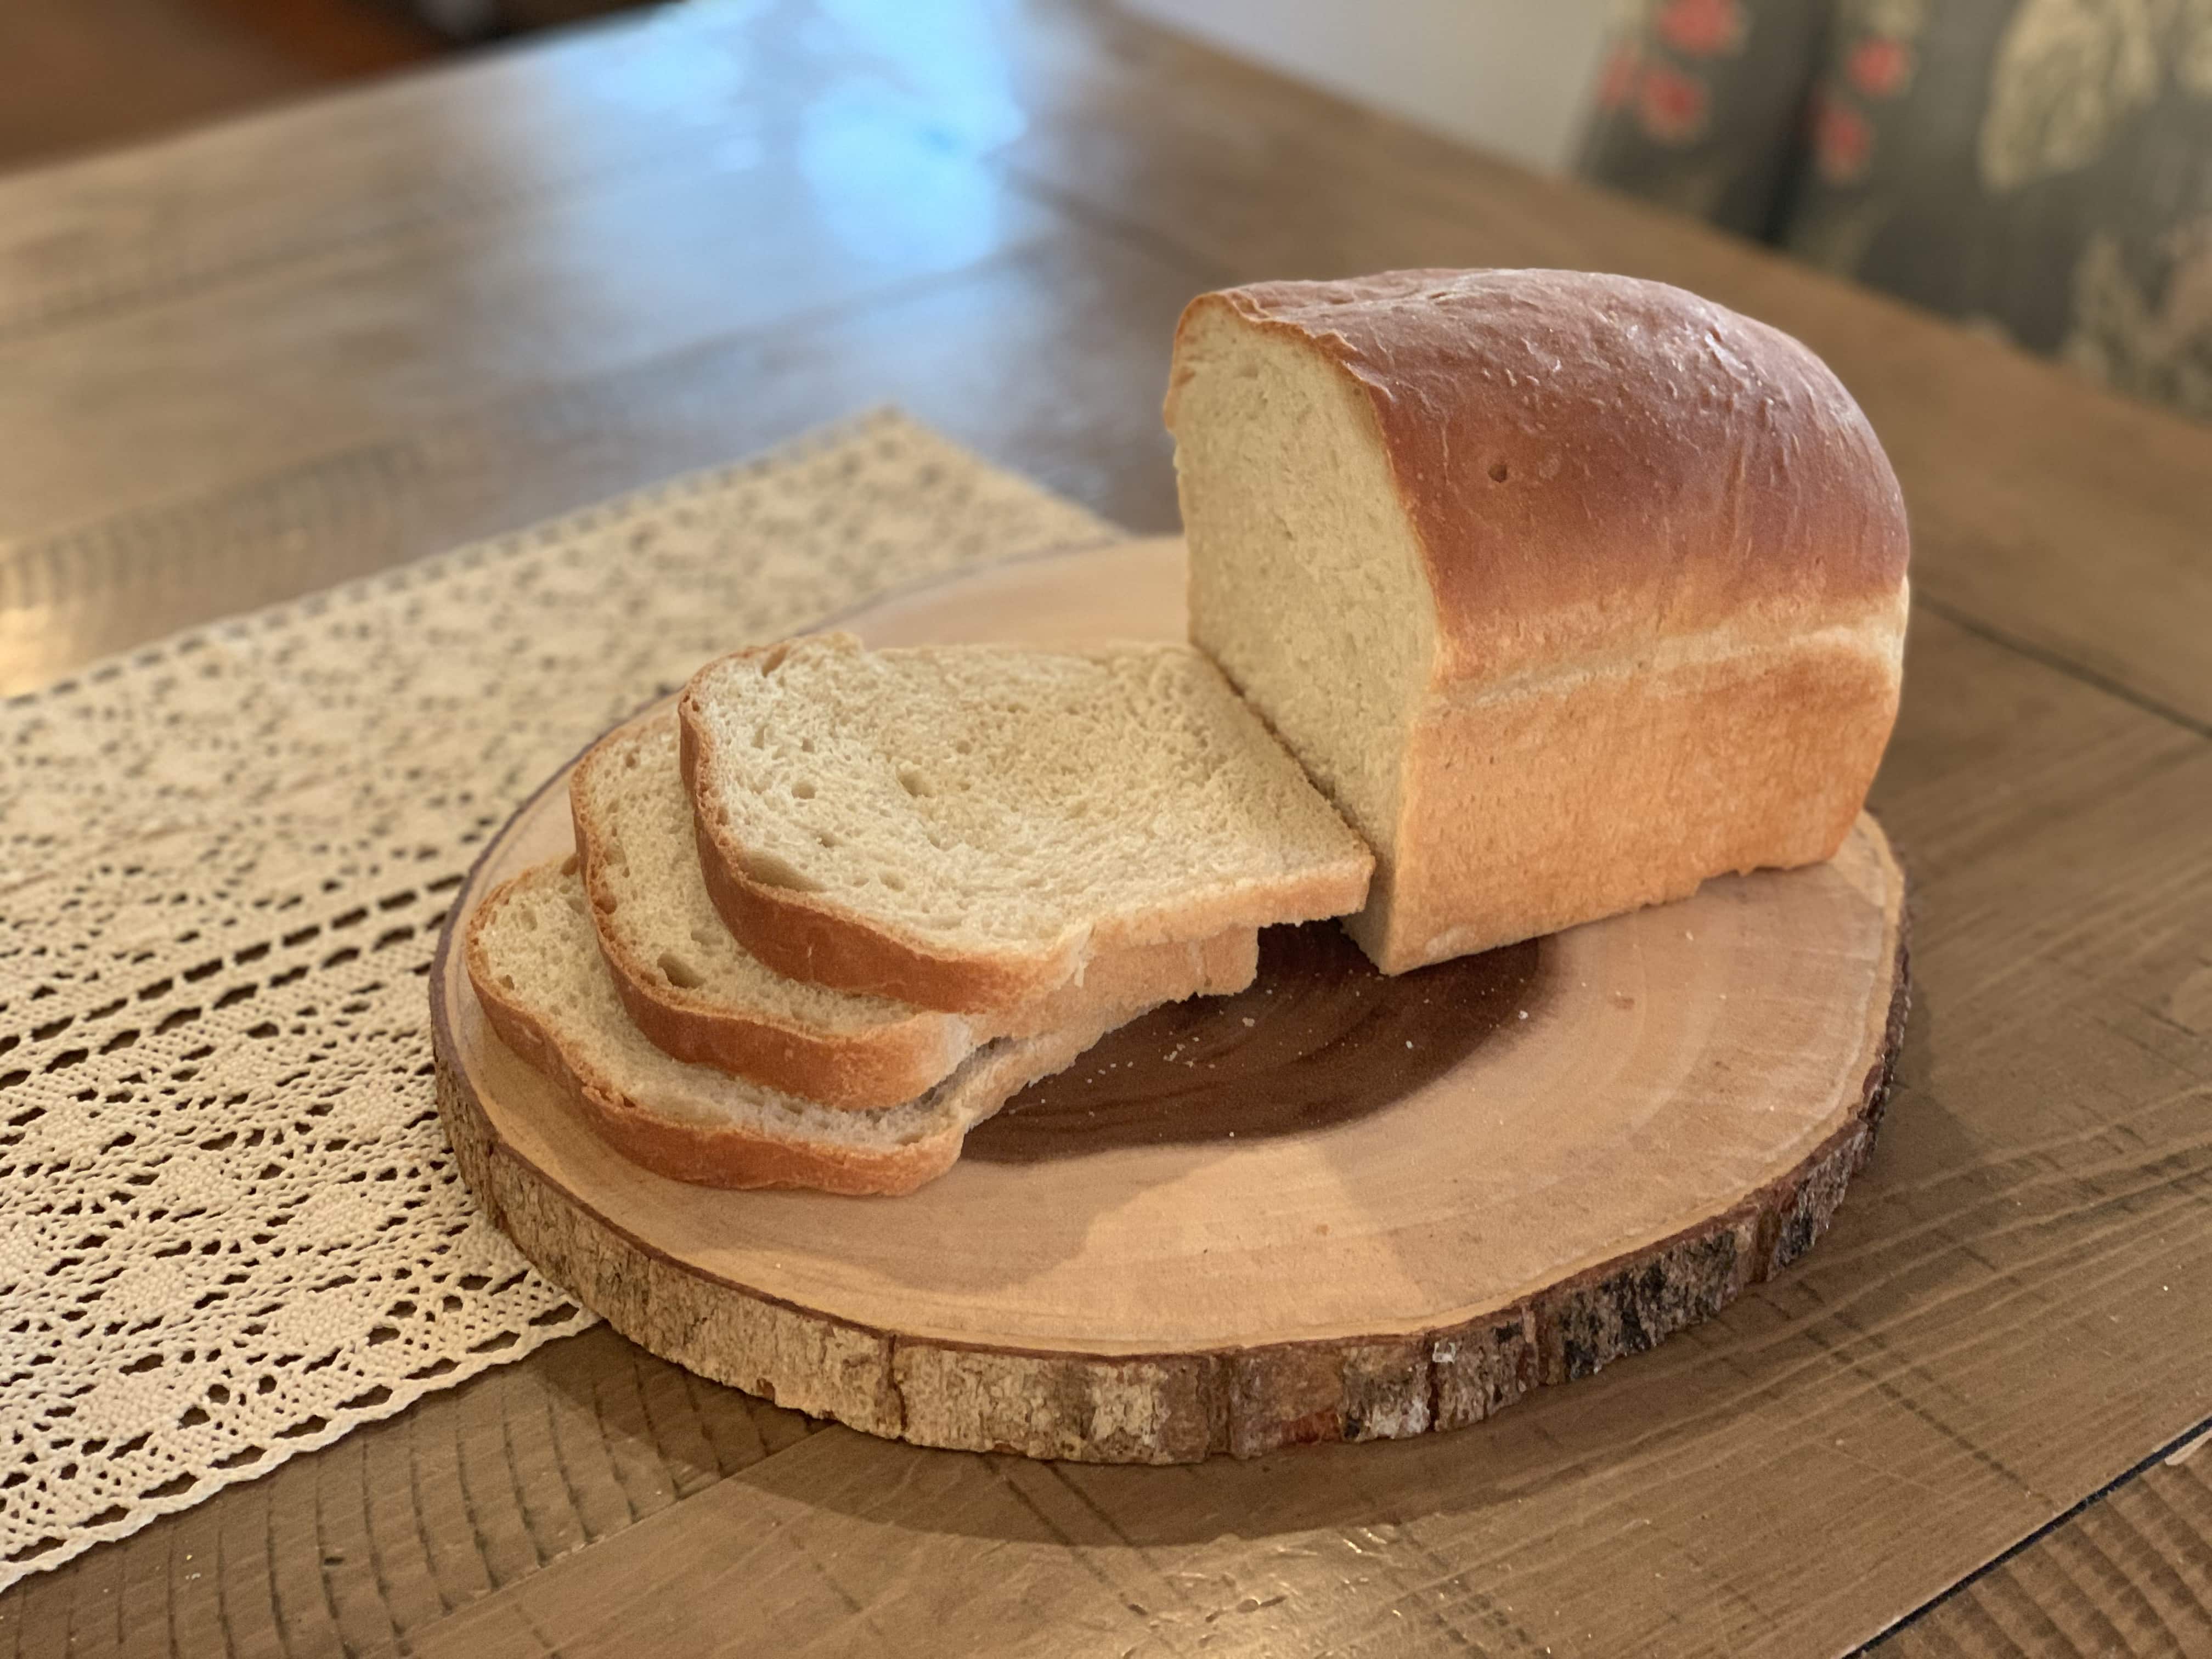
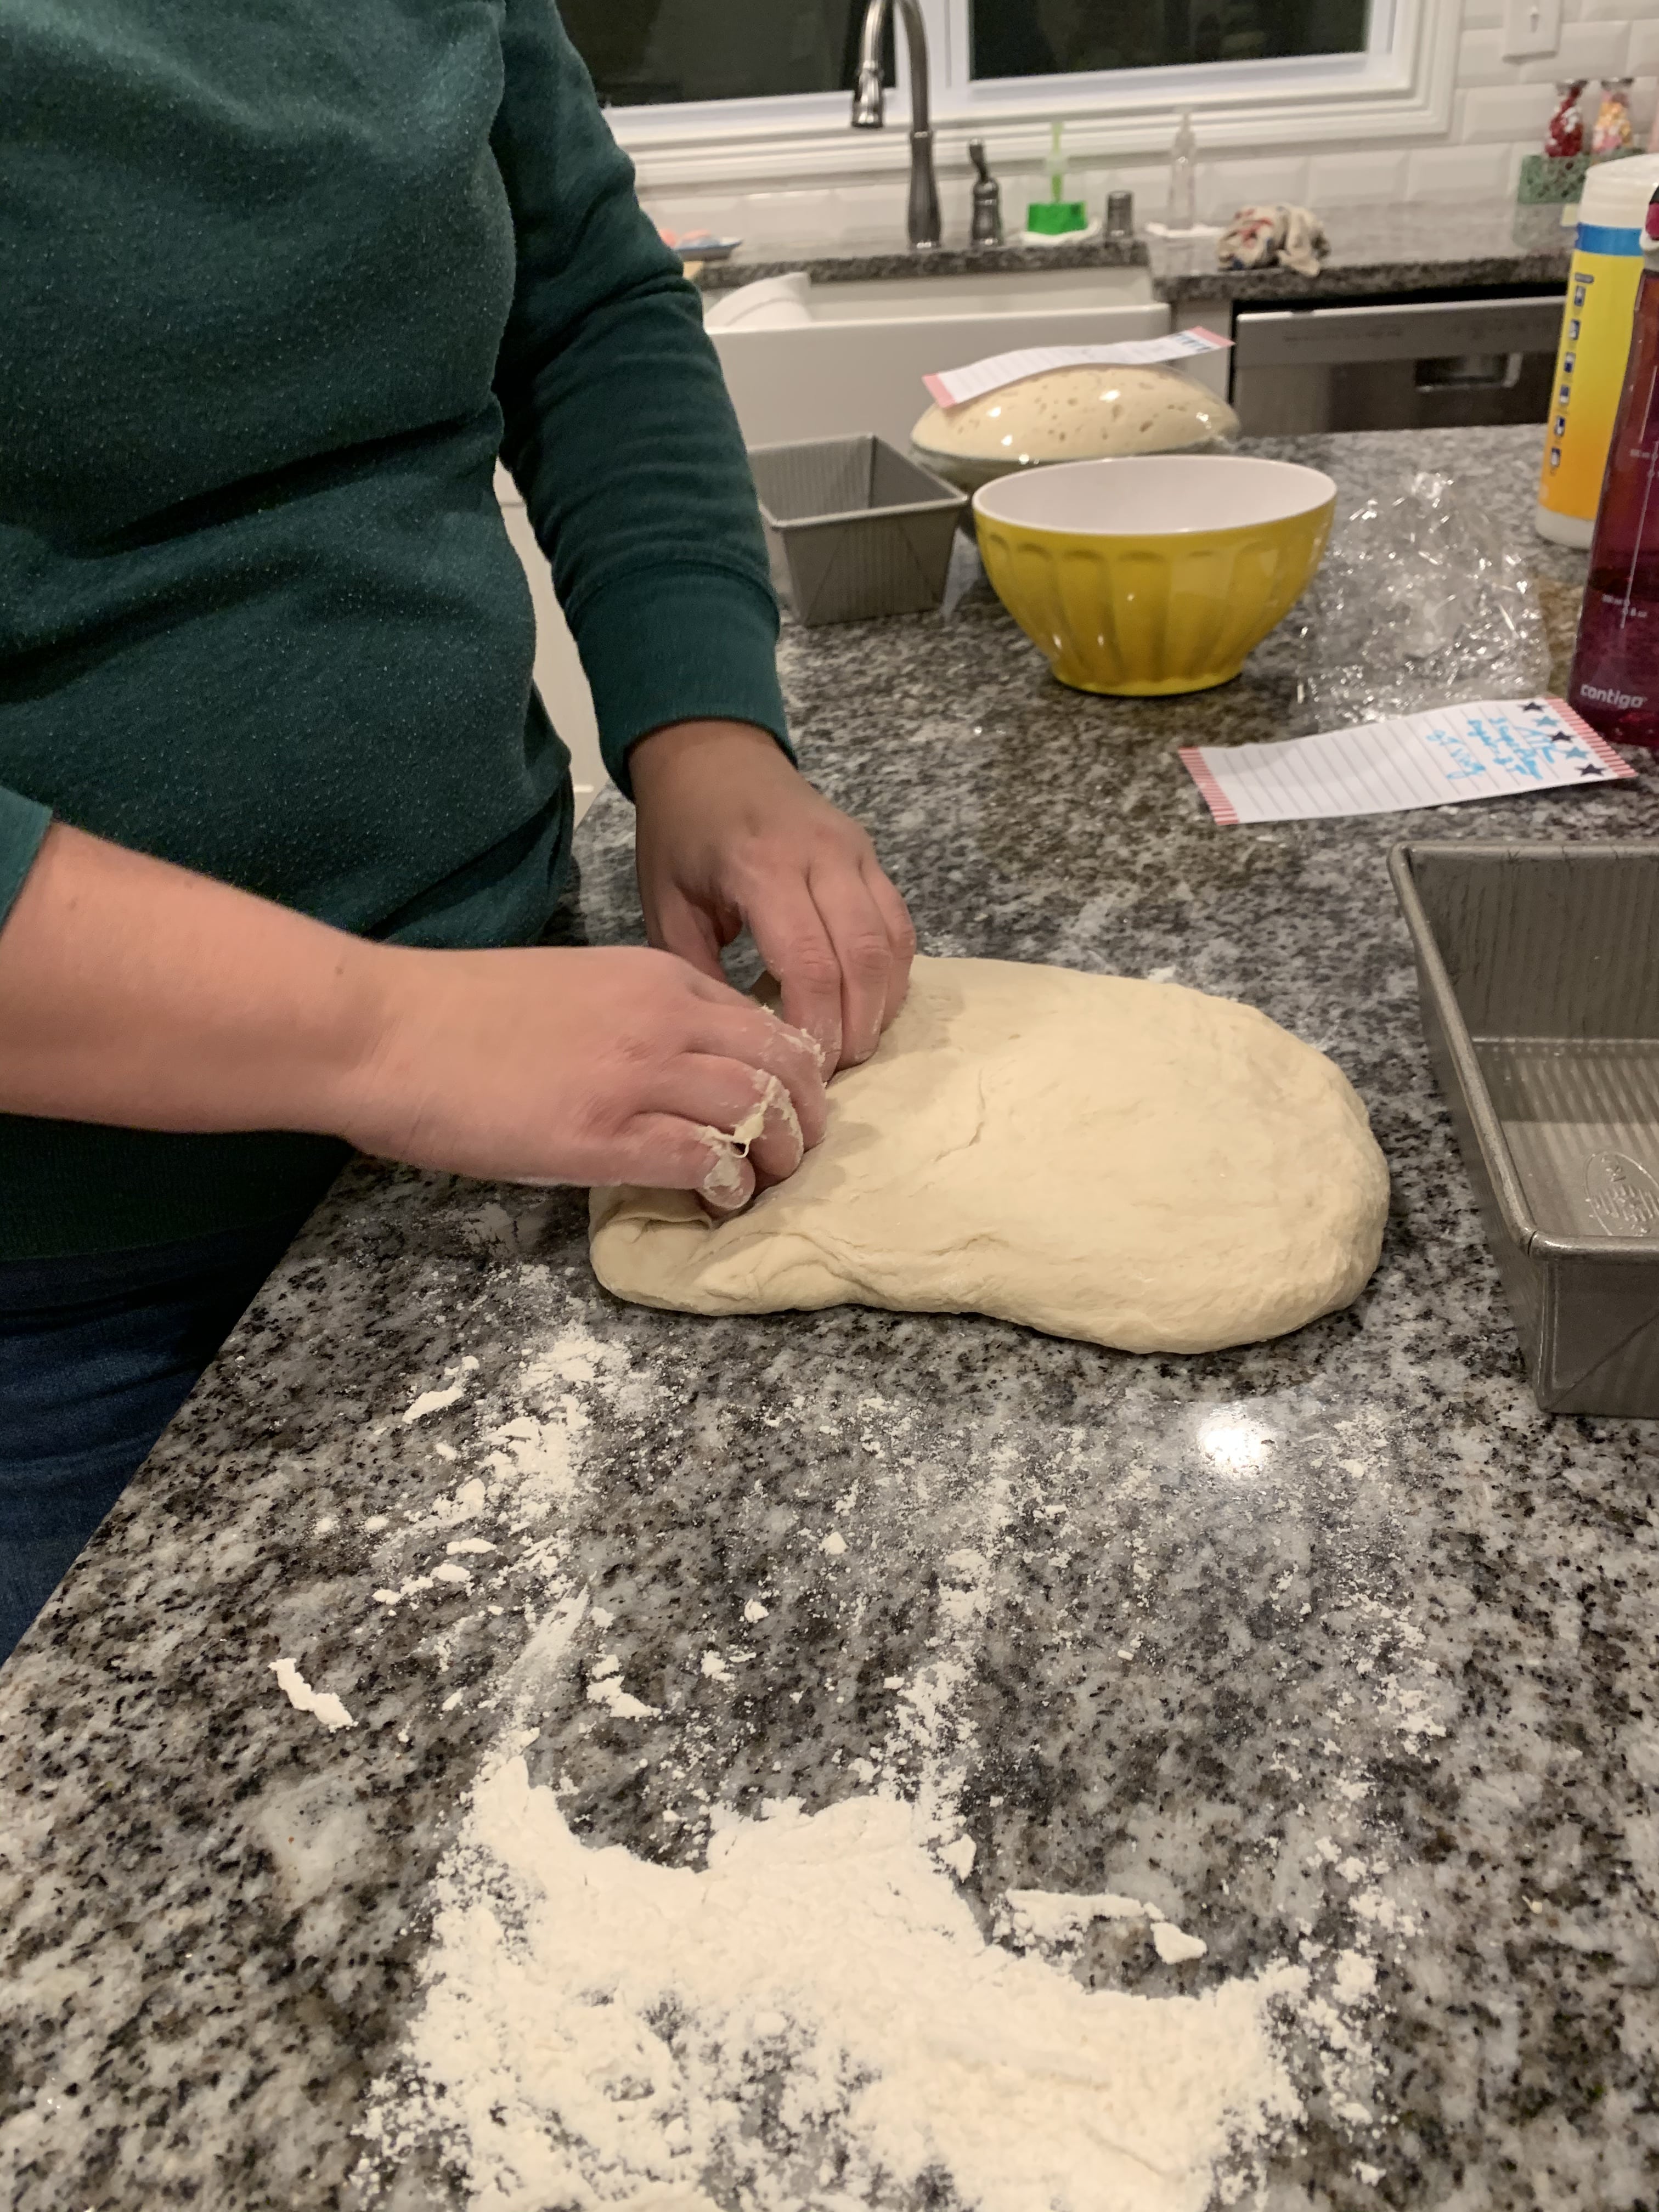
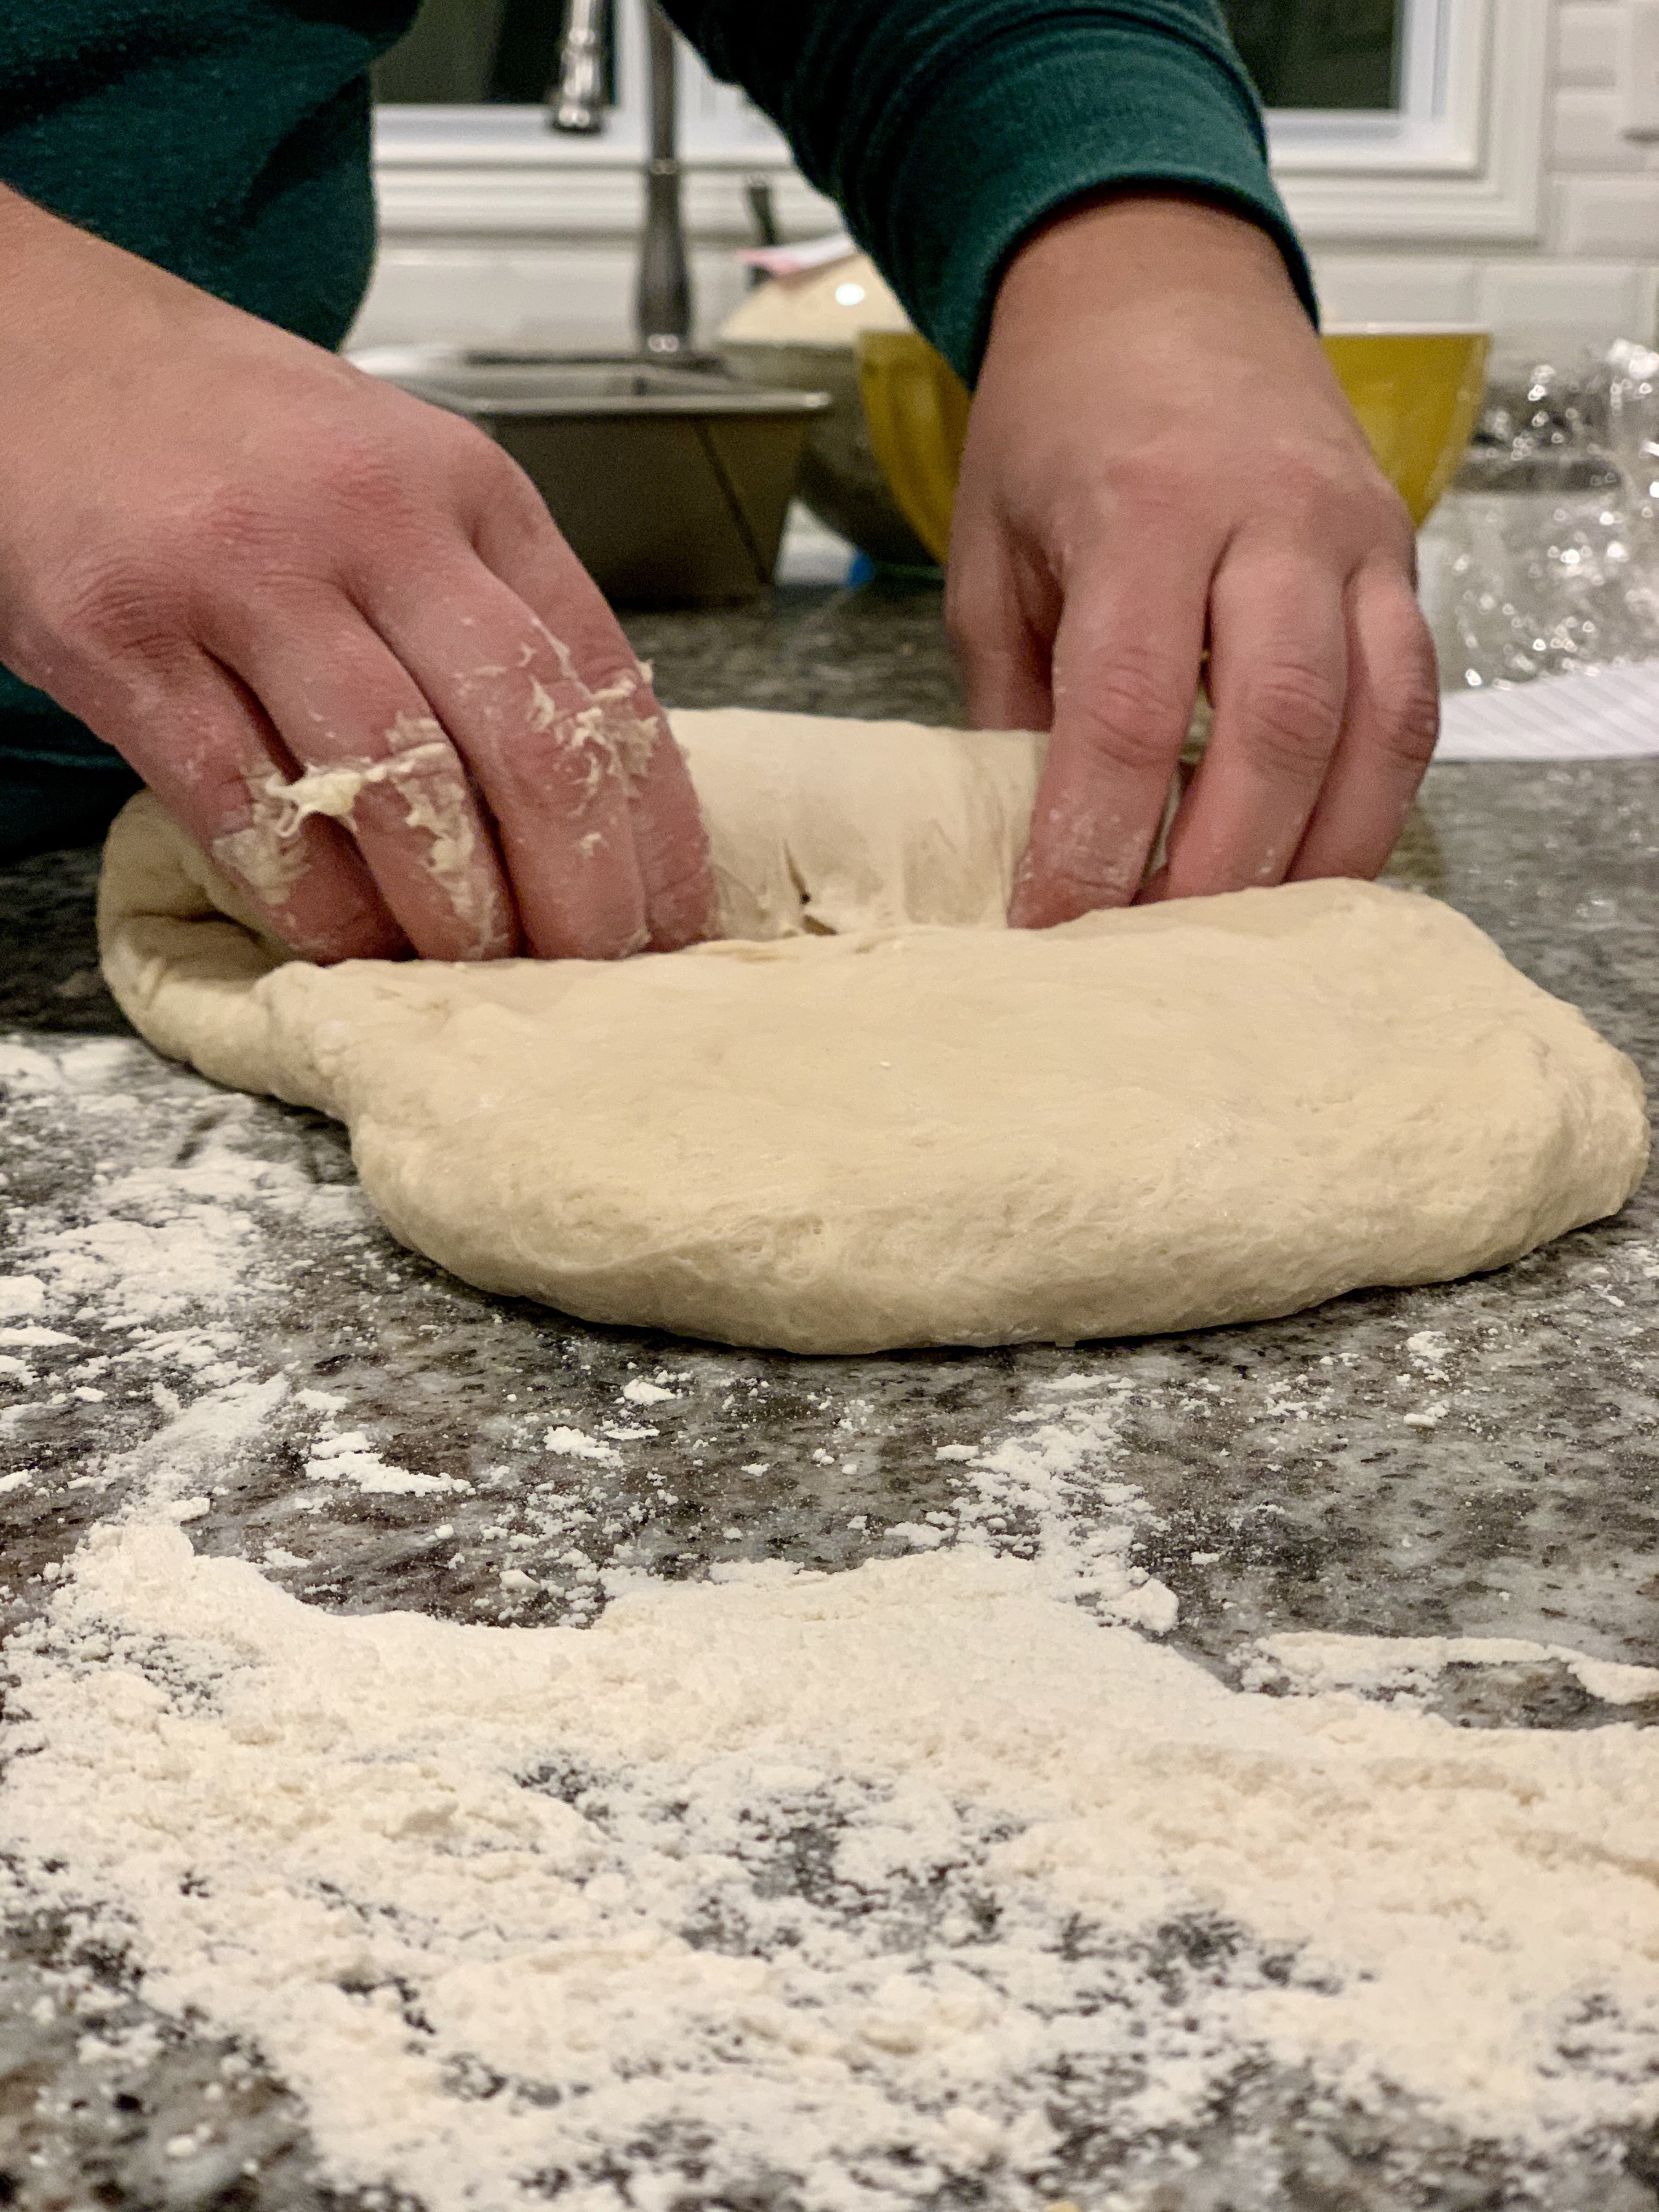
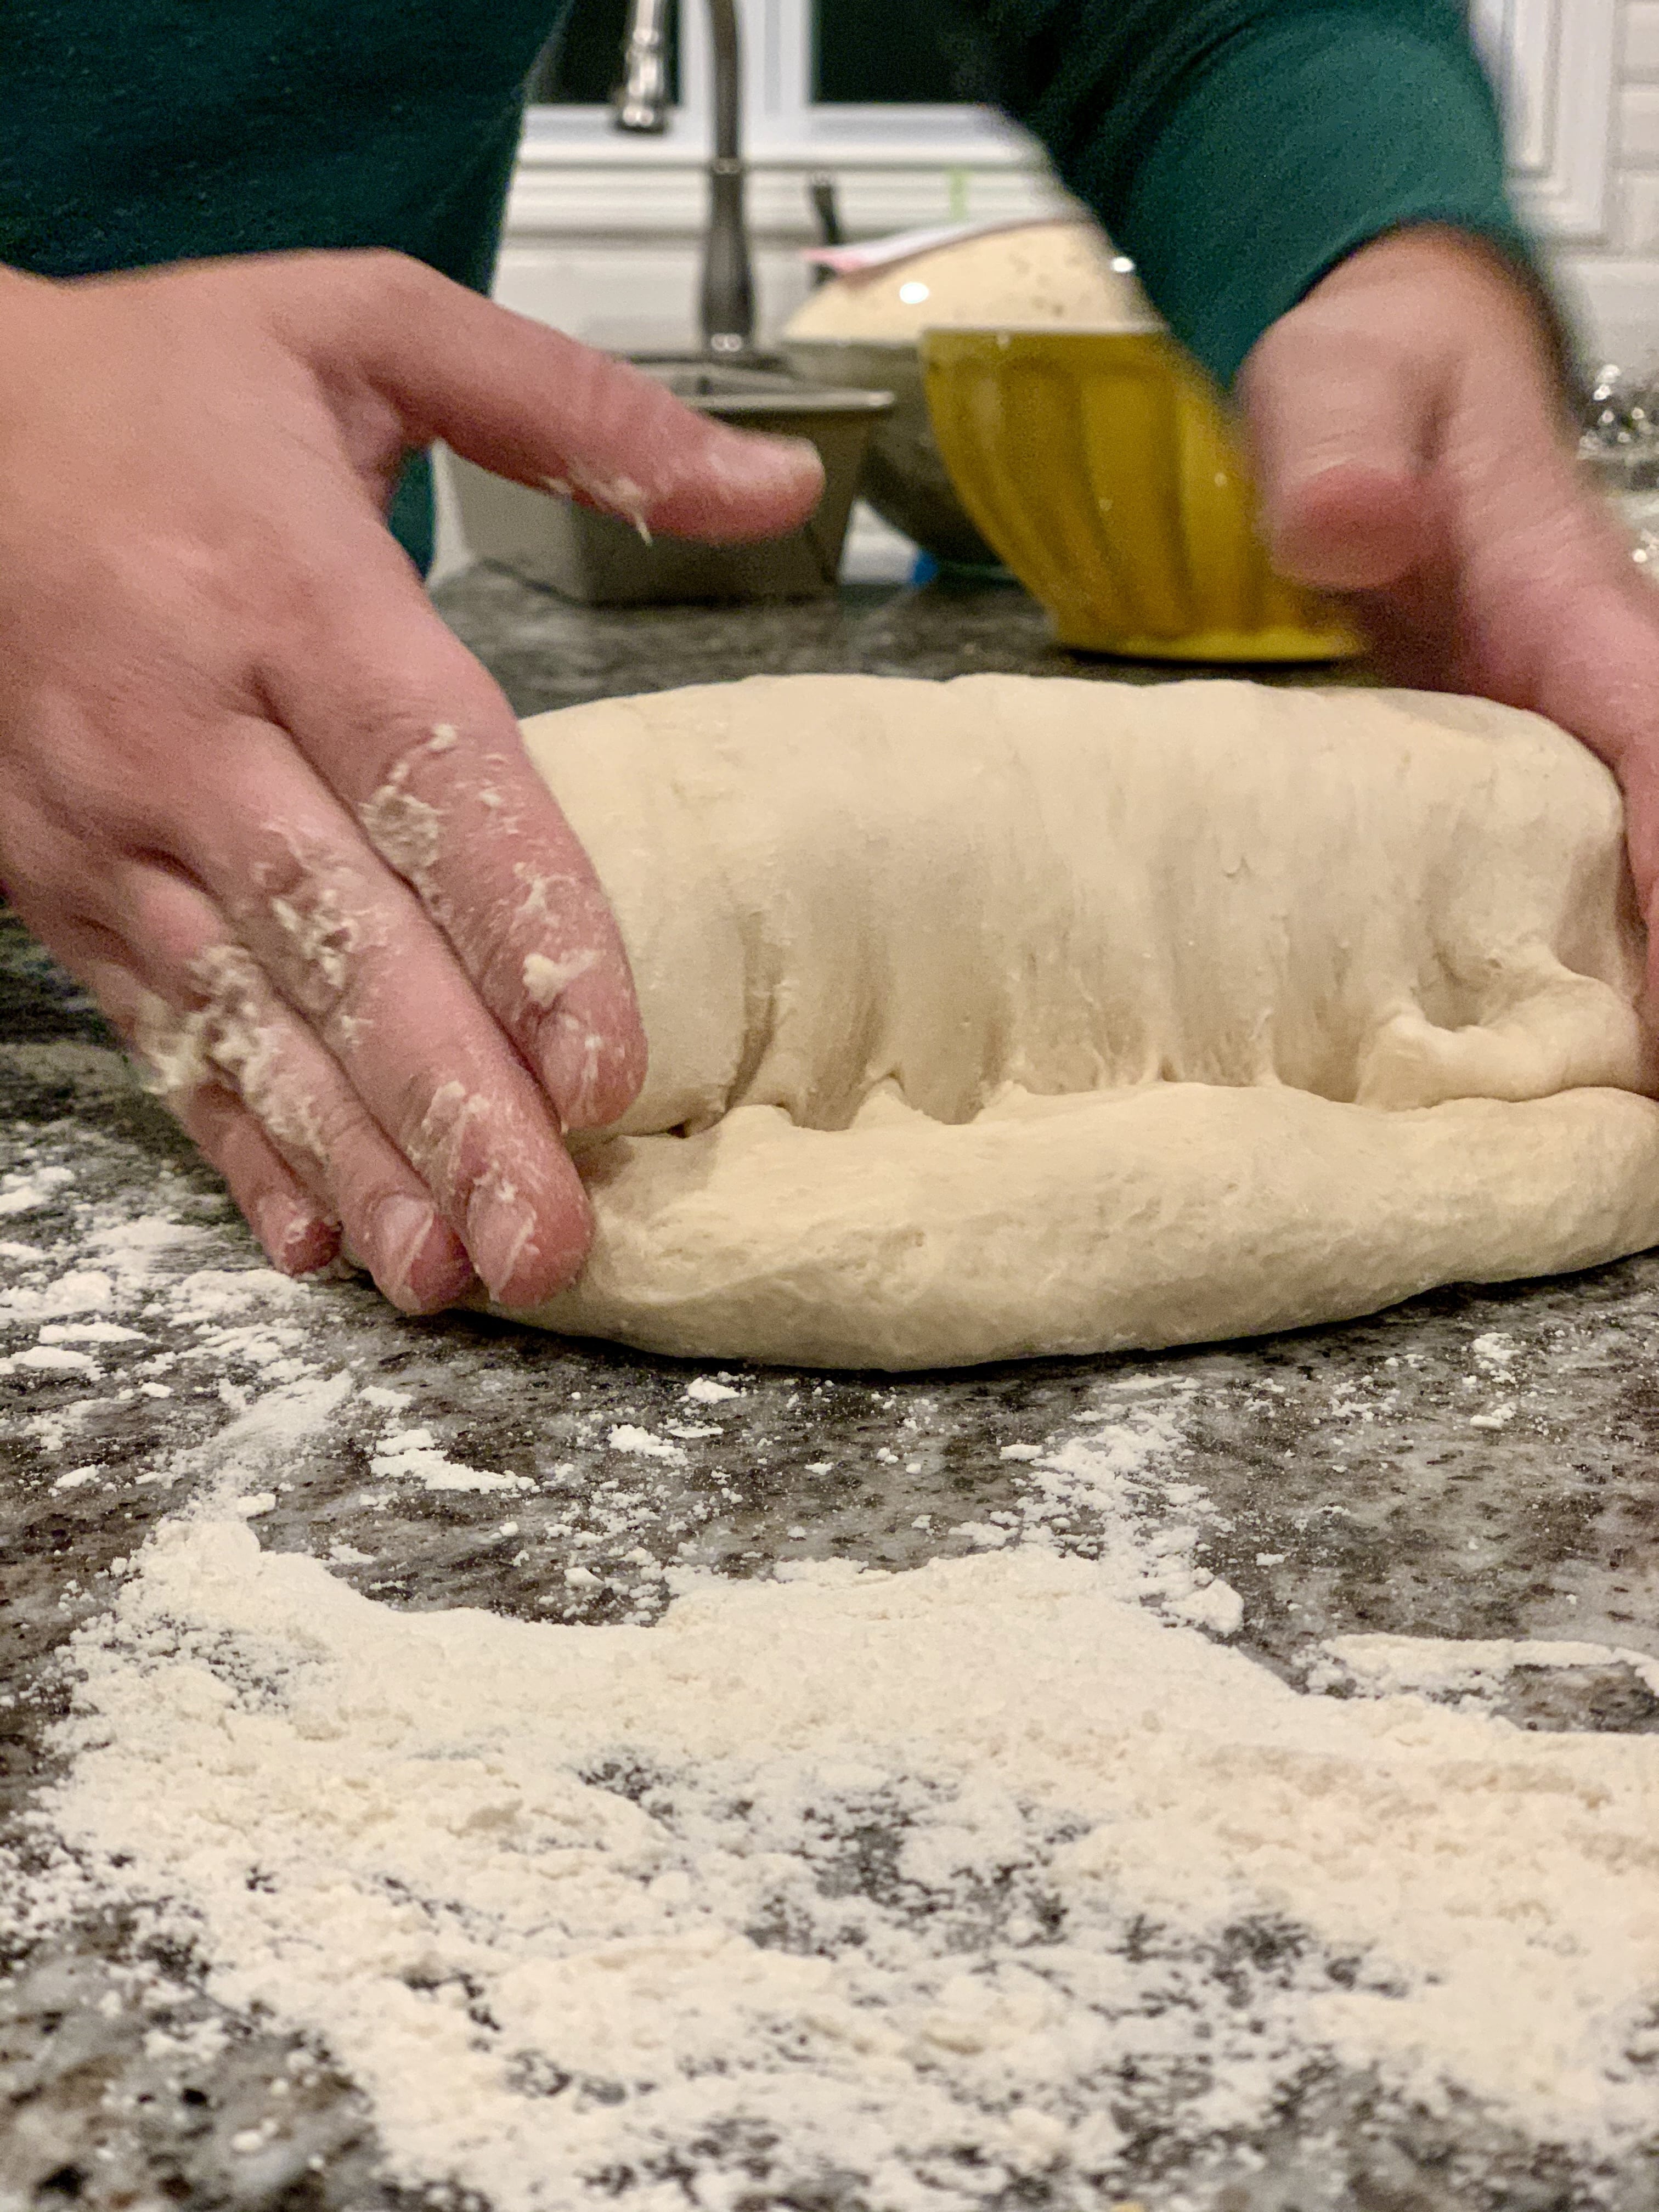
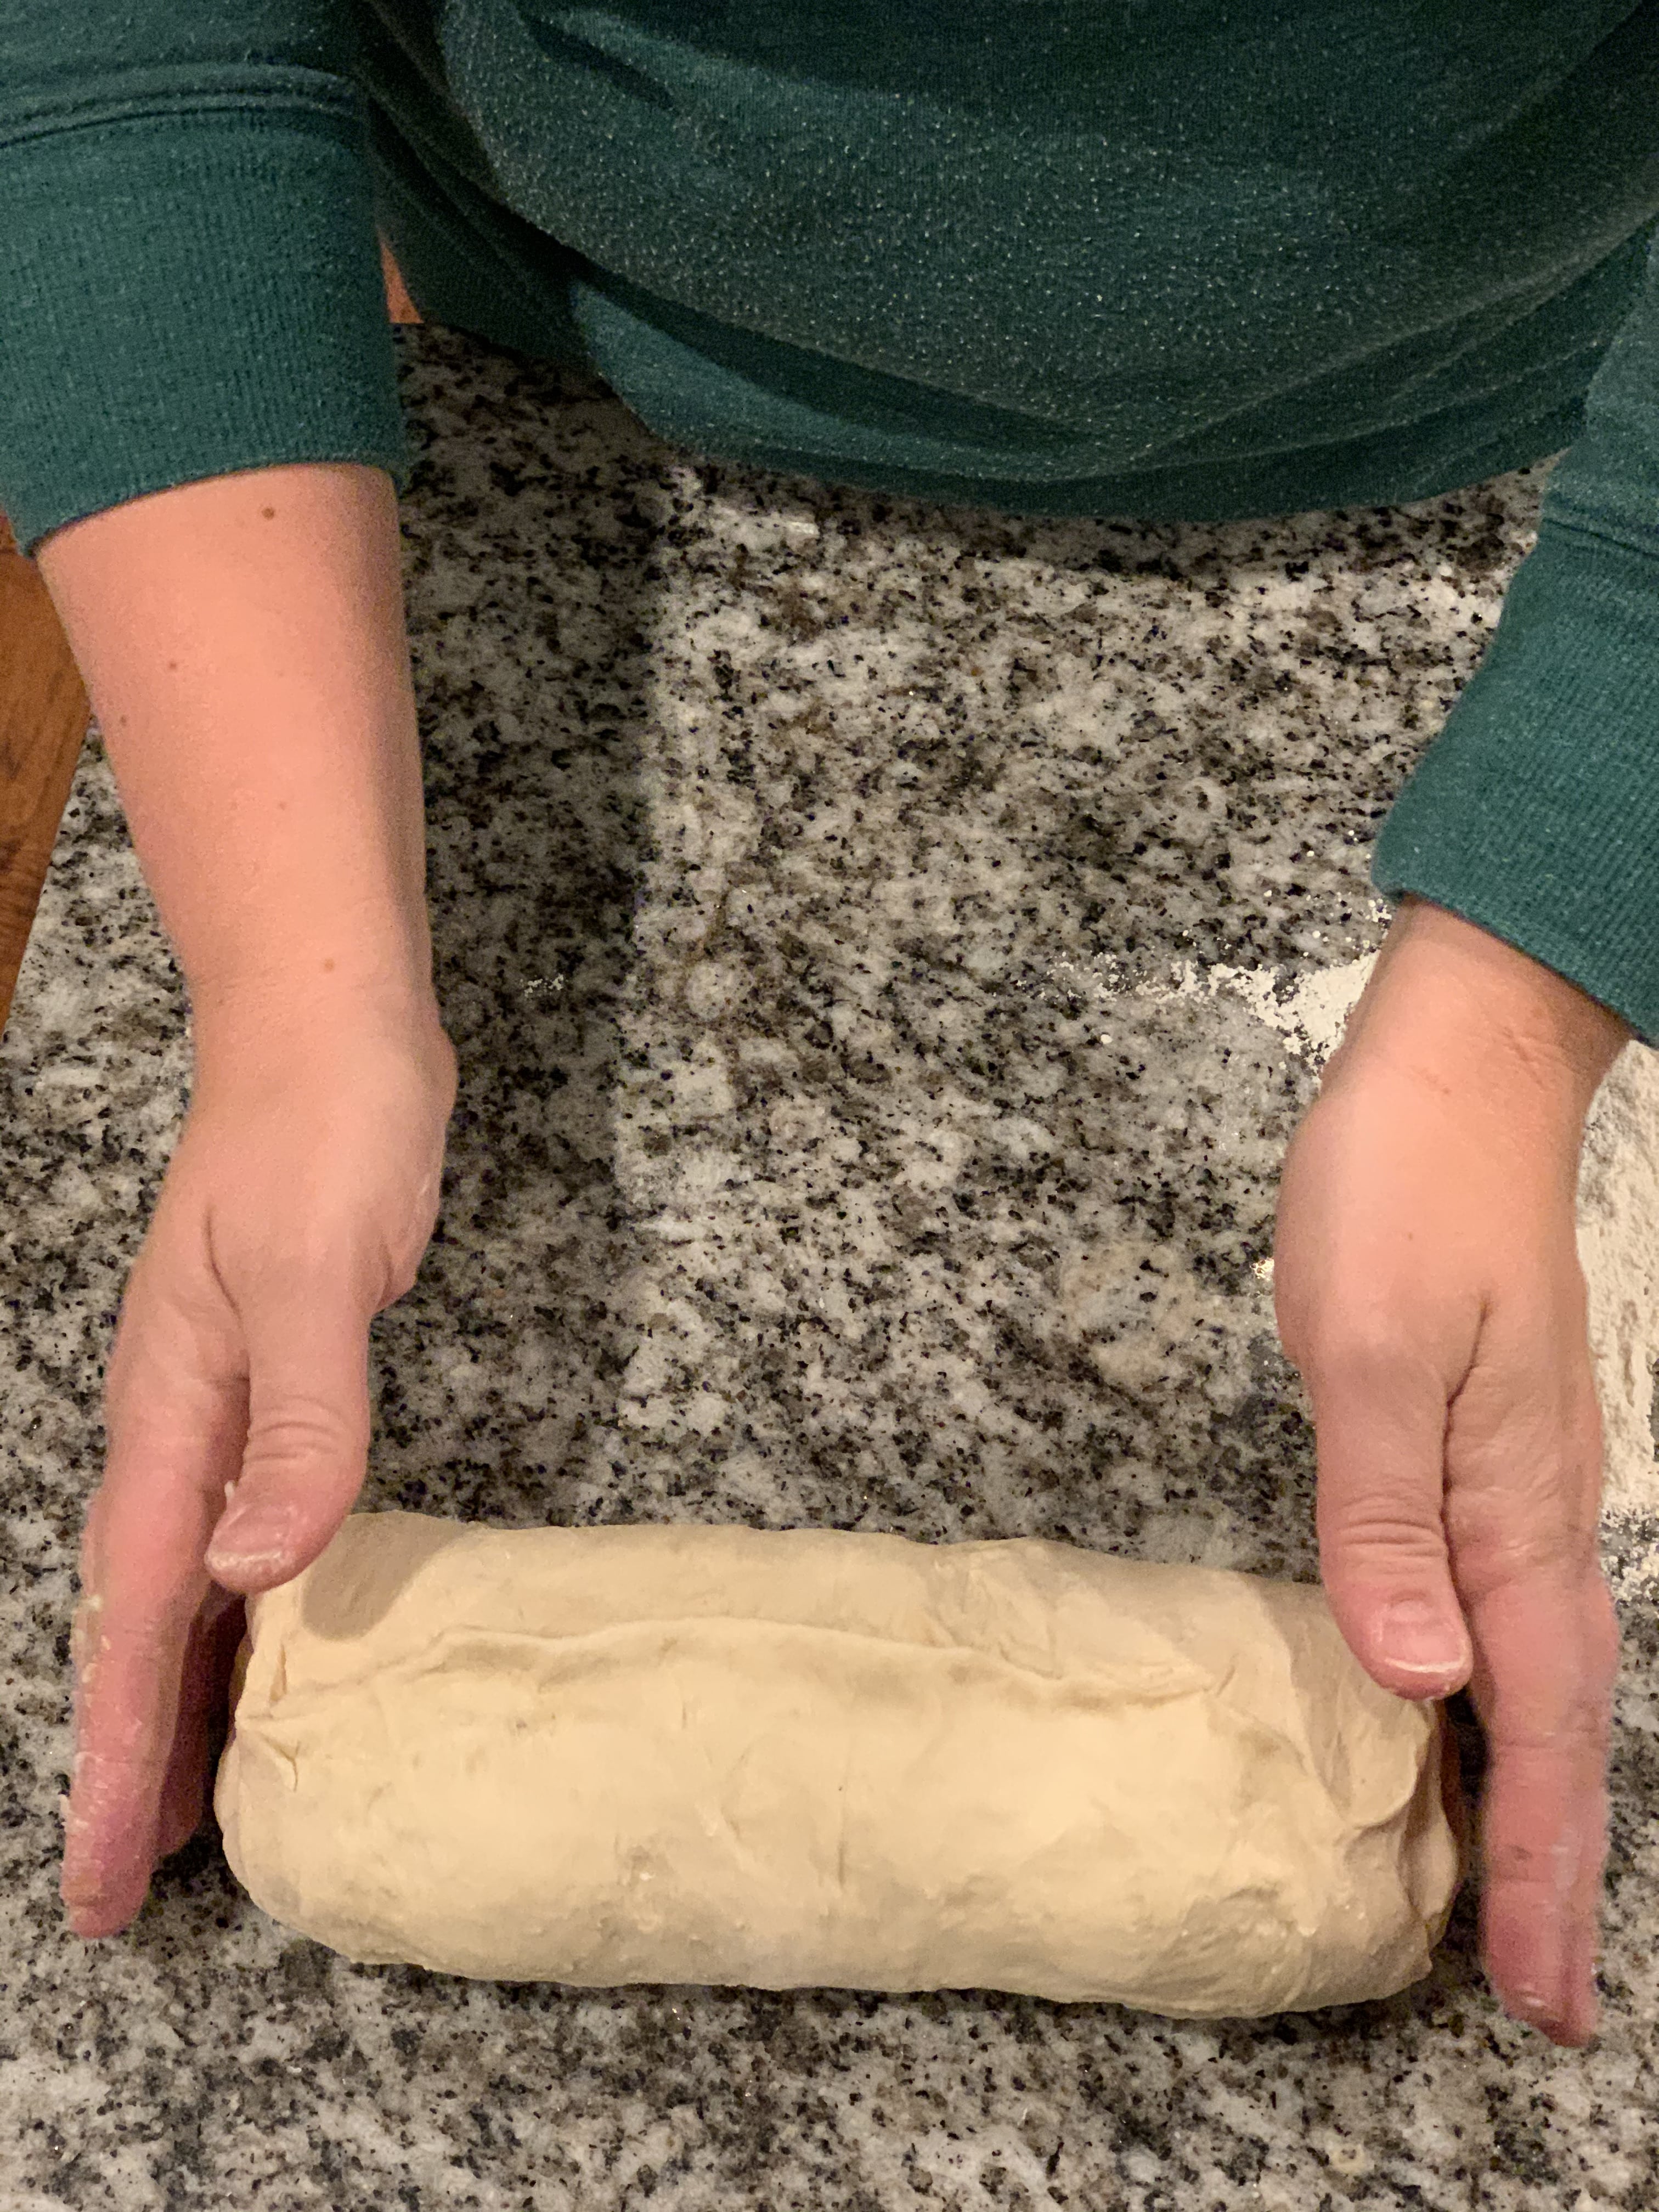
Shaping the dough is another important step in a perfect loaf of bread. Press the dough out with your fingers into a rectangle shape (use your bread pan as a guide for how wide the dough should be). Roll the dough up, pinching in the seams as you go along and creating a puffy center of dough. Pinch the seams closed and place the bread seam-side down into the loaf pan. My favorite loaf pans are these (affiliate link). They require no oiling and the bread will pop right out after cooling for about 5-10 minutes. The bread really needs the structure before putting it in a loaf pan (don’t just plop it in there and expect for the best!).

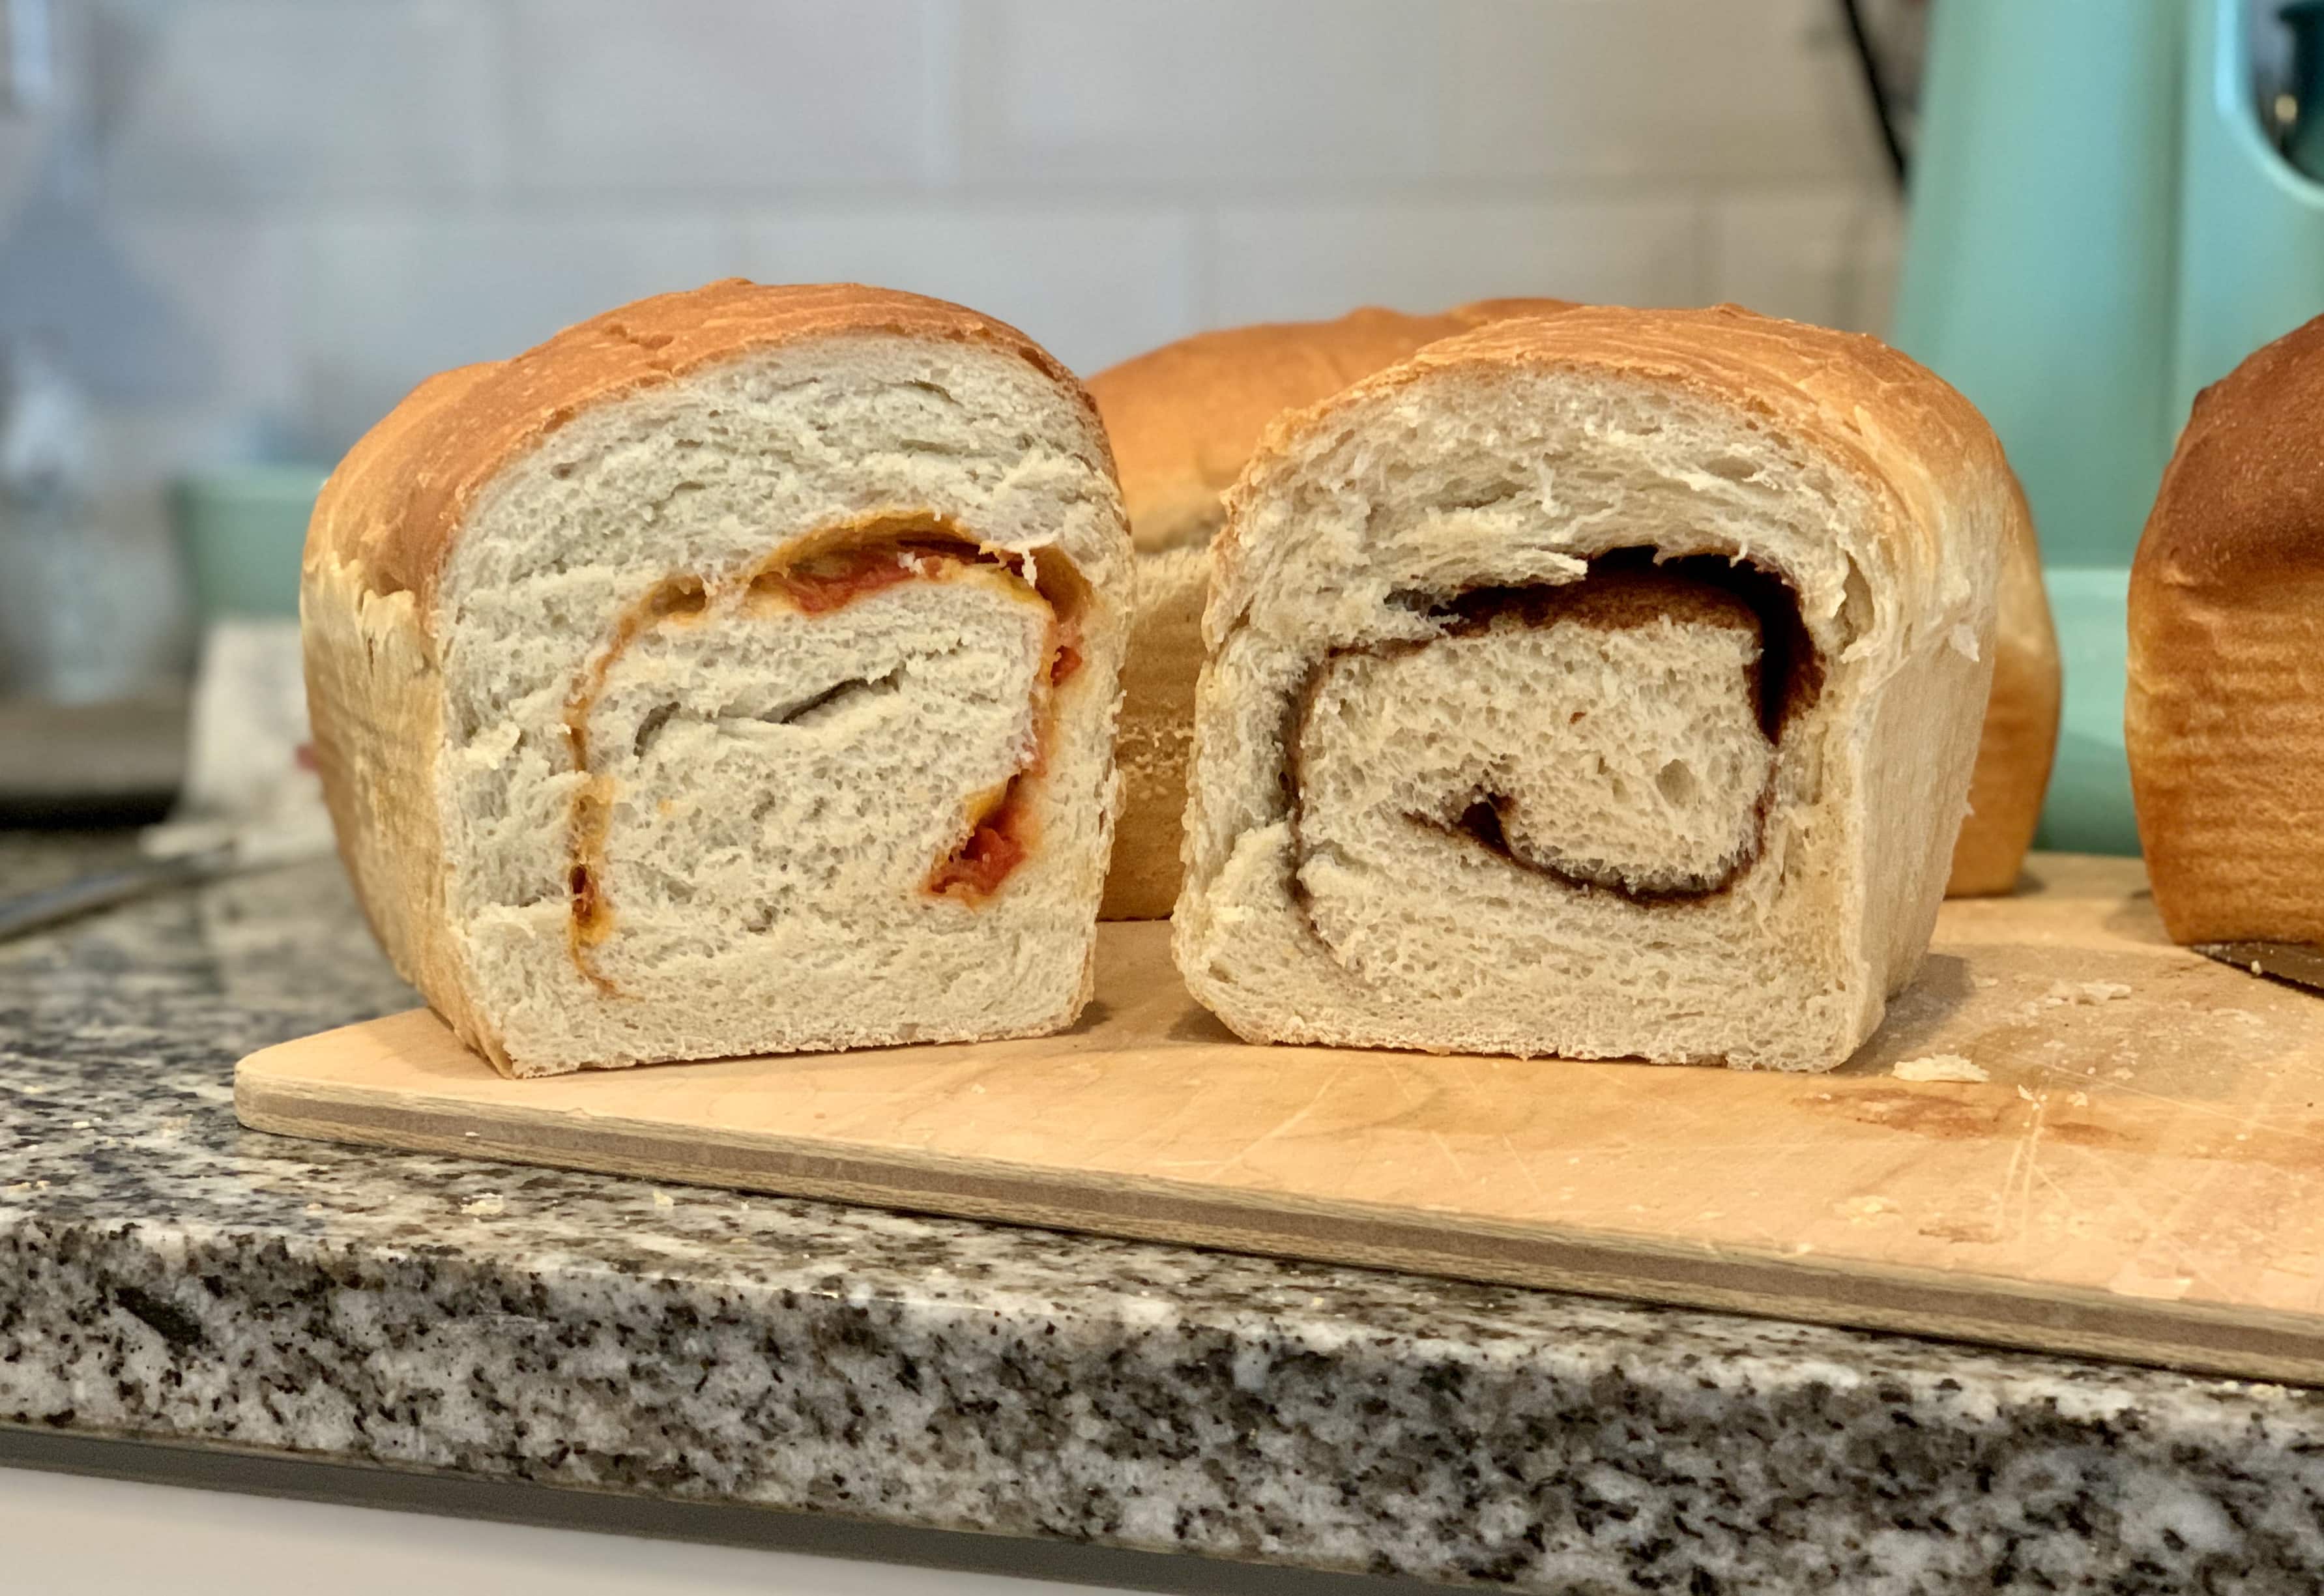
Baking With Kids: Add a Swirl
We are going on week three here of having kids at home full-time and I try to dedicate one day a week to work on a baking skill with them. This past week it was this delicious white bread. It’s a fairly basic yeast-dough recipe and the results are awesome. My kids love to pick a filling and swirl it into their bread. We had cinnamon swirl bread and “pizza” bread…both delicious. I love seeing their creativity and excitement at getting to create something that’s all theirs.
Swirl Breads: If you want to add a swirl to your bread, simply pick a small amount of ingredients, layer it on (like you would a pizza) and roll up tightly, making sure to pinch the seam closed on top. Bake as directed. A few ideas from my kids:
- Cinnamon Swirl: 2 Tablespoons white sugar, 1 Tablespoon cinnamon
- “Pizza”: 10 chopped up pepperoni, 2 Tablespoons red sauce, ¼-½ cup shredded cheese
- Cheese bread: ½ cup your favorite cheese sprinkled over the bread
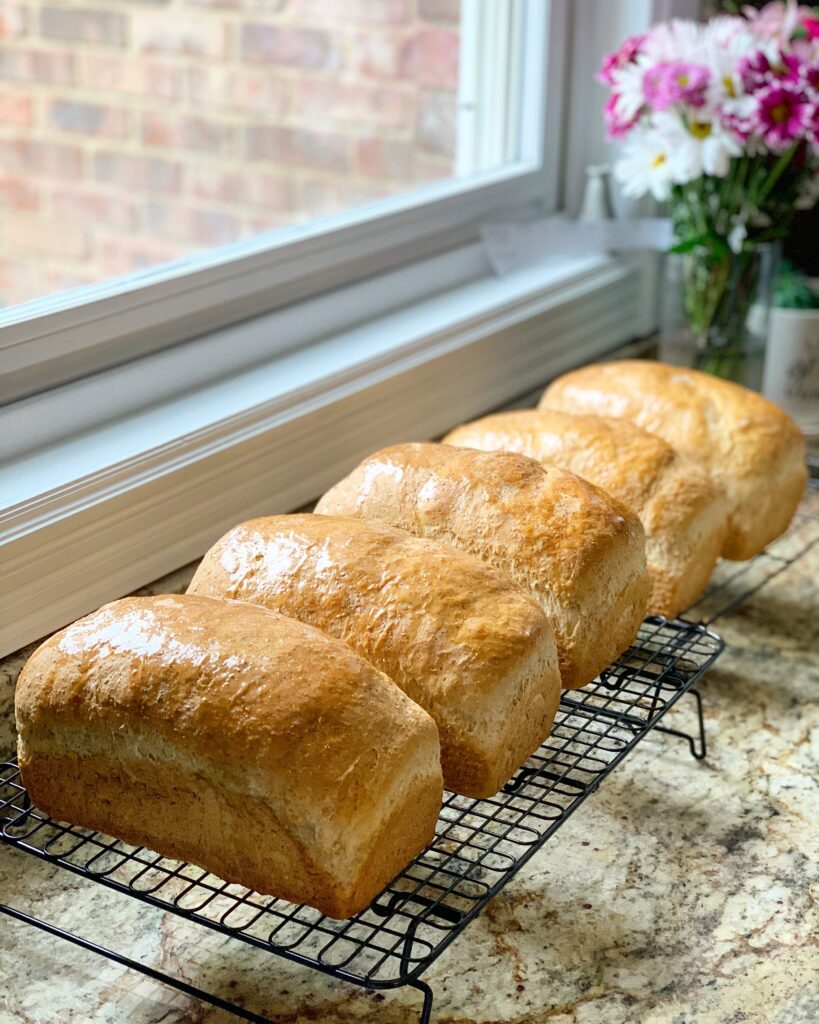
This recipe makes one delicious loaf of white bread, though it can easily be doubled or tripled I usually multiply it by four or five and slice and freeze the leftover bread. It slices well and is the perfect bread for a sandwich or to snack on. We use our leftovers for french toast on lazy mornings…which seems to be every morning these days. So check your pantry and give it a go!

White Sandwich Bread
Save this for later!
Equipment
Ingredients
- 1 ⅓ cup warm water, about 98-100ºF, substitute milk for a richer bread
- ¾ Tablespoon instant yeast
- 2 ½ Tablespoons granulated sugar
- 2 Tablespoons neutral flavored oil
- 1 ½ teaspoons salt
- 3-4 cups bread flour, see recipe note
Instructions
- To the bowl of a stand mixer fitted with a dough hook, mix together the water, instant yeast, sugar, oil and salt. Add 2 1/2 cups bread flour and begin kneading. The dough will start coming together.
- Add flour 1/4 cup at a time until the dough is just a little sticky but rolls into a ball in your fingers. You will also notice the dough no longer sticks to the sides of your stand mixer. Check out this post for how to know when to stop adding flour. I tend to go by the feel of the dough for when to stop adding flour more than an exact measurement. Knead for 8 minutes in a mixer or 10 minutes by hand.
- Lightly oil a bowl and transfer the dough to the bowl. Cover with a kitchen towel, set in a warm place and let it rise for about 1 hour or until doubled in size.
- Turn the dough out onto the counter and shape into a rectangle. You will roll the dough into a cylinder shape. Starting at the edge closest to you, roll up the dough. Take care to press in the dough at the seam after each roll and pinch the seam closed at the end. Refer to the photos in this post for a visual.
- Transfer the dough, seam side-down to a bread pan. I like using an 8.5 by 4.5 (affiliate link) bread pan but this loaf will fit a 9 by 5 bread pan too (the bread may not rise quite as tall if you use the larger pan but will be a bit wider).
- Allow the dough to rise about 45 minutes to an hour, covered and in a warm place. The dough should just rise a little bit over the top of the bread pan (it will rise more in the oven).
- Pre-heat your oven to 350ºF. Bake the bread for about 35-40 minutes. Top with melted butter if desired. Let cool before slicing. I like to slice and freeze the slices for easy sandwiches or toast.
Notes
Nutrition
Nutrition information is automatically calculated, so should only be used as an approximation.


Love this recipe! It is now a staple in our home.
Thanks for the review! I’m glad you found a new staple!
Can you substitute honey for the sugar without other changes to this recipe?
You can do that, but you may need to add a little extra flour to the dough.
I cannot recommend this recipe in its current form. If you are newer at bread making, consider a different recipe.
I made the recipe twice, once, doubling the recipe, then once tripling the recipe, using the provided recipe calculator. Both times the dough over fermented. The first time I made it, I followed the recommended timings. The batch raised high and baked up with a lovely crumb but with an alcohol smell and taste. An hour and 45 mins between the two rises likely over fermented the dough. I knew nothing about over fermenting but I do now thanks to 3 hours and awful smelling bread. Maybe suggest more frequent checks during the rise time?
Determined not to make that mistake again,, thee second batch was tripled, the dough cleaned the sides of the bowl, but I couldn’t reach a window pane, dough was too wet. I kept adding flour but the Bosch started overheating. Still I attempted to use it and 30 mins into the first rise it smelt strongly of alcohol so I tossed it. Overfermented again, probably flour/water ratio off.
**Please indicate how you measure your flour into cups, specific to this recipe if you are not going to give weights. There are three different ways to fill measuring cups that can really throw the flour/hydration ratio off. And please note that when we triple the recipe, as per the recipe calculator you provided, you’ve written a 4 cup variance for the bread flour!! That is just too much. We’re all using bread flour here afterall.
All ingredients and your suggestions for what to look for were followed exactly as written. Lastly, this recipe uses a LOT of sugar per flour and I wonder if that over fermented the yeast both times when dough was in a cozy proofing box at 79 degrees? *More specifics and less guess work will help your readers not waste ingredients. Thank you!
Thanks for feedback. This is one of the original recipes I posted on this website – about 5 years ago and one that I used to make often for my family. It was also before I switched over to using weight measurements for baking, so I gave ranges of flour that really relied on understanding a feel for the dough and adding more flour as needed (which is how I learned to bake). Over the years I have become converted to using a scale and I haven’t had the time to revisit and remake some of the older, original recipes on my website. It is my goal this year to get to them, though and get them all updated into grams. I have updated this recipe to reflect that I now use a different sandwich bread recipe typically: https://amybakesbread.com/light-and-fluffy-white-sandwich-bread/, but it has a lot of honey in it, so you may not like the sweetness associated with it.
As far as the sugar in this recipe, that amount of sugar shouldn’t have caused the dough to over-ferment. It is more likely your dough was left too long at a high temperature. I may also check the yeast to make sure it’s not an issue because what you are describing with over-fermenting doesn’t happen too frequently with instant or dry active yeast – unless its left for a very long time at a warm temperature. Sorry this one didn’t work out for you.
Easy to make and wonderful to eat!!
This recipe was easy and my bread was perfect! So tasty without all the extra preservatives! Thank you
So glad you enjoyed it!
What type of bread flour do you use? I’m using King Arthur and to get the bread to look like yours I’m having to use about a cup less of flour. Is this normal with King Arthur, I don’t know the difference between King Arthur and other bread flour.
I use a bread flour from my local mill: Weisenberger Mills. There are a couple different things happening:
1. All flour and brands have different protein content (bread flour is anywhere from 11-13% protein). That could differ between our brands a bit. The higher the protein content, the less flour you will need (it soaks up the liquid quicker).
2. People scoop flour differently. If you weigh the flour from two people scooping…it can actually be very different weights. This is why I usually say to look for the signs of dough being ready instead of using an extract flour amount. If a flour amount is written, I always start with the lower end and work my way up so I don’t over flour the dough.
3. I will go back and double check this recipe as a single loaf. I almost always make it as four or more loaves. This was one of my first recipes on the site and I may need to address that measurement a bit.
I really appreciate your feedback! In general King Arthur flour is a great brand and I think it’s a good one to continue using.
Swirl breads are always fun to do!!!
They are! What are your favorite swirl ingredients?
I love cinnamon a lot!!
That looks so good! I love the smell of baking bread.
🙂
So very delicious!! And beautiful, too! I love the added “swirl bread” ideas! Thanks for sharing!! ❤️🍞🙏🏻