Why Your Sourdough Isn’t Working (And How to Fix It)
Published: Apr 20, 2026
Affiliate disclosure: This post may contain affiliate links. Please see our disclosure policy.
If your sourdough isn’t turning out the way you expected, you’re not alone. Every sourdough baker runs into issues at some point.
I’ve been baking sourdough since 2013, and I still have to troubleshoot and make adjustments almost every time I bake. Baking is a science, and you’re working with a living sourdough starter, so some variation is completely normal.
The good news is that most problems come down to a few common things. Once you know what to look for, they’re usually easy to fix.
Use this guide to match what you’re seeing with the problem, then follow the fix. Focus on how your dough looks and feels, rather than relying only on the exact timing in a recipe.
Save this for later!
How to Use This Guide
I’ve been teaching sourdough baking for many years and have helped troubleshoot a lot of loaves along the way. This guide is based on my experience helping others fix their sourdough.
Start by finding the problem that matches what you’re seeing. Then look at the cause and follow the suggested fix. If you’re not sure where to start, use the quick guide below to point you in the right direction.
The photos you’ll see are all from my own bakes over my many years of baking sourdough bread.
What Usually Goes Wrong
Most sourdough issues come down to just a few things.
- Your sourdough starter needs to be active, strong, and ready to use before you mix your dough. If it’s weak or not at its peak, your bread won’t rise properly. Learn when your sourdough starter is ready to use.
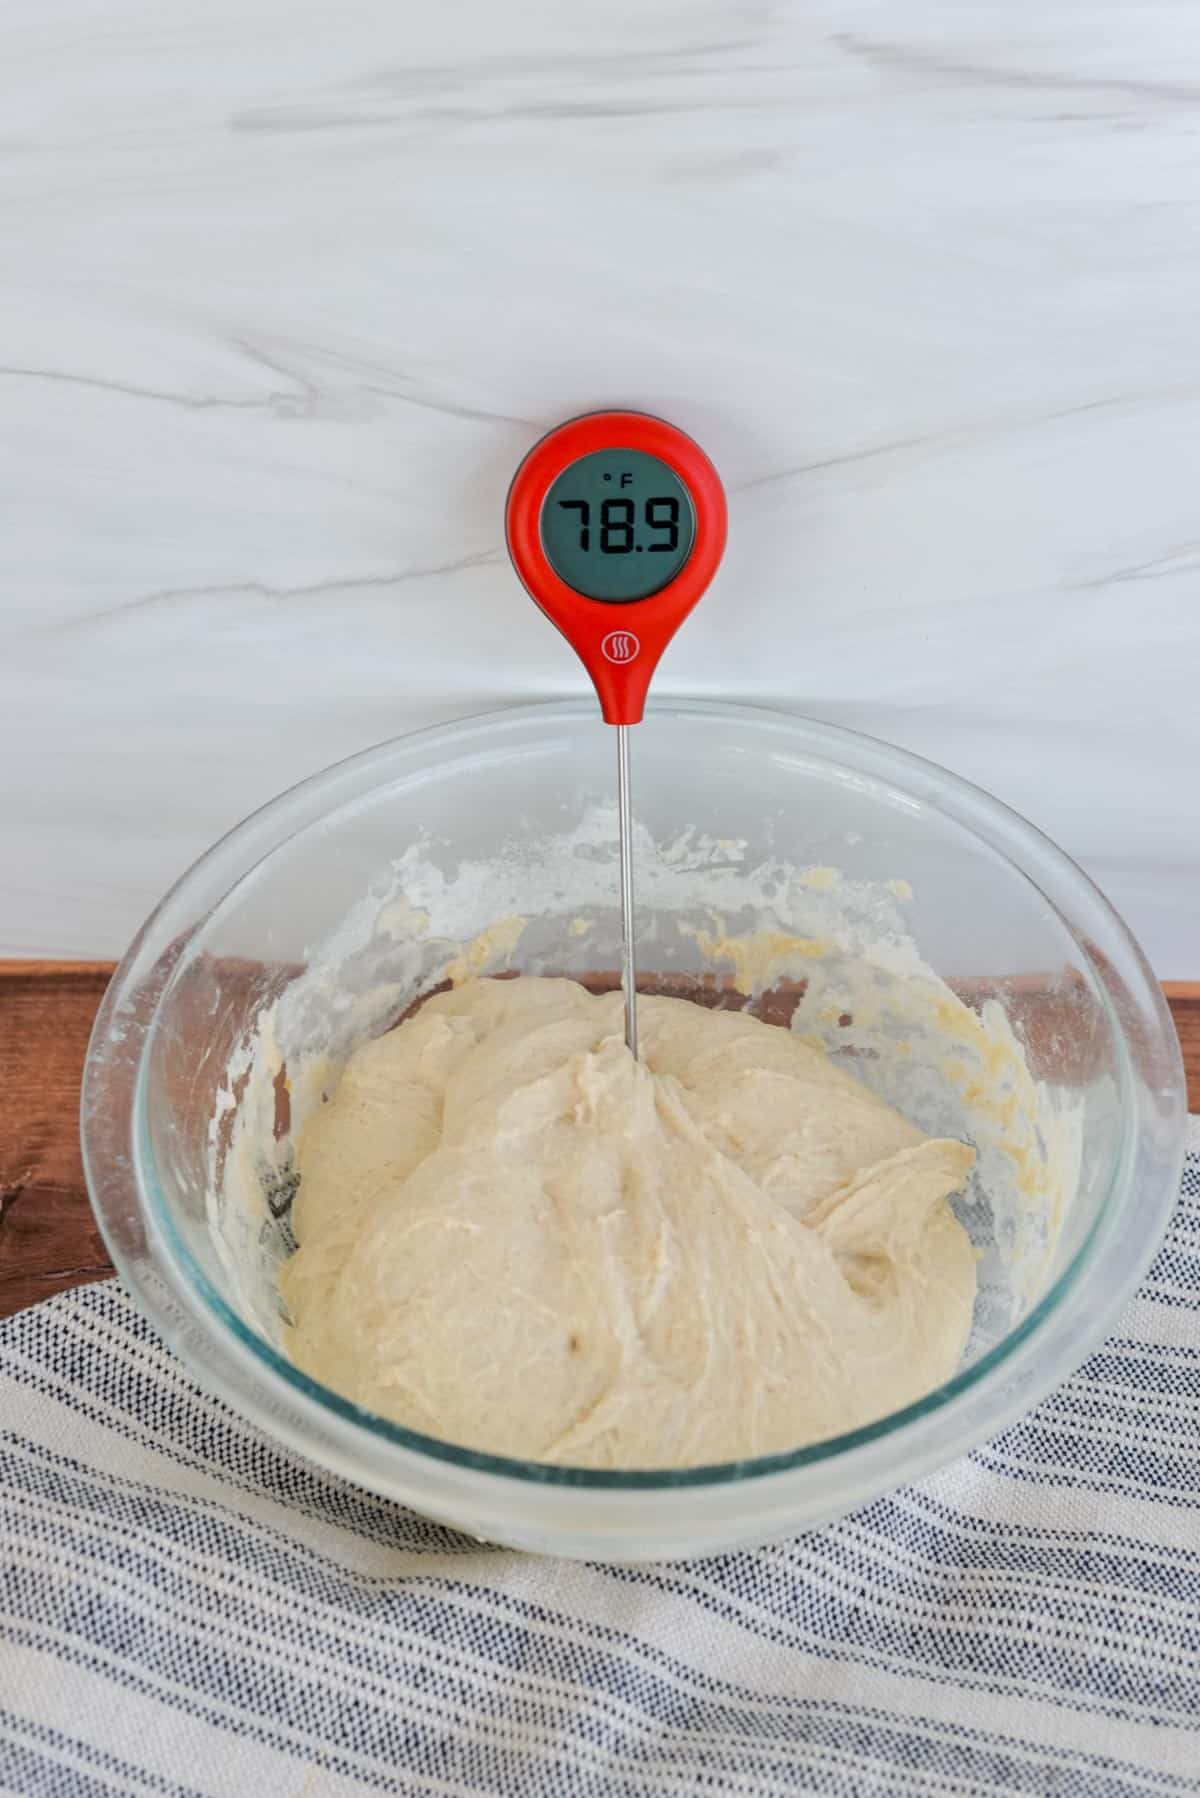
- Temperature also plays a big role. Warmer dough will rise faster, while cooler dough will take longer. If your dough is too cold or too warm, and you’re only watching the clock instead of your dough, it can affect both fermentation and your final bake. Use this guide on how temperature impacts sourdough.
If you focus on these two things first, you’ll fix most sourdough problems before they even start.
Quick Troubleshooting Guide
Here’s a quick way to narrow down what might be going wrong:
- Dense or heavy → likely underproofed (didn’t rise long enough)
- Flat or spread out → likely overproofed (rose too long and lost structure) or weak gluten development
- Not rising → starter or temperature issue
- Sticky and hard to handle → high hydration or overfermented
- Didn’t rise in the oven → overproofed or weak starter
A quick note: This guide is written for traditional sourdough bread dough (higher hydration, artisan-style loaves). If you’re making sandwich bread, rolls, or enriched doughs, some of the same ideas apply, but the dough will behave differently and won’t look exactly the same.
Before you Troubleshoot
Don’t go looking for problems. If your bread tastes good, you’re doing it right. Good bread is good bread, and everyone likes something a little different. This guide isn’t meant to tell you exactly how your loaf has to look.
If you’re happy with how your bread is turning out and tasting, that’s what really matters. This troubleshooting guide is here to help if something isn’t working the way you expect.

Common Problems
These are some of the most common issues I hear about from sourdough bakers.
The fixes below are meant to help you adjust for your next bake and troubleshoot what may have gone wrong. We learn from every bake!
Most sourdough issues can’t be fully corrected once the dough is already at that stage, but always bake your dough anyway. Worst case, you can turn it into homemade sourdough croutons or sourdough bread crumbs. Best case, it’s still delicious with a slather of butter.
Dough Isn’t Rising

What’s Happening
Your dough isn’t increasing in size after you mix it. It may look flat, dense, and inactive, with little to no visible bubbles.
Why it Happens
- Starter is not active or used at peak
- Starter hasn’t been fed recently and is too weak
- Starter is too new and not strong enough yet
- Dough is too cold, slowing down fermentation
- Dough hasn’t had enough time to rise
How to Fix It
- Make sure your starter is being fed regularly and is strong before baking. Learn how to feed and maintain a sourdough starter.
- Use your starter when it’s at peak (bubbly, doubled, just starting to fall back down). Learn when your sourdough starter is ready to use.
- Give your dough more time to rise – don’t just follow the clock!
- Use warmer water when mixing your dough to encourage fermentation
- Check your dough temperature and move it to a warmer spot if needed. Use this sourdough temperature guide to help.
- If you are making a sourdough starter from scratch, it may need a few more feedings before it’s strong enough to raise a loaf of bread. Keep feeding it consistently.
What you should be seeing
- Your starter is bubbly, doubled in size, and active when you mix your dough.
- Your dough shows a noticeable rise during bulk fermentation.
- You’ll start to see small bubbles forming throughout the dough.
- The dough feels puffy, airy and alive.
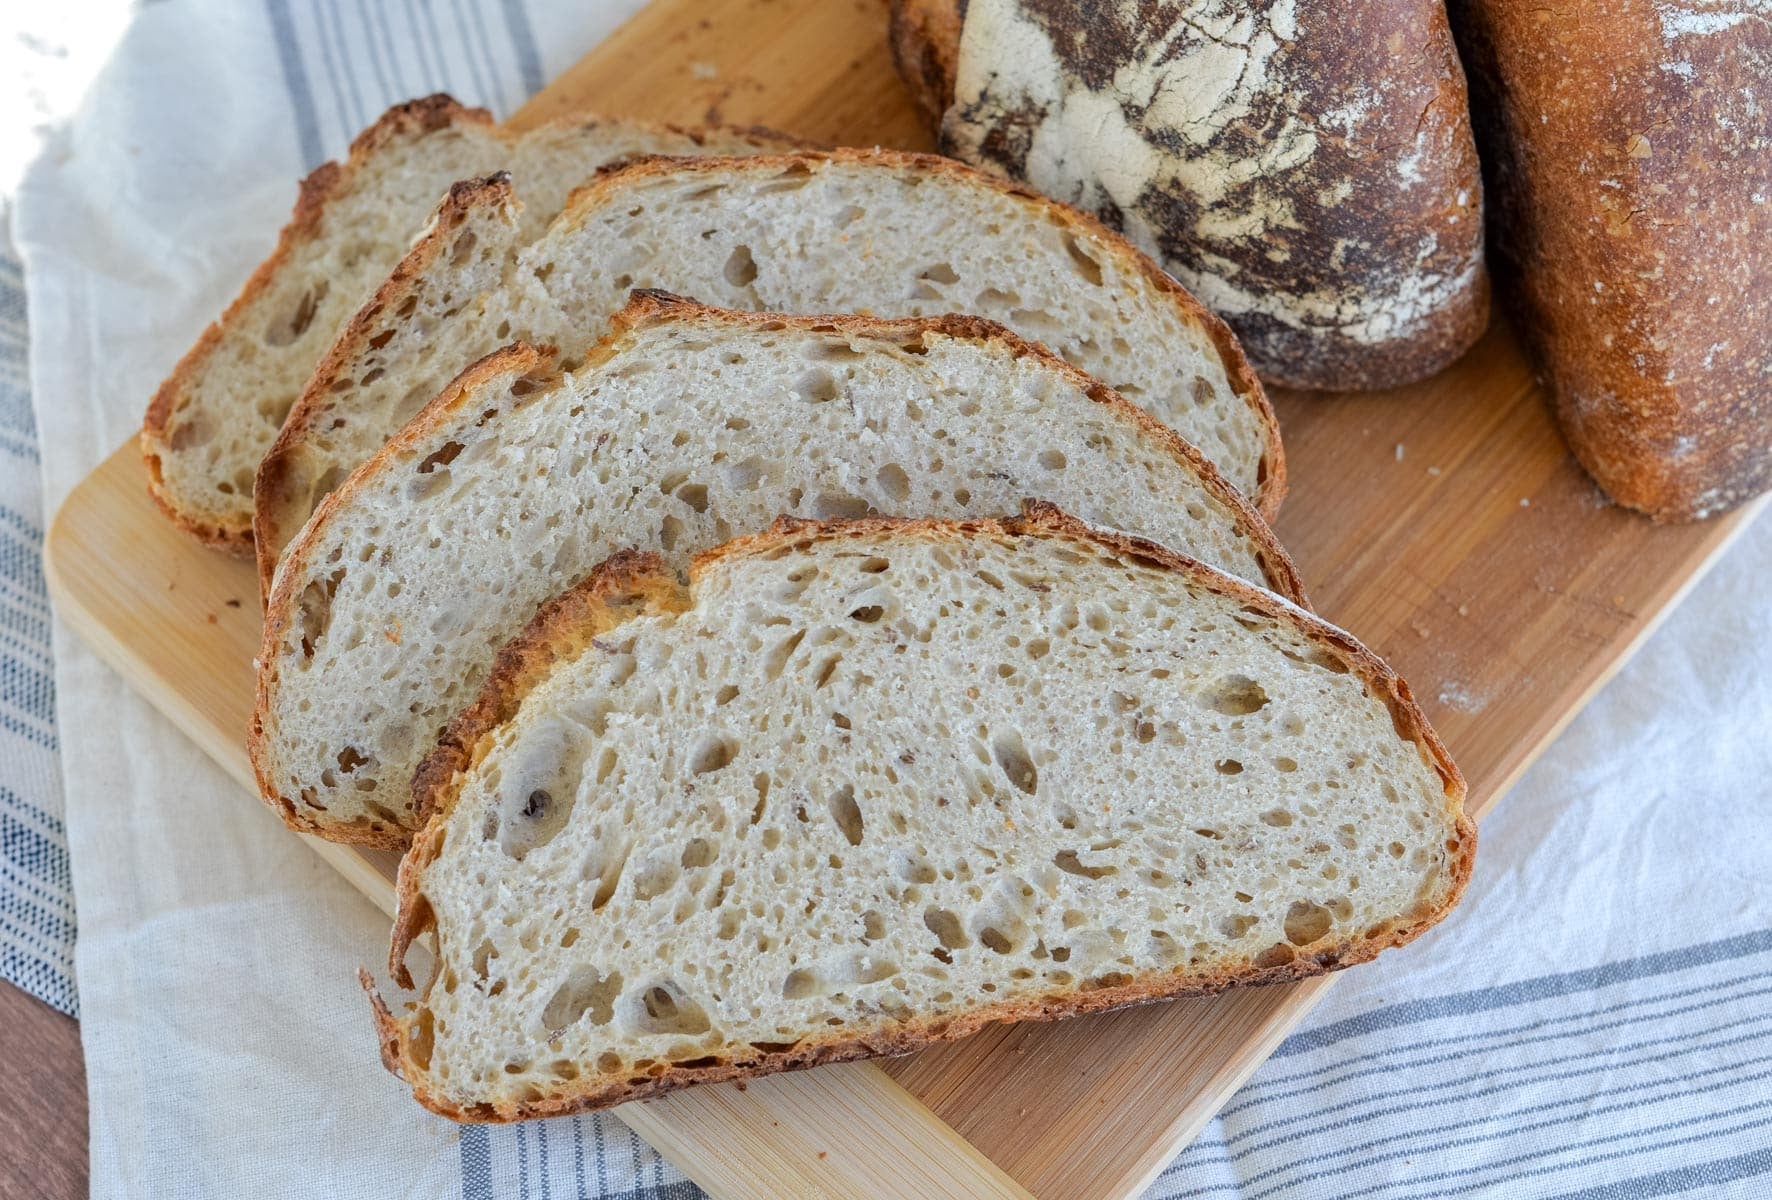
Dense or Gummy Bread

What’s Happening
Your bread feels dense or heavy, and the crumb is tight with very few air pockets. In some cases, the inside of the loaf may feel slightly wet, sticky, or gummy when you slice into it. This can happen for a few different reasons, which is why it’s not always the easiest issue to troubleshoot.
Why it Happens
- Dough is underproofed and hasn’t developed enough structure
- Starter is weak or not at peak when you mix the dough, so the dough doesn’t rise well
- Dough is overproofed, especially after a long cold ferment, causing the structure to break down
- Bread is underbaked
- Bread is sliced before fully cooled
How to Fix It
Start by figuring out what’s causing the dense or gummy texture, then adjust from there:
- If your dough didn’t rise much and feels dense, it likely needs more time to ferment.
- If your starter wasn’t very active, make sure to use it when it’s at peak (bubbly, doubled, and active). Learn when your sourdough starter is ready to use.
- If your dough has been rising for a long time, has doubled, or has been in the fridge for over 24 hours and feels very soft or sticky, it may be overproofed. Shorten your fermentation time on your next bake.
- If your dough is very wet or hard to handle, try slightly reducing the water or building more strength during mixing and stretch and folds.
- If your bread feels wet or gummy when sliced, it may be underbaked or cut too soon. Bake it longer and let it cool completely before slicing.
What you should be seeing
During bulk fermentation:
- Your dough should look risen (usually about 40–70%, depending on temperature).
- You’ll see small bubbles along the edges.
- The surface will look slightly domed.
- The dough may start to pull away from the sides of the bowl.
- Dough should feel lighter and airy, not dense or tight.
- The dough should hold some structure and shape, not feel overly wet or slack.
Learn more about how to tell when your dough is properly proofed and ready to be baked.
After baking:
- Your baked loaf should be pulled out of the oven around 205–210ºF.
- When sliced, the crumb should be set and slightly springy, not wet or sticky.
Flat or Spread-Out Loaf

What’s Happening
Your dough spreads out instead of holding its shape. The loaf may look flat, wide, or slightly deflated, and doesn’t have much height after baking.
Why it Happens
- Dough is underproofed and didn’t build enough structure
- Dough is overproofed and has lost structure
- Dough doesn’t have enough strength to hold its shape
- Shaping wasn’t tight enough to build surface tension
How to Fix It
Start by figuring out what your dough is telling you:
- If your dough feels very soft, slack, and hard to shape, it may be overproofed. Shorten your fermentation time on your next bake.
- If your dough spreads immediately after shaping, it likely needs more strength. Add more stretch and folds during bulk fermentation.
- If your dough is consistently very soft, try reducing the water in the dough.
- Focus on tighter shaping to build surface tension and help the dough hold its shape.
- Use a strong flour, like bread flour, that can better handle higher hydration doughs.
What you should be seeing
- After shaping, the dough should hold its shape on the counter and not immediately spread (it may relax slightly over time).
- It should feel strong, elastic, and aerated, not loose or slack.
- During proofing, the dough will puff up and rise slightly while still holding its shape in the basket.
- It should not collapse or flatten out.
- When scoring, the dough should hold its shape and not deflate.
- In the oven, the loaf should rise up and expand, not spread outward.
Amy’s Tip: If you notice your dough spreading when you go to score it, it will probably bake up flatter. To prevent that, place the dough in a loaf pan and bake your sourdough in a loaf pan instead.
Sticky, Wet, Hard-to-Handle Dough

What’s Happening
Your dough feels very sticky, wet, and difficult to work with. It may cling to your hands or the counter, feel loose or slack, and be hard to shape.
Sourdough is naturally a higher hydration dough, which means it contains more water and will feel slightly sticky. That’s normal. But if your dough feels overly wet, hard to control, and impossible to shape, that’s what we’re troubleshooting here.
Why it Happens
- Sourdough dough is naturally higher in hydration than most bread doughs (it has more water) than typical bread dough
- Dough hasn’t developed enough strength or structure
- Dough is overproofed, has too much acid and has started to break down
- Flour may be lower protein and not absorbing as much water
How to Fix It
Start by figuring out what your dough is telling you:
- If your dough is sticky but still holds together, it likely needs more strength. Add more stretch and folds during bulk fermentation or knead the dough more at the beginning (slap and folds works well). Watch a video here.
- If your dough feels very loose, slack, and hard to shape, it may be overproofed. Shorten your fermentation time on your next bake.
- Use slightly damp hands to make handling the dough easier. It’s normal for sourdough to stick to your fingers, but as the dough develops strength, it will become less sticky.
- If this happens consistently, try slightly reducing the water in your recipe.
- Use a bread flour with a 12.5-13% protein content to help the dough hold its shape.
- If all else fails, turn it into focaccia. The sides of the pan will give the dough structure and turn a sticky dough into something delicious.
What you should be seeing
- The dough should become smoother and easier to handle as it develops.
- It should hold together, not feel loose or runny.
- It should hold some shape when you handle it, even if it’s soft.
- The dough may feel slightly sticky, but it should stay together and be workable with lightly damp hands.
Didn’t Rise in the Oven
What’s Happening
Your bread doesn’t rise much in the oven. The loaf may look flat or dense, with little expansion after baking and minimal oven spring.
Why it Happens
- Starter is weak or not at peak
- Dough doesn’t have enough strength or structure
- Dough is underproofed and hasn’t built up enough gas to rise
- Dough is overproofed and has lost its ability to rise in the oven
- Oven is not hot enough or not fully preheated
- Not enough steam during the initial bake, causing the crust to set too early and prevent expansion
How to Fix It
- If your dough feels tight, dense, and hasn’t risen much, it is probably underproofed. Don’t go by the clock. Let it ferment longer before baking.
- If your dough has doubled in size, spreads out and flattens quickly, it may be overproofed. Shorten your fermentation time on your next bake
- Use your starter when it’s at peak height (bubbly, doubled, and active)
- Build more strength in your dough with proper mixing and stretch and folds.
- Make sure your oven is fully preheated before baking.
- Bake in a covered Dutch oven or create steam at the beginning of the bake to allow for proper expansion.
- Score your dough confidently and quickly to direct where the loaf will burst in the oven.
What you should be seeing
- The dough should feel light and airy before baking, not dense or tight.
- The loaf should rise up in the oven, not just spread outward.
- You should see the score open up as the bread expands.
- The finished loaf should have good height and structure, not look flat.
Amy’s Tip: If you’re adding inclusions to your sourdough, they can affect how your dough behaves and may slow down fermentation. You may need to give your dough more time to rise.
→ Learn more about adding inclusions to sourdough
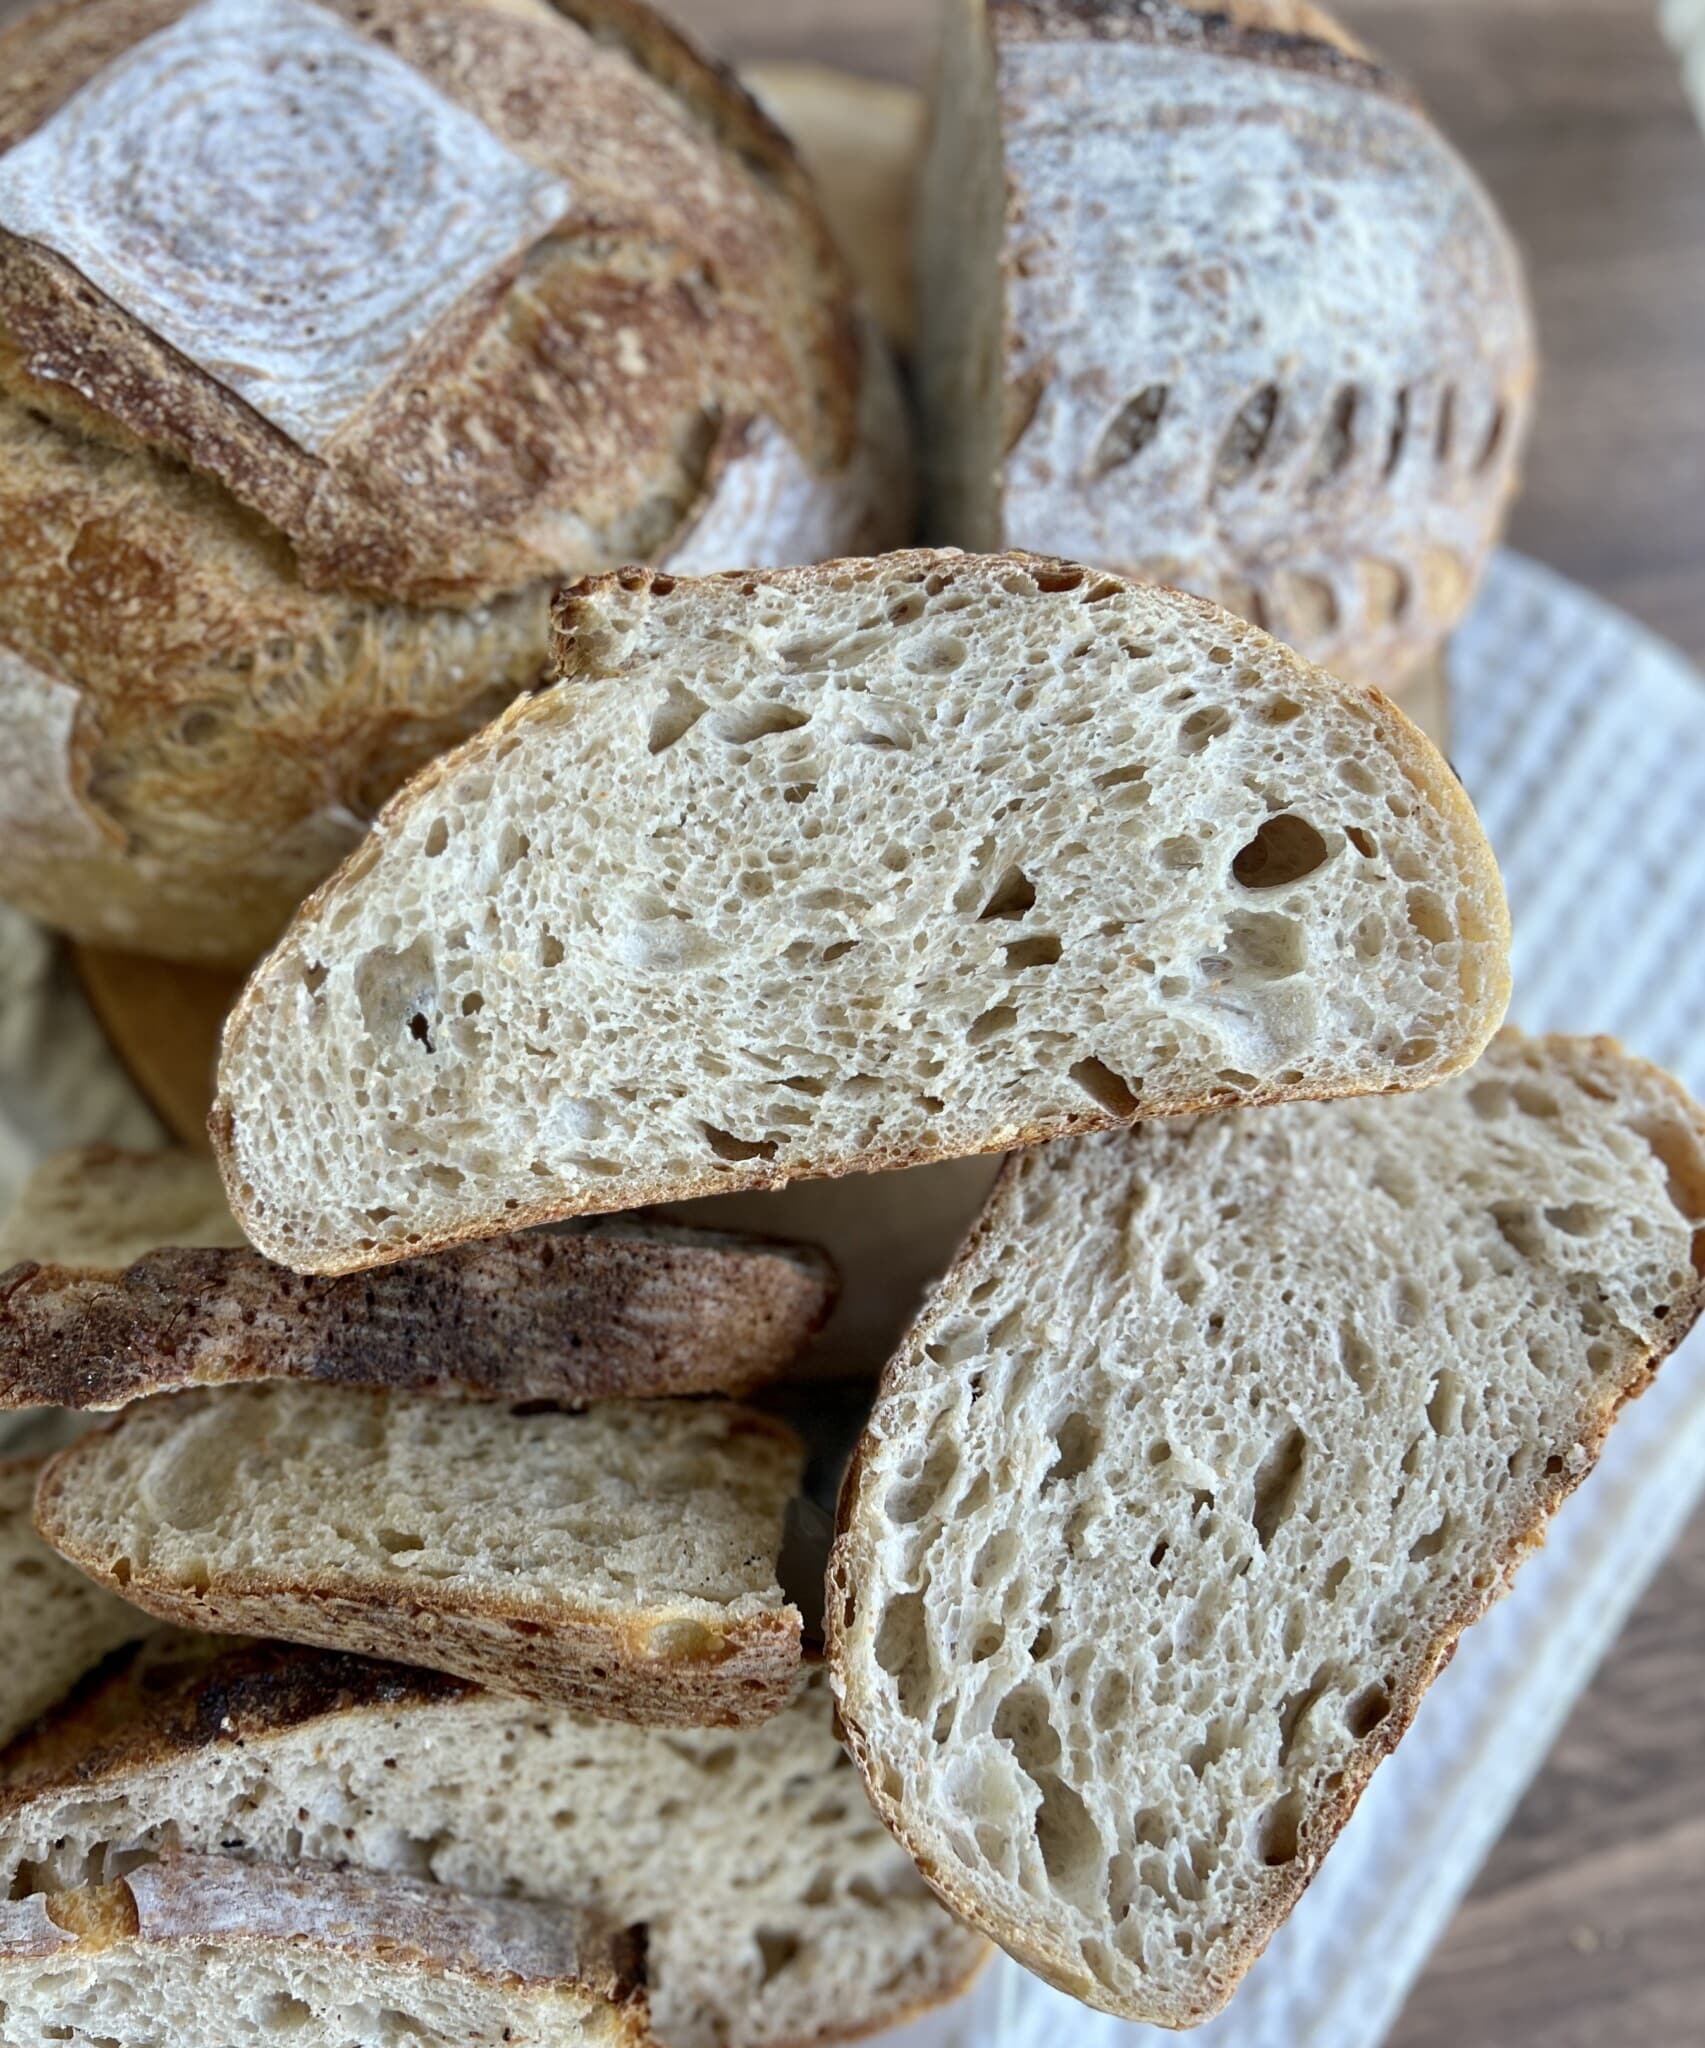
Uneven Crumb or Large Holes

What’s Happening
Your bread has large holes or tunnels in some areas, while other parts are dense. The crumb looks uneven instead of airy and balanced.
Why it Happens
- Dough is underproofed and hasn’t fermented properly
- Dough doesn’t have enough strength or structure to raise bread
- Large air pockets were trapped during shaping
How to Fix It
- If your crumb has large holes with dense areas, your dough likely needed a longer fermentation time.
- During shaping, gently press out large air pockets and create an even structure for the dough to rise.
- Build more strength in your dough with proper mixing and stretch and folds.
- Shape your dough with more tension to help create a more even crumb.
What you should be seeing
- The dough should feel light and airy, with bubbles distributed throughout, not just a few large pockets or tunnels.
- Before shaping, the dough should be risen, with small bubbles around the edges and a slightly domed surface toward the center of the bowl.
- The baked crumb should have an even, consistent texture, with holes scattered throughout the bread, not large tunnels in one area.
Crust is Too Tough, Hard or Pale


What’s Happening
Your crust may be very thick, hard, or difficult to cut, or it may come out pale with little color. The crust may not have that crisp exterior with a balanced interior. This is a baking issue.
Why it Happens
- Bread is overbaked, which leads to a thick or hard crust.
- Not enough steam at the beginning of the bake can cause the crust to set too early. Steam helps the dough expand before the crust sets, so without it, the crust can become tough.
- Bread that is not baked long enough or at a high enough temperature can result in a pale crust.
How to Fix It
- Bake your bread covered at the beginning to trap steam and allow the dough to expand before the crust sets.
- Make sure your oven is fully preheated before baking so the loaf gets proper oven spring and color.
- If your crust is too hard, try shortening the bake time slightly or lowering the temperature toward the end of baking.
- If your crust is pale, bake the bread longer or increase the oven temperature so it has time to develop color. If you are baking in a Dutch oven, leave the lid off for longer to help the crust brown. Every oven bakes a little differently, so you may need to make small temperature adjustments to get the results you want.
What you should be seeing
- The crust should develop a golden to deep brown color, not pale.
- It should feel crisp on the outside, but not thick or overly hard.
- The loaf should expand before the crust fully sets.
Burned Bread

What’s Happening
Your bread may be too dark on the outside or have a burned bottom. Sometimes it’s just darker than expected, and other times the bottom crust can be hard, thick and bitter.
Every loaf is a little different, and everyone has a different preference for how dark they like their crust. Learning your oven is part of the process.
Why it Happens
- Oven temperature is too high
- Dutch ovens can hold and radiate a lot of heat, especially on the bottom
- Every oven bakes differently and may run hot
- Dough with sugar (like enriched or sweet loaves) can brown and burn more quickly
How to Fix It
- Lower your oven temperature slightly (about 25ºF) if your bread is consistently too dark.
- If the bottom is burning frequently, place a baking sheet on the lower rack to help deflect heat.
- You can also place a layer of uncooked rice in your Dutch oven, then parchment paper, then your dough to help protect the bottom of the loaf.
- Keep an eye on your bake time and adjust as needed based on how your oven performs.
- For enriched or sweet doughs, reduce the oven temperature slightly since sugar can burn at higher temperatures.
What you should be seeing
- The crust should be deep golden to brown, not black or overly dark.
- The bottom should feel firm and baked, but not hard or burnt.
- Your loaf should have even color throughout, without overly dark spots on the bottom.
Too Sour/Not Sour Enough
What’s Happening
Your bread may taste more sour than you expected, or it may not have much sour flavor at all. Sourdough flavor can vary quite a bit depending on how you make and ferment your dough.
Sourdough doesn’t always mean sour. It’s a method of leavening bread using a natural starter, and the flavor can range from very mild to more tangy depending on how it’s made.
Why it Happens
- Sourdough is made using a wild starter, which naturally produces acids as it ferments.
- The longer your dough ferments, the more those acids develop, creating a more sour flavor.
- Shorter fermentation times result in a milder flavor.
- Longer, slower fermentation, especially in the fridge, increases sourness.
How to Fix It
Start by adjusting your fermentation time and temperature:
- For a more sour loaf, allow your dough to ferment longer, especially with a cold proof in the fridge.
- For a milder flavor, use a shorter fermentation time and bake your dough sooner.
- Use your starter when it’s freshly fed and active for a more mild flavor.
- Use whole grains in your loaf for more sour and complex flavor.
- Adjust your dough temperature by using warmer or cooler environments depending on the flavor you want.
Learn more about how to adjust the sour flavor in sourdough bread.
What you should be seeing
- Your dough should still look properly fermented and airy, regardless of how sour you want it.
- A more sour loaf will have a deeper, more tangy flavor.
- A milder loaf will have a lighter, more subtle flavor.
- The crumb should be light and well developed, not dense or gummy.
Dough Stuck to Banneton or Dutch Oven

What’s Happening
Sometimes your dough sticks to the banneton or Dutch oven, especially if it’s a higher hydration or stickier dough. It can tear when you try to remove it or lose its shape.
Why it Happens
- Sourdough is high hydration and naturally sticky
- Not enough flour in the banneton
- Dough wasn’t chilled long enough before baking
How to Fix It
- Chill your dough before baking to help it firm up and release more easily
- Dust your banneton with flour or rice flour for better release or use a hair net to line your bannetons or bowls with (these release chilled dough so well!).
- Use parchment paper or a silicone baking mat to transfer your dough.
- If your dough sticks to the Dutch oven, go ahead and bake it anyway. It may have a slightly different shape, but it will still taste great.
- If the dough is sticking and losing shape, place it in a loaf pan and bake it in a loaf pan instead.
What you should be seeing
- The dough should release easily from the banneton without tearing.
- The surface should feel lightly floured and not overly wet.
- The dough should hold its shape when turned out.
If Your Starter Isn’t Working
If your starter isn’t rising, bubbly, or predictable, your dough won’t rise properly either. These guides will help you troubleshoot your sourdough starter.
→ How to make a sourdough starter
→ How to feed and maintain a starter
→ When your sourdough starter is ready to use
Start with a good recipe
You may have found this page to troubleshoot your sourdough, but the truth is, sourdough really starts with a good recipe. The ingredients, directions, and dough development should lead you to a good loaf.
When I was pulling photos for this guide, it was hard to find really bad ones. That’s because I don’t see many anymore, and my community isn’t sharing major fails either. Most people are working from reliable, tested recipes. They understand the basics and then tweak things as they go.
Tried & True Sourdough Bread Recipes


Amy’s Final Thoughts
Sourdough gets easier with practice. Every loaf teaches you something, and even the ones that don’t turn out perfectly are part of the process.
Focus on your starter, your dough, and what you’re seeing in front of you. Pay attention to how your dough looks and feels, not just the clock, and you’ll solve most sourdough problems before they even happen and get more consistent results over time.


