Affiliate disclosure: This post may contain affiliate links. Please see our disclosure policy.
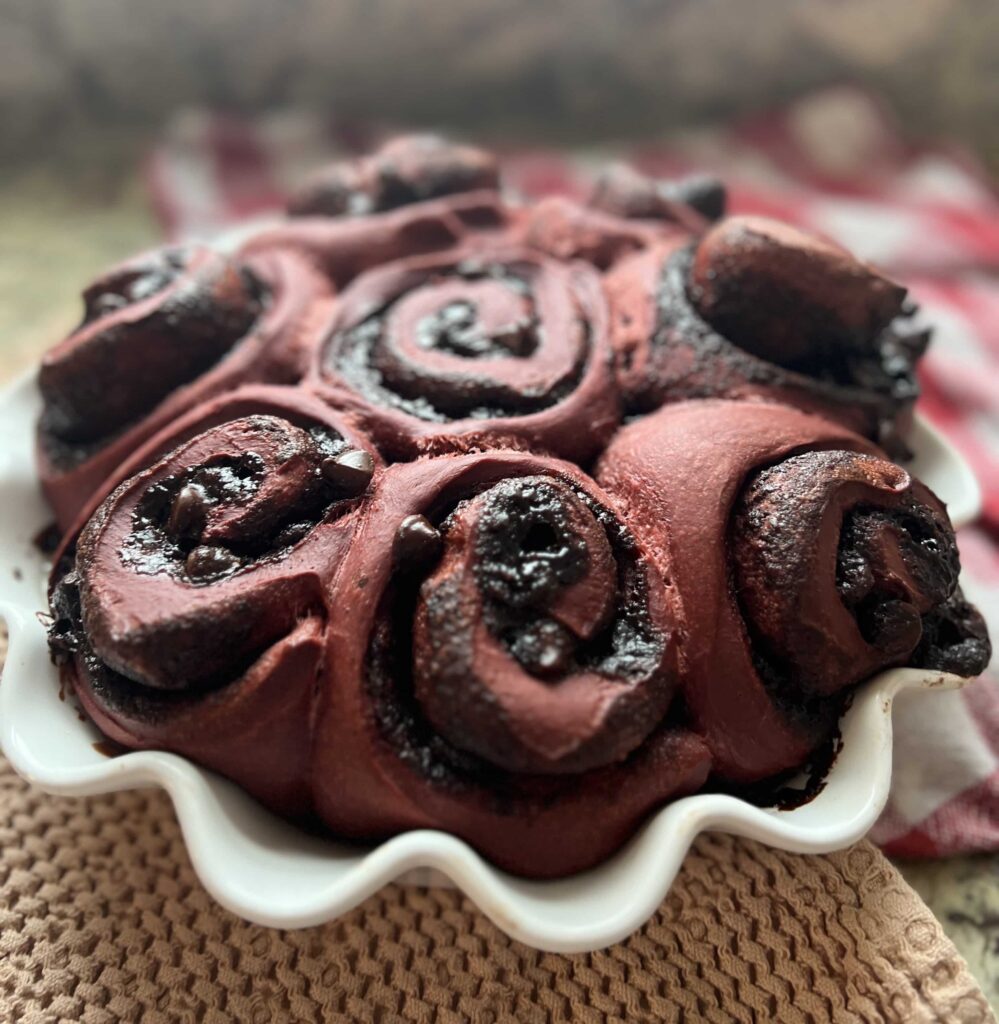
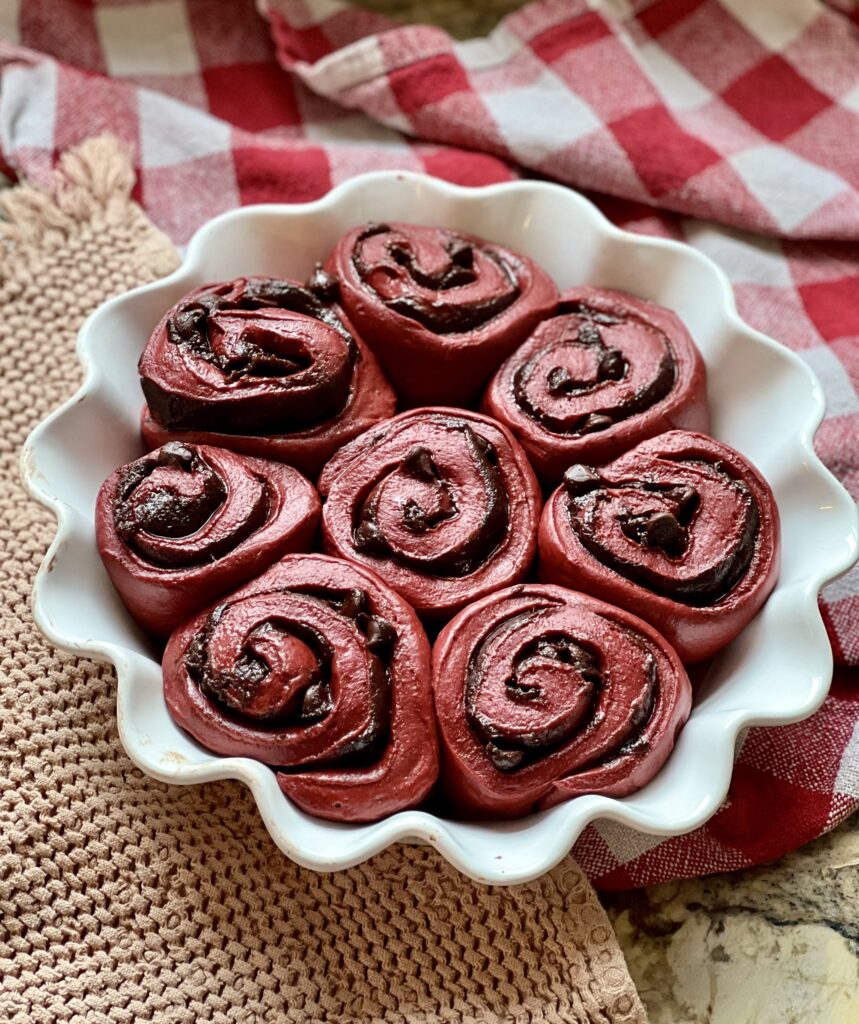
A few years ago I was looking for something sweet, decadent and just over-the-top to make for Valentine’s Day weekend. And these Red Velvet Sourdough Cinnamon Rolls are the result. Based off my favorite sourdough cinnamon rolls, the are so decadent, delicious and perfect for any red velvet and chocolate lovers.
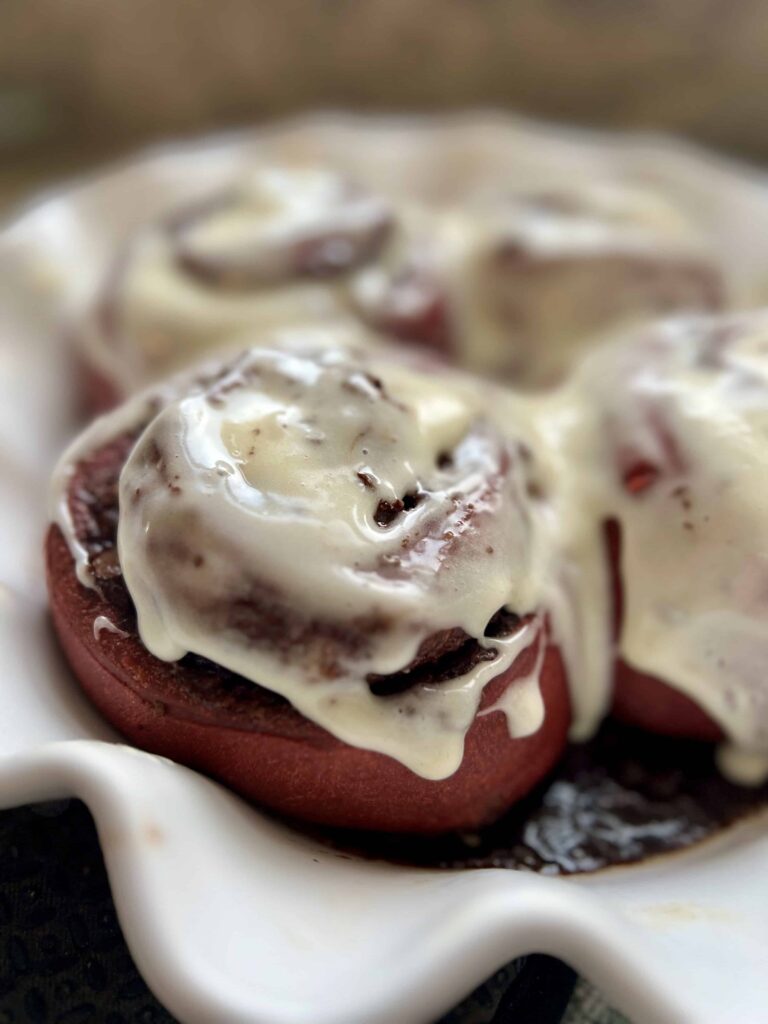
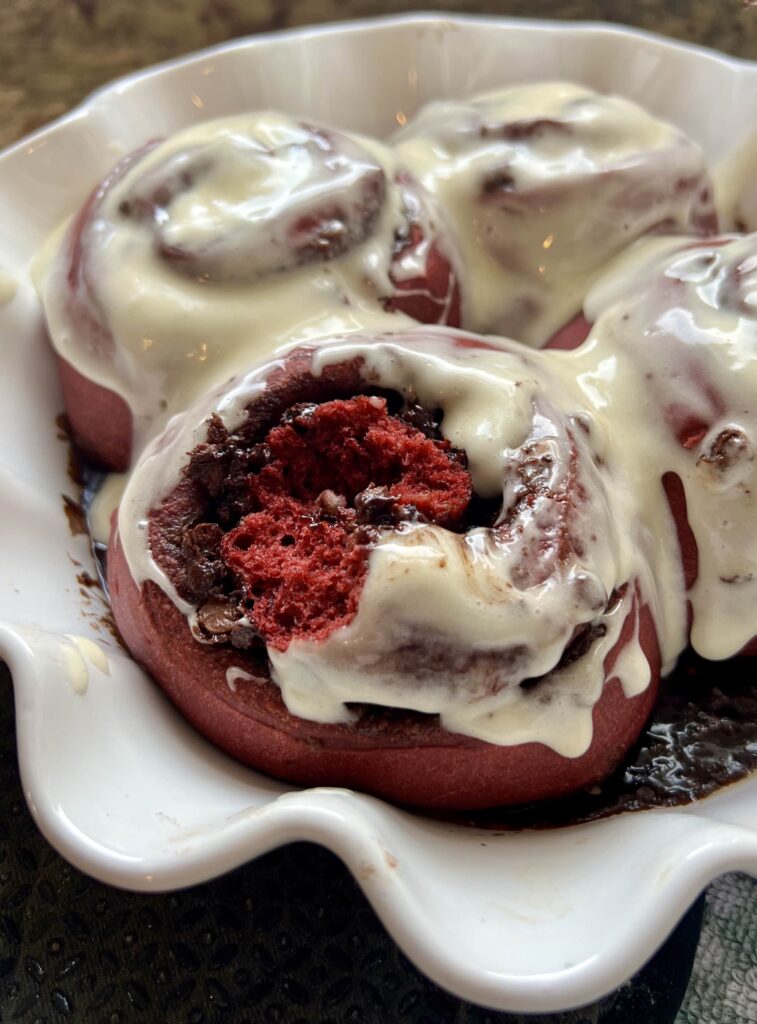
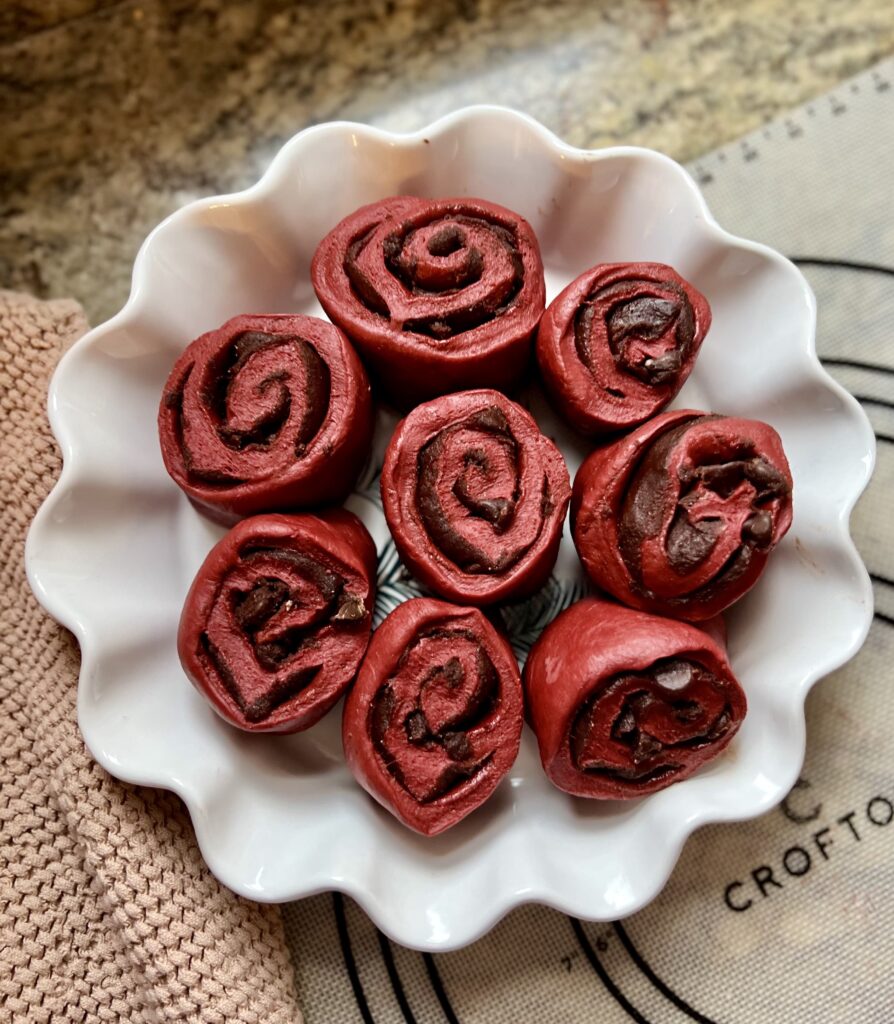
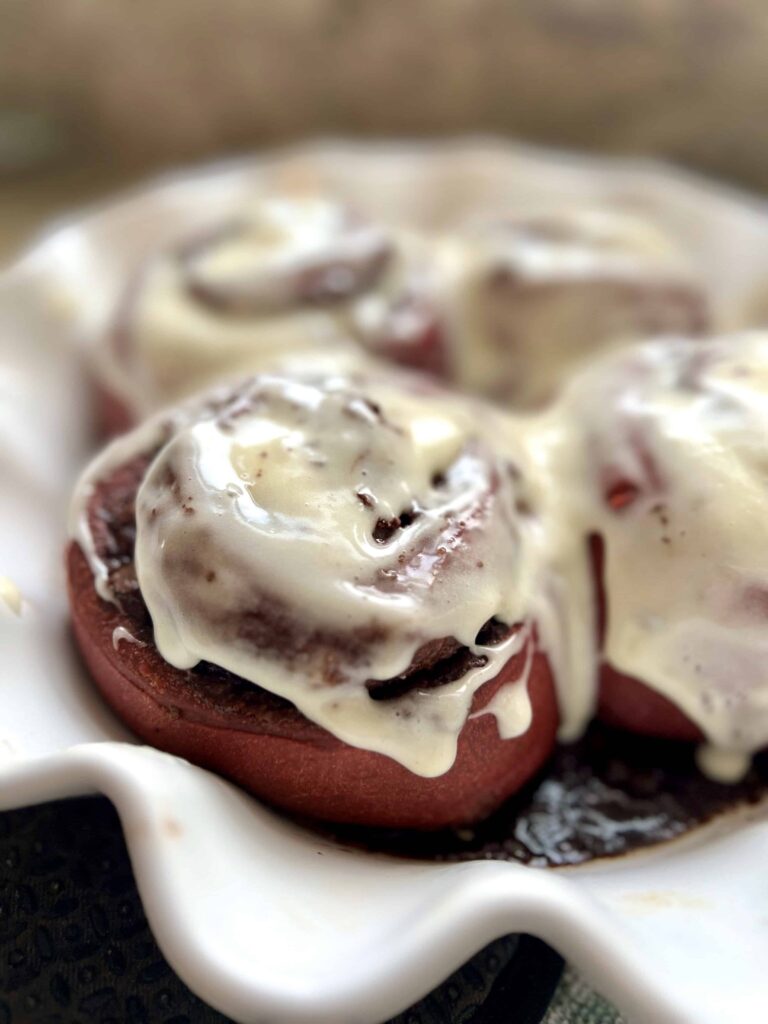
Rich chocolate filling rolled between red velvet dough, baked to perfection and drizzled with a creamy cream cheese icing. It doesn’t get much better than that!
Save this for later!
Sample Baking Schedule
A sample baking schedule helps me when baking with sourdough. Sourdough takes much longer to rise than traditional bread. This schedule helps me plan my bake.
Note: This schedule assumes the dough temperature is 78-80ºF throughout the process. If your dough is colder, the process will move slower. If your dough is warmer, the process will move faster.
Also Note – Red Velvet Rolls are typically enjoyed first thing in the morning. This can be a little tricky with sourdough to get just right. Check out my options for morning red velvet rolls in the recipe notes of the recipe card and choose the option that works best for you!
This sample schedule includes my most-used option which is to make the rolls through rising, then refrigerate and bake in the morning.
| Day 1 | |
| 8:00 PM – 8:00AM | Make Stiff Sweet Levain. Let rise overnight for 10-12 hours. |
| Day 2 | |
| 8:00 AM | Mix Dough |
| 8:15 AM | Begin Bulk Fermentation |
| 12:15 PM | End Bulk Fermentation Shape Rolls |
| 12:30 – 8:30 PM | Proof at 78-82ºF |
| 8:30 PM | Refrigerate risen rolls overnight |
| Day 3 | Bake |
| 8:30 AM | Bake and frost. Serve warm. |
How to Make Red Velvet Rolls
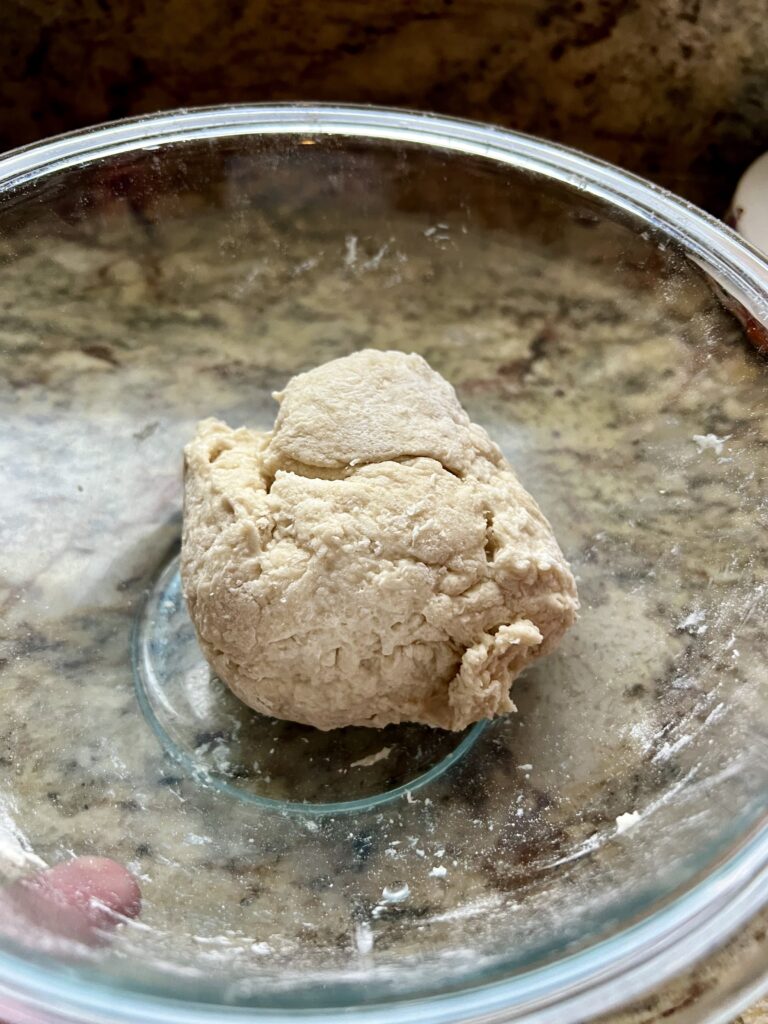
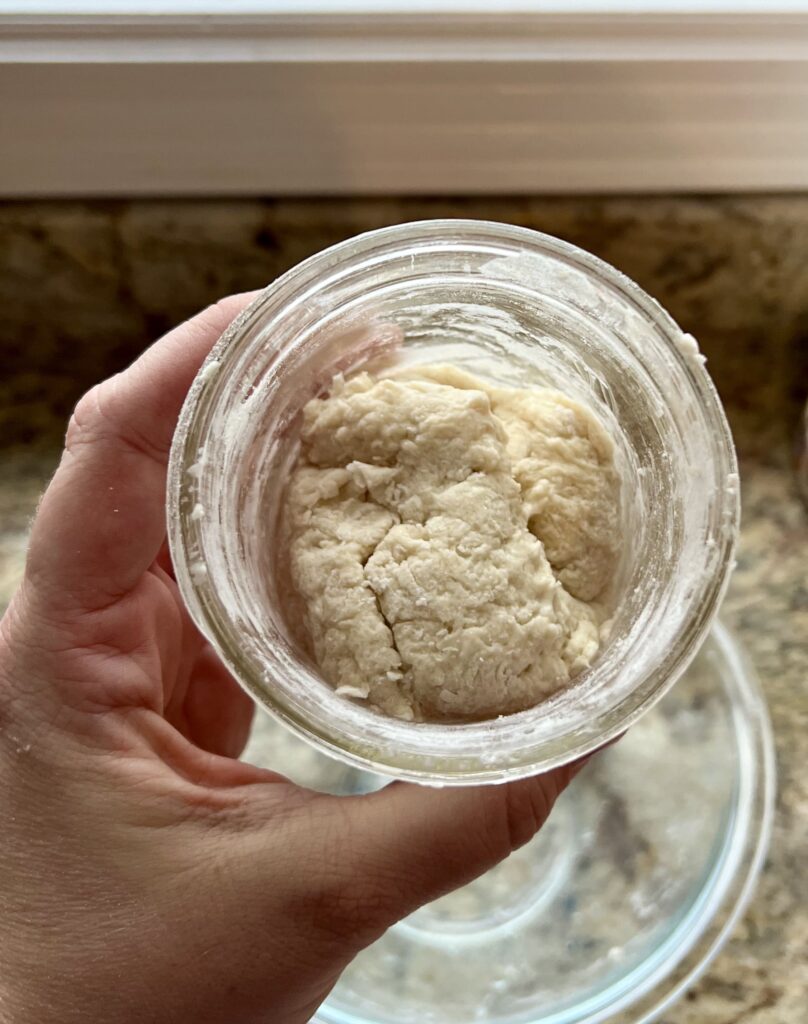
Make a Stiff Sweet Levain
One of the reasons I advocate for making a levain instead of using straight sourdough starter is in cases like these red velvet sourdough cinnamon rolls. Maintaining a sourdough starter at 100% hydration makes it easy for me to create a stiff sweet levain when I need it for an enriched dough. I use a stiff sweet levain for enriched breads like my favorite sourdough cinnamon rolls and this cinnamon sugar babka. A stiff levain is a levain that mixes up to a firm consistency and is anywhere from 50%-65% hydration. It adds elasticity to dough and helps temper the acid in the sourdough which gives all the benefit of sourdough fermentation but not the tang. The sugar in the levain helps counteract the acidity and creates a more mild flavor. My picky kids are especially grateful for this! To make a stiff sweet levain:
- Use 100% hydration sourdough starter at its peak
- Add 20 grams of ripe sourdough starter to 100 grams of all purpose flour, 50 grams of water and 20 grams of sugar. Mix together.
- A stiff starter will be a little more difficult to mix together because it forms a dough ball instead of a batter. Knead the ball of dough a few times until smooth.
- Place the stiff sweet levain in a liquid measuring cup and set in a warm (78℉) spot for 10-12 hours.
- Stiff Sweet Levain is ready to use when it has doubled in size and has a rounded top. Using it right when it reaches its peak will help decrease the acidity in the dough.

Mix the Dough
I use a stand mixer to mix this dough. If you don’t have a stand mixer, you can use your hands, though it will take longer. Add all the dough ingredients to the mixer fitted with a dough hook. Reserve a little bit of the flour to add toward the end of mixing the dough as needed. Weight measurements are always more accurate than volume, but I always like to reserve a bit of flour so I don’t over-flour my dough. Varieties of flour and weight of eggs can impact the amount of flour added to dough, so I play it safe. It’s easier to add more flour than fix over-floured dough.
Mix the dough on low speed for about 3-5 minutes. Add the reserved flour as needed. The dough should be tacky, not overly sticky. Continue kneading about 5 more minutes until smooth and elastic. Place in a container or bowl for bulk fermentation.
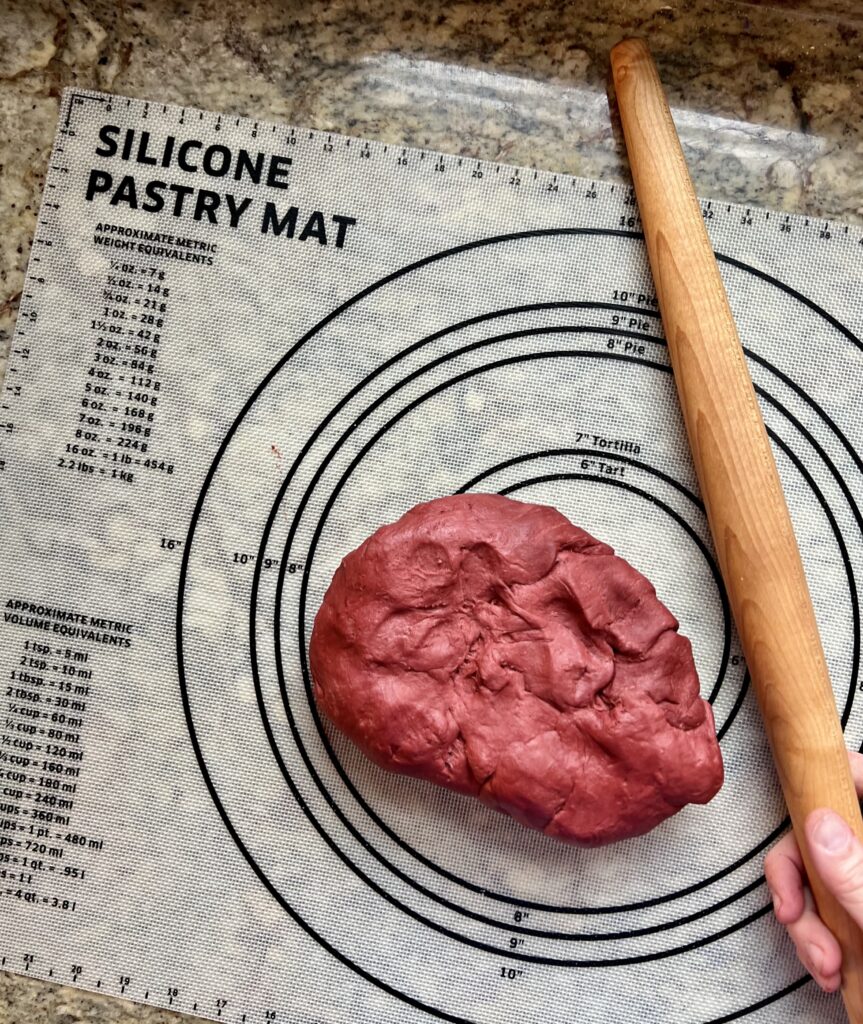
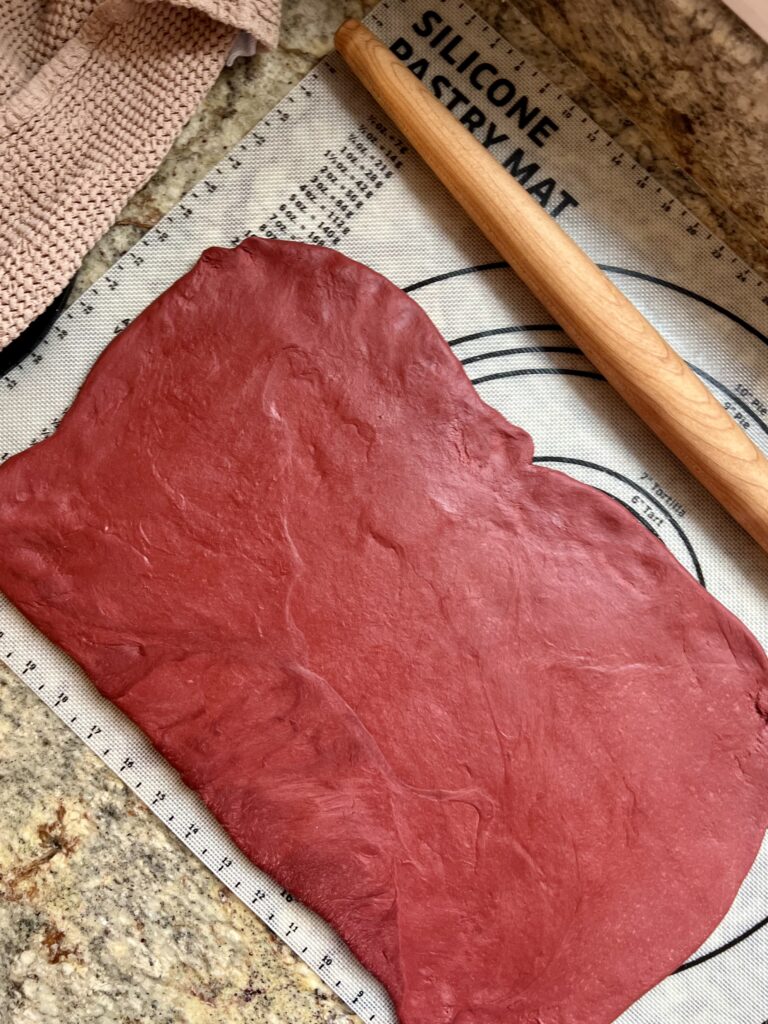
Red Velvet Color: Red velvet as a cake flavor was not traditionally made with red dye. It was the chemical reaction of vinegar/buttermilk with cocoa powder. Today, the most common way to get the red color is with red dye or a red velvet emulsion. This emulsion givres the flavor and bright red color. Lately I’ve been trying to cut out red dyes and other additives so I prefer the natural food coloring from this Dragon Fruit Powder. I add 40 grams or 1/4 cup to the dough and 4 grams (1 teaspoon) vanilla extract and it turns the dough a beautiful dark shade of red velvet – a little more muted than the emulsion.
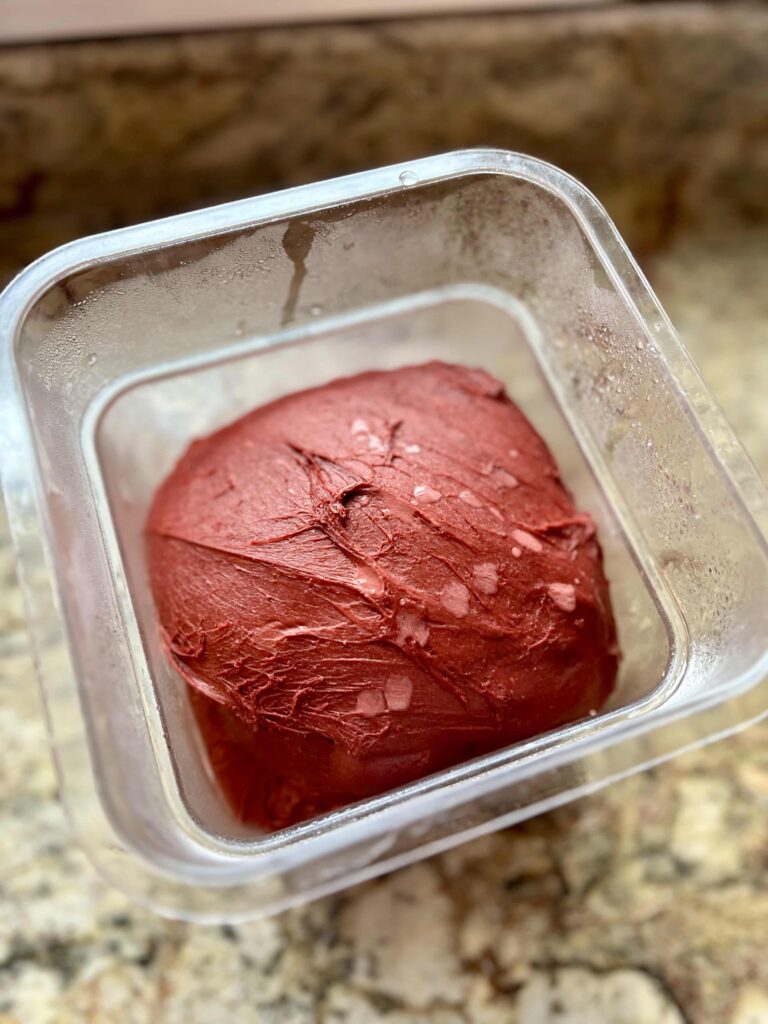
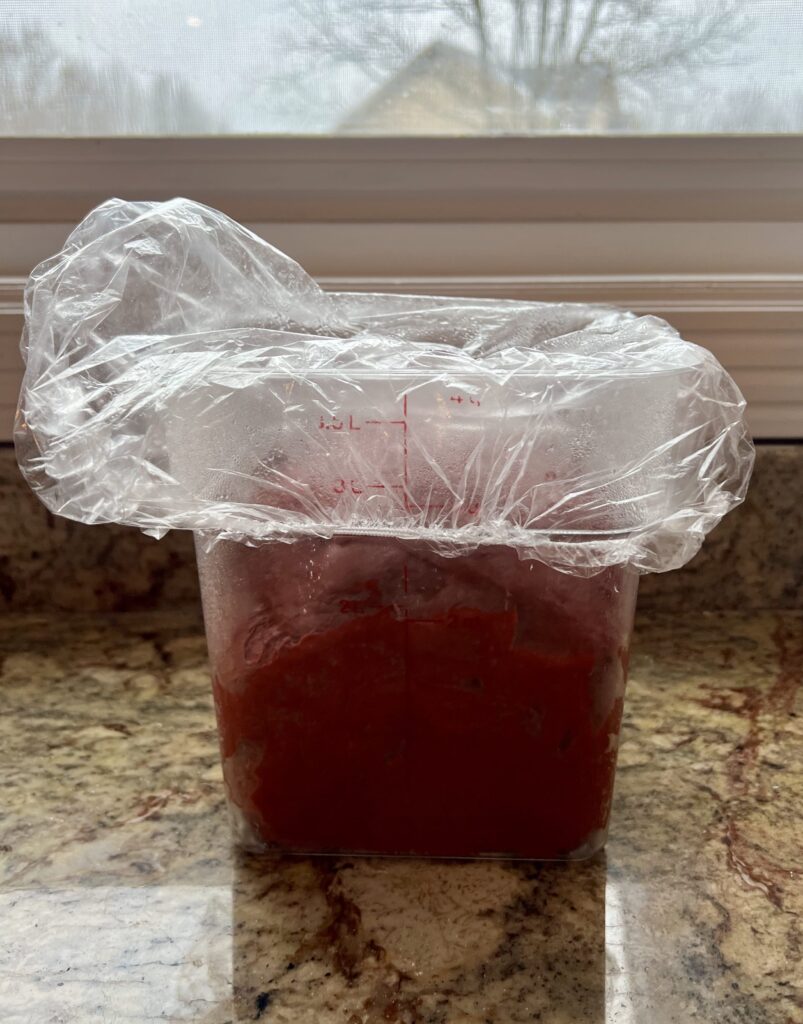
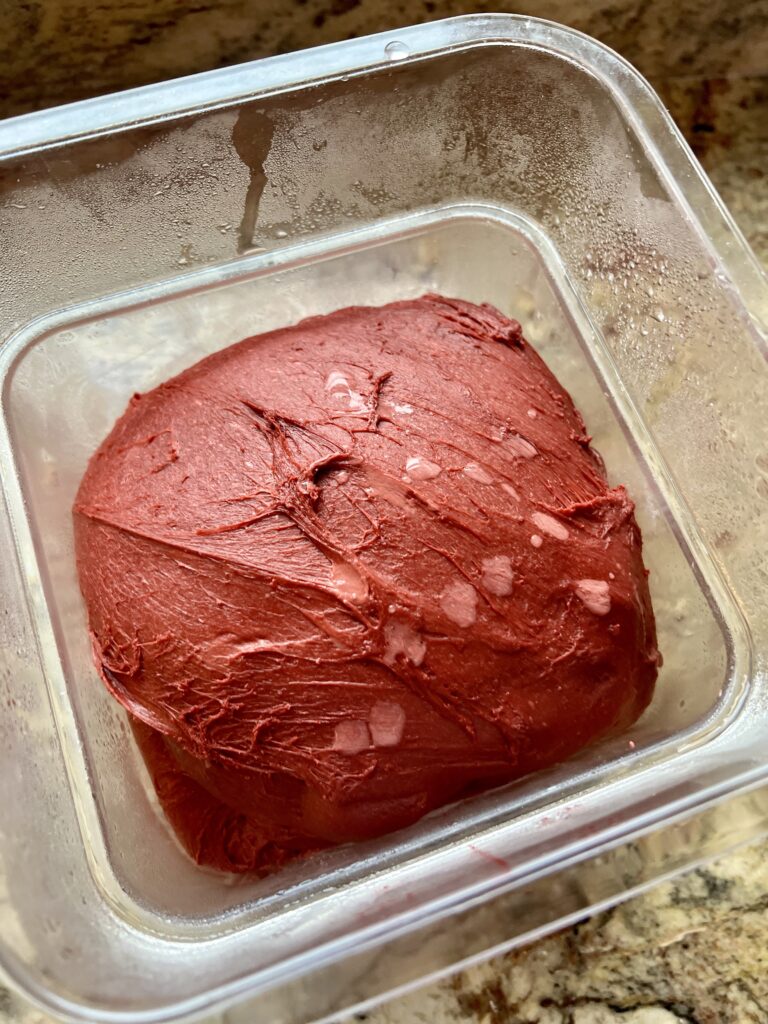
Bulk Fermentation
Bulk fermentation is the name for when the dough ferments in one big mass. Put the dough in a container and cover it (I like using these shower caps). The entire bulk fermentation should take about 4 hours at 78-80℉ Take the temperature of the dough, it should be between 78-80℉. If your dough is significantly colder, bulk fermentation will take longer. If it’s warmer, the bulk fermentation will be a bit shorter.
Wild yeast perform best in the 78℉ range, so do your best to keep the dough in that range. I use a dough proofer or the inside of my oven with the light turned on (don’t turn the oven on!) to keep my dough warm. Let the dough sit for 4 hours in that warm place. By the end of 4 hours it should have puffed up and risen a little. The dough will feel aerated and smooth.
Red Velvet Roll Filling
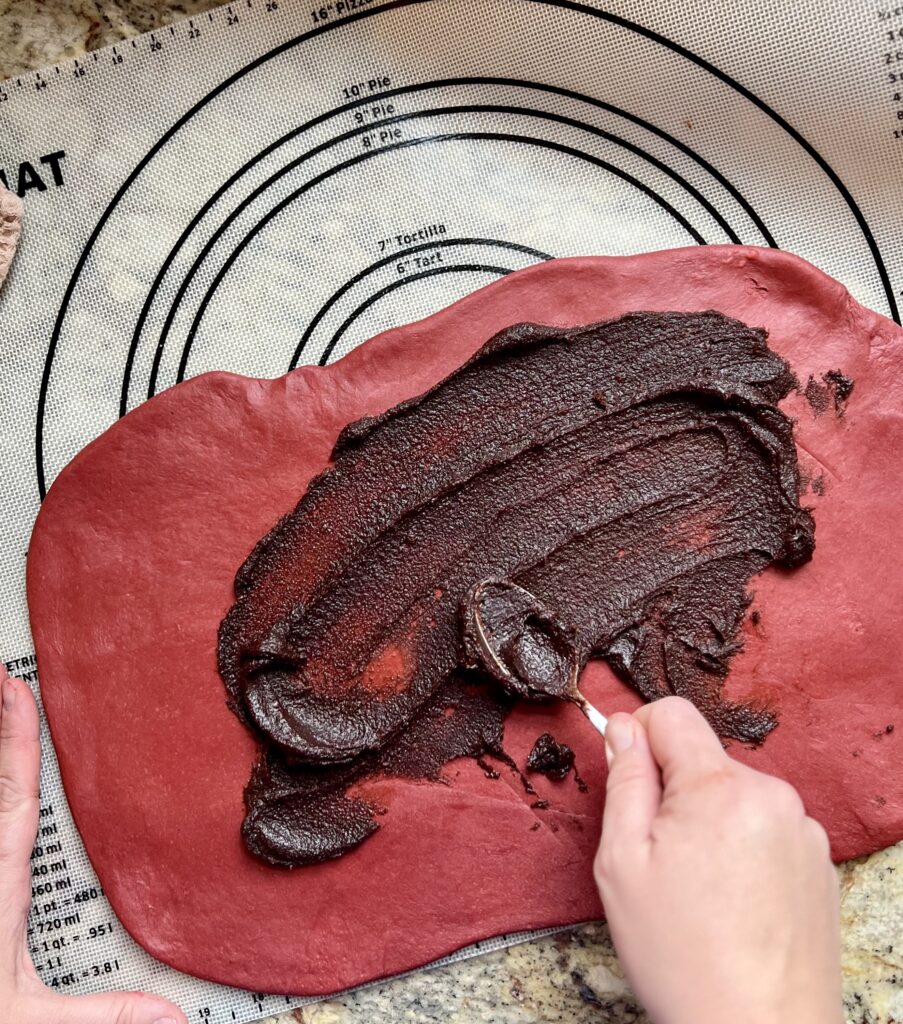
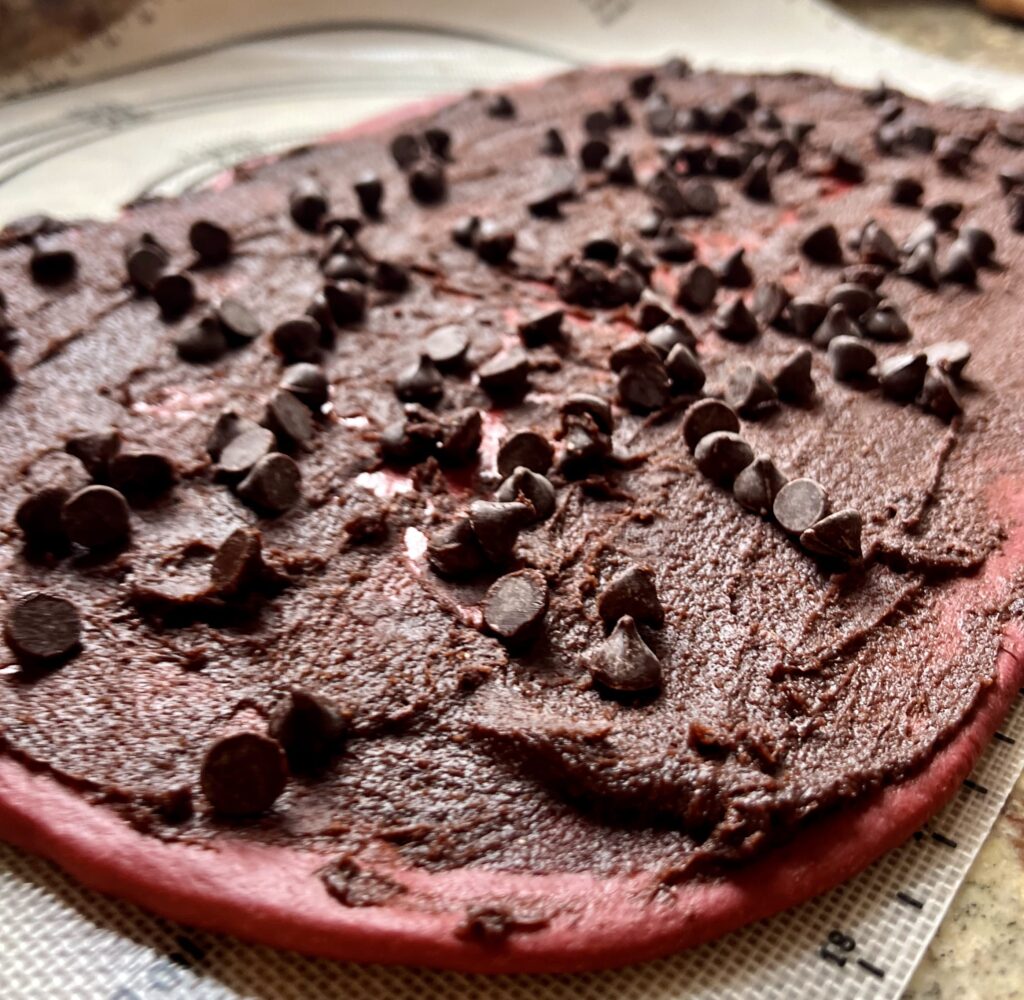
Toward the end of bulk fermentation, make the red velvet roll filling. I use a combination of brown sugar and cocoa powder to get a rich chocolatey flavor in these rolls. I recommend using a dutch cocoa powder (I linked my favorite one) for the most chocolate flavor. Stir together melted butter, brown sugar, cocoa powder, flour, cinnamon, vanilla and salt. Set aside to spread when shaping the rolls.

Options for Morning Red Velvet Rolls:
- Shape Rolls, Proof and Refrigerate to bake the next morning: This is my favorite way to have sourdough rolls ready when I wake up. Go through the entire process of shaping the rolls and then proofing them until just doubled in size. Cover them and stick the risen rolls in the refrigerator overnight. Bake straight from the fridge the next morning.
- Refrigerate the dough for 12-24 hours and shape rolls in the morning: Refrigerate dough, shape and fill the next morning. Rolls rise in a warm (80-85ºF) place for 3-4 hours and are typically ready for brunch.
- Shape and Let Rise Overnight: If you time it right and have consistently lower temperatures (76ºF-78ºF), it can work well to mix the dough in the evening and shape the rolls about 10-12 hours before you want to bake them, giving them time to rise overnight and bake when you wake up.
- Shape Rolls, Proof and Bake: Shape the rolls, proof them and bake the rolls when they are risen, light and airy. Cover with foil. Reheat the next morning in the microwave for 10-20 seconds, top with icing and enjoy.
Shape Sourdough Red Velvet Rolls
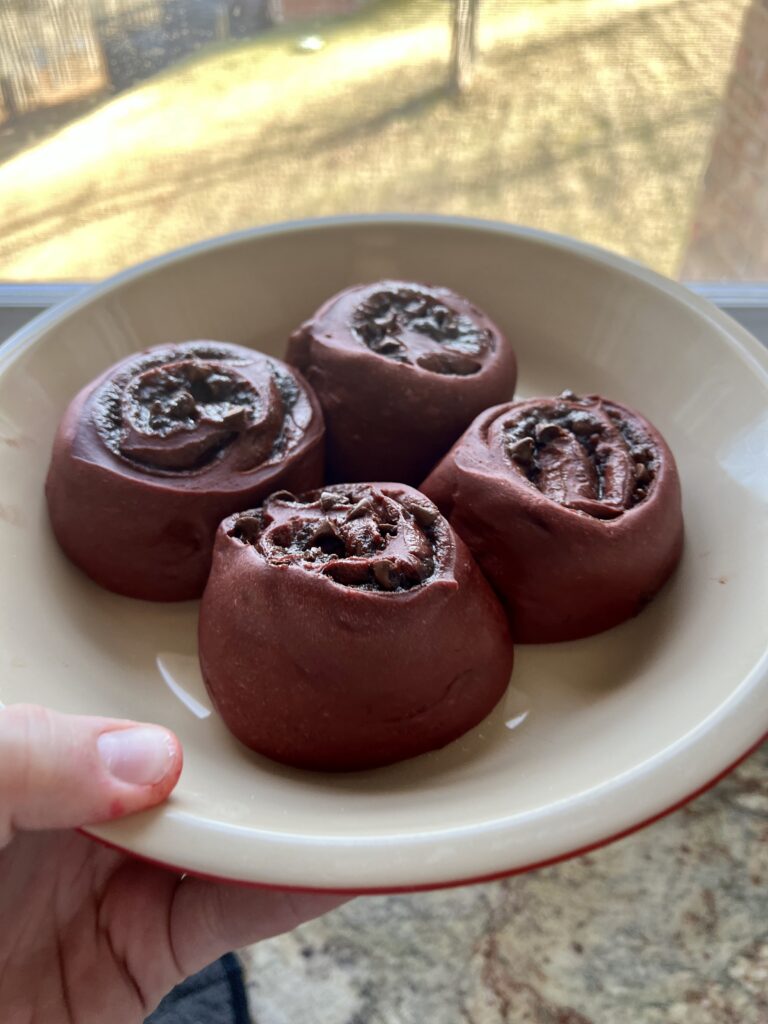
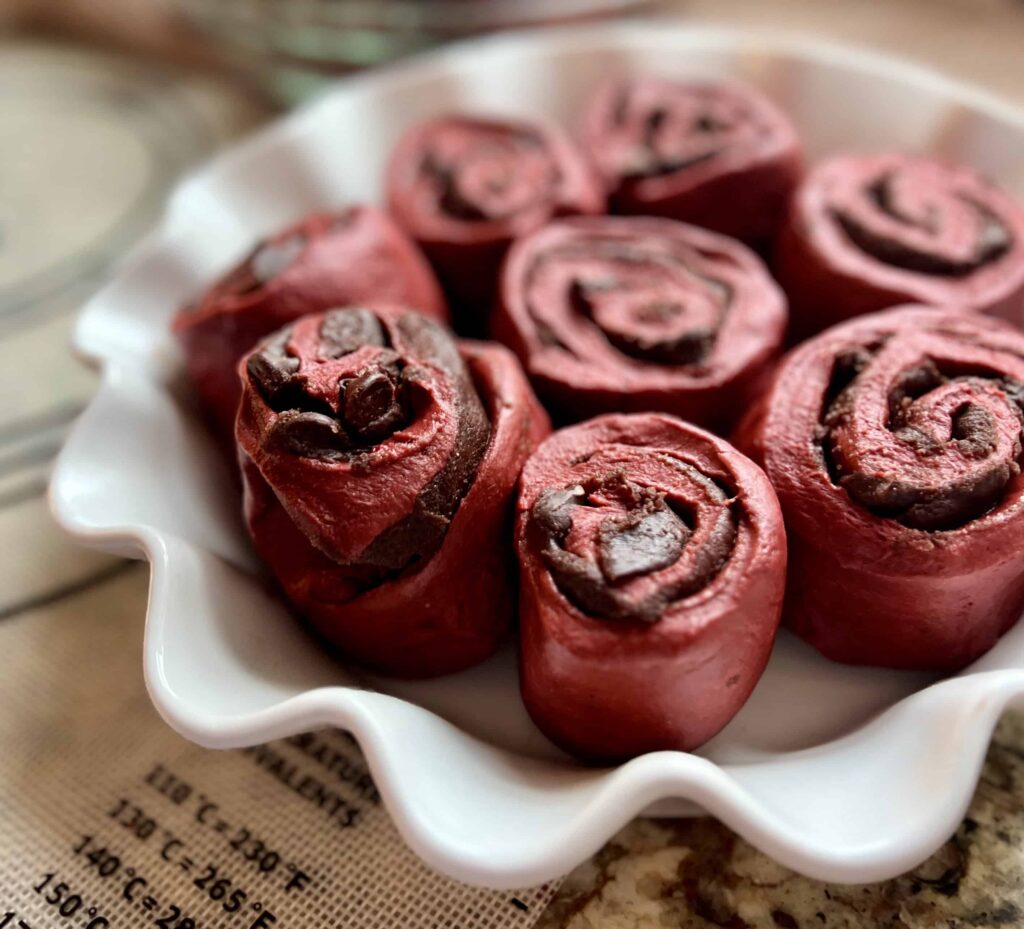
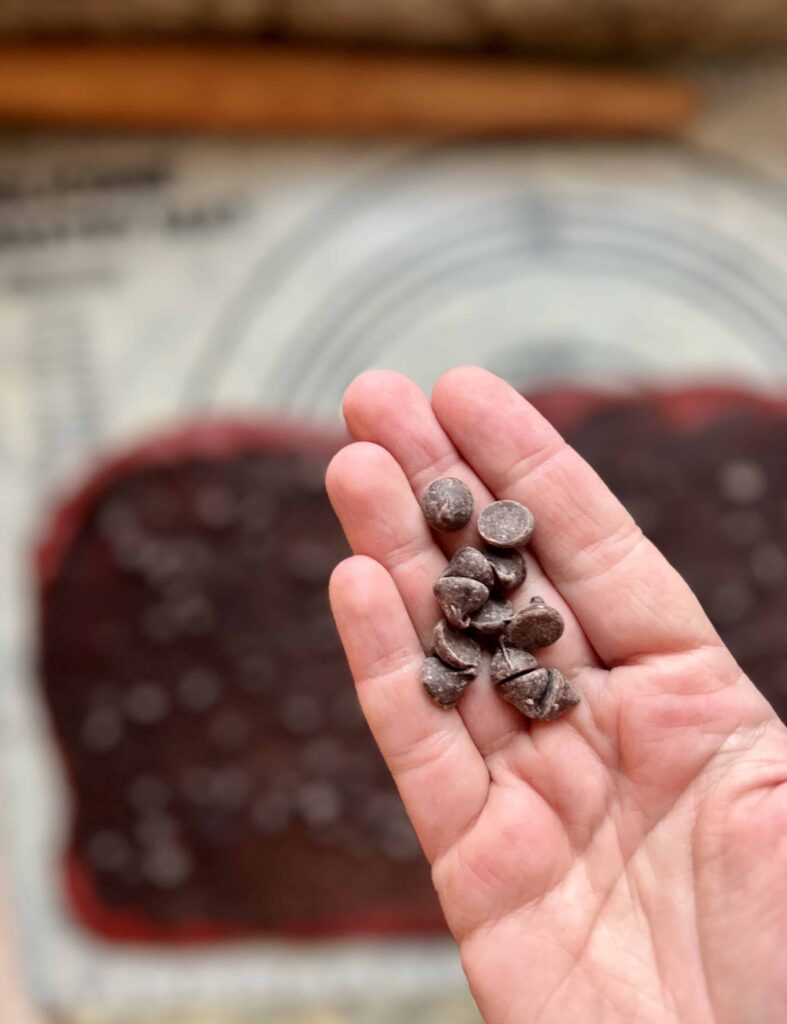
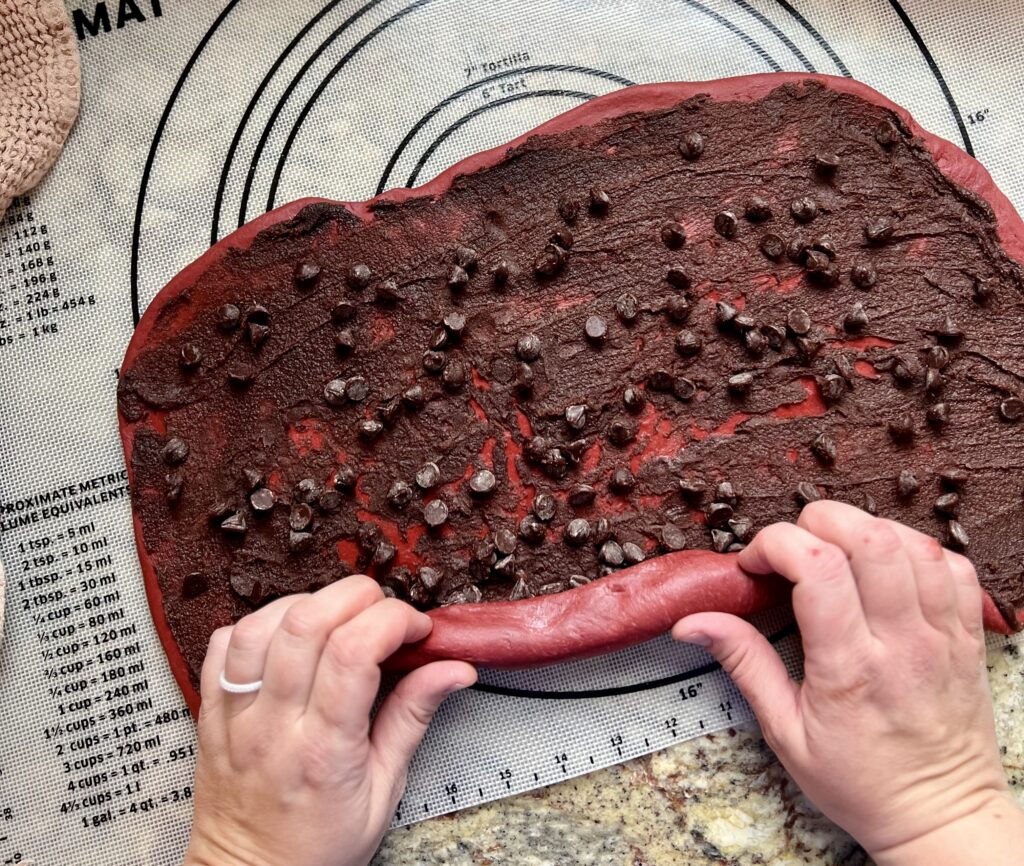
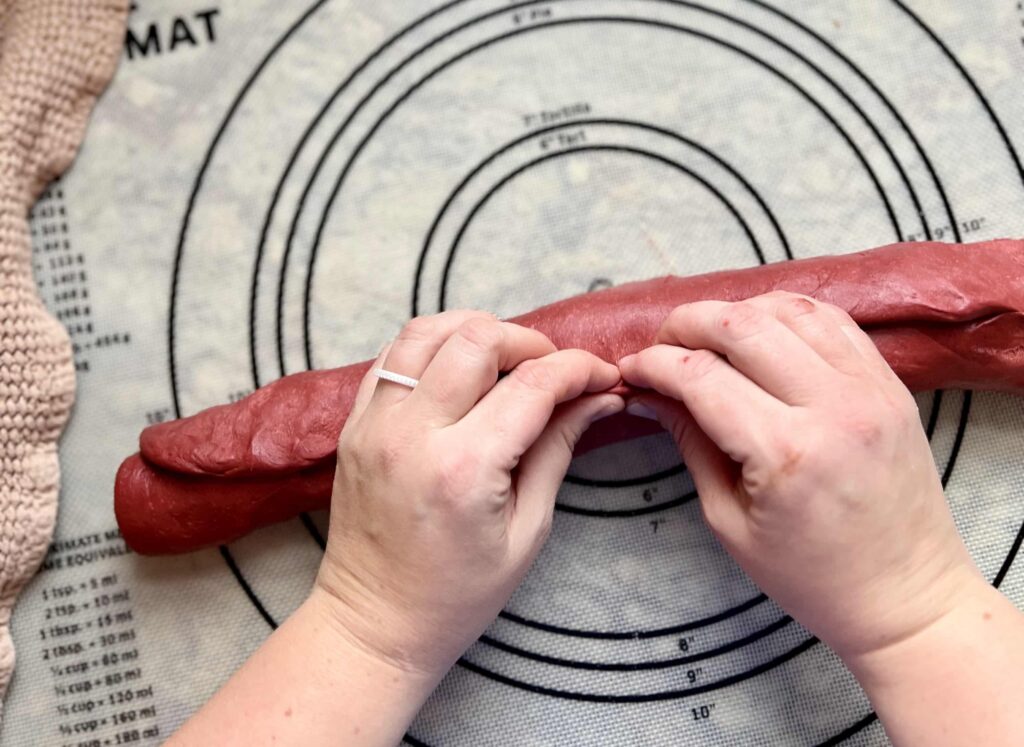
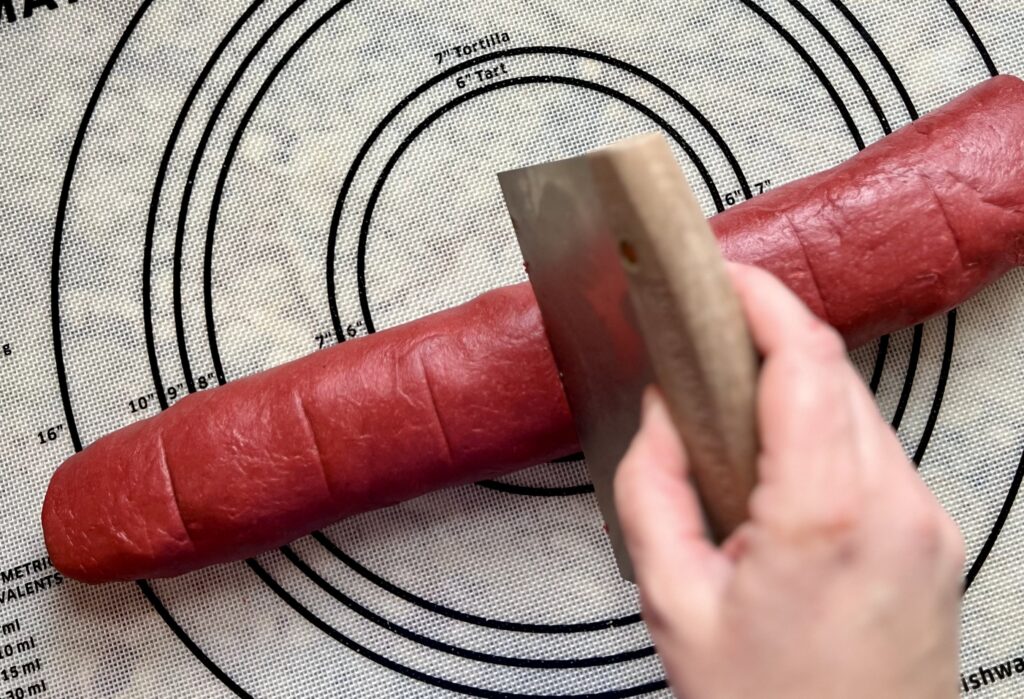
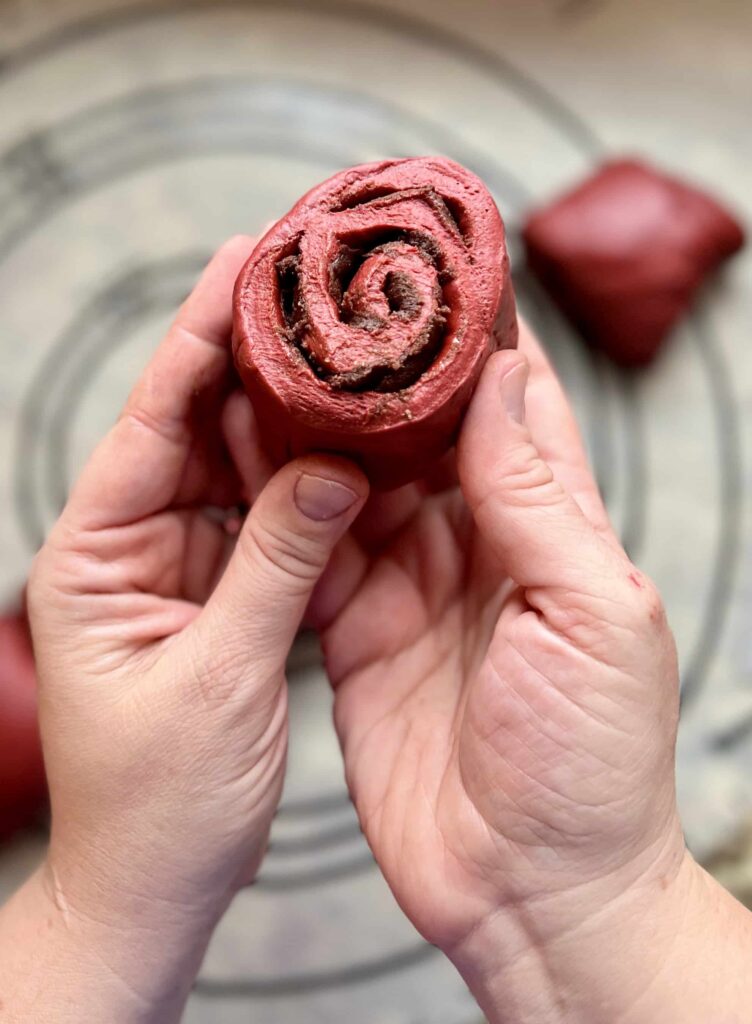
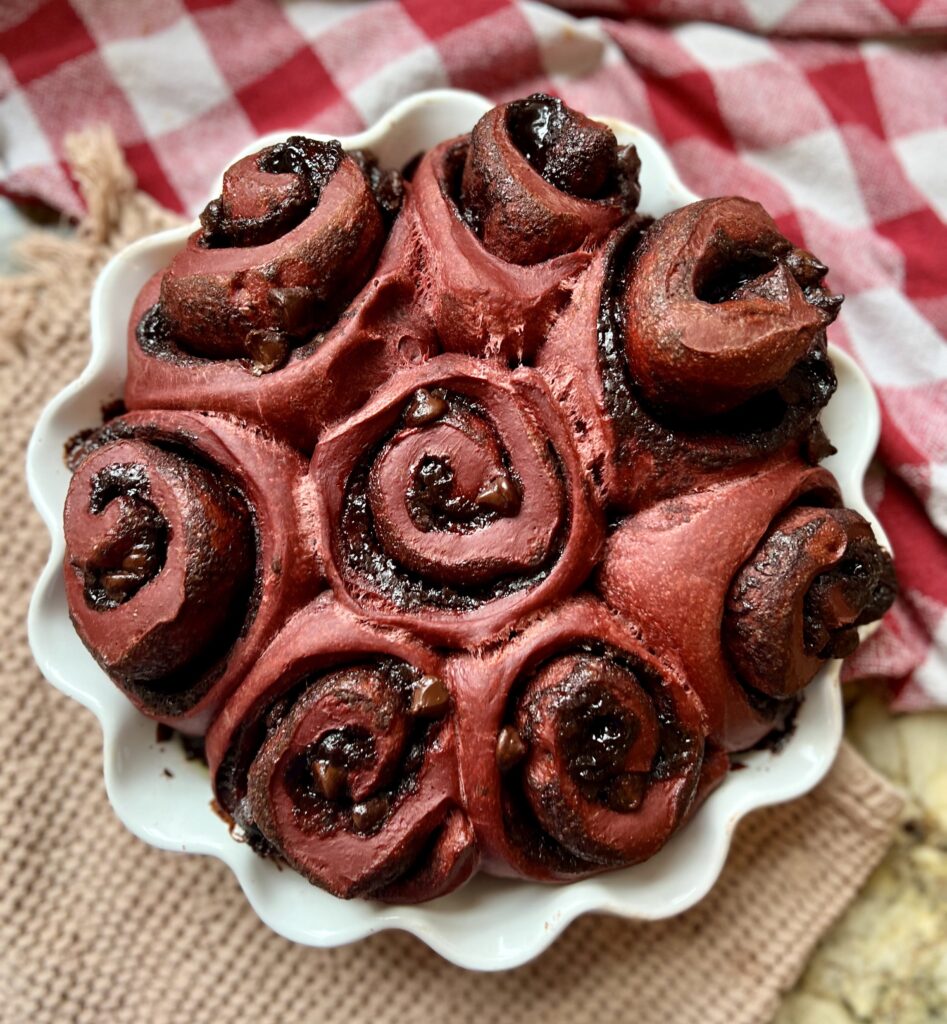
Roll the dough out in a 16 by 10 inch rectangle. I like to do this on a pastry mat with measurements on the side. Due to the nature of the mat, I don’t usually need to dust the mat with flour, but if your dough is a little sticky you can use a slight dusting of flour. Spread the reserved filling over the dough, making sure to cover up to the edges. Sprinkle chocolate chips or chopped up chocolate over the filling. Roll the red velvet rolls up, cinnamon-roll-style, starting at the edge closest to you and rolling tightly. Pinch the seam closed and flip the log seam-side down. Slice into 8 equal rolls and place into pan, leaving a little space between rolls for them to rise.


What Pan Should I Use?
I’ve experimented with a couple different options. I found that when the rolls are touching, they need a little bit longer to bake through completely.
- Pie Pan (7-8 inch): You will need 2 pans, 4 rolls to a pan and bake for about 30-35 minutes.
- Pie Pan (10 inch): One dish will fit all 8 rolls snuggly. If you like the look of rolls all baked together, use a large circular pie pan. Bake 45-50 minutes.
- Glass Baking Dish (9 by 13): Bake for about 30-35 minutes
- Half Sheet Pan: Rolls will not be touching. Bake for 20-25 minutes.
Proof and Bake Red Velvet Rolls
If I could give one piece of advice on sourdough is let the rolls rise until they are fully proofed. Keep the temperature in the 78-80℉ range. I cover my rolls with a plastic shower cap and stick them in a dough proofer or my oven with the light on (don’t actually turn the oven on).
Let the rolls puff up and rise. If you touch the risen rolls with your finger they will feel light and airy. Use the timeline as a guide and go by the feel and appearance of the rolls before baking them. The amount of time this will take will vary greatly depending on the temperature of your roll dough (reference the sample schedule). Once the rolls have risen, I stick them in the refrigerator and bake from the refrigerator the next morning.
The next morning, pull them out and bake in a preheated 350ºF oven. How close together your rolls are will affect the length of time to bake them. Typically I bake these rolls for 30-35 minutes in a baking dish, unless they are crammed together. Then I’ll add on an extra 10-15 minutes to make sure the middles are baked through. If you use a baking sheet where the rolls are not touching at all, they will need less time, around 22-25 minutes.
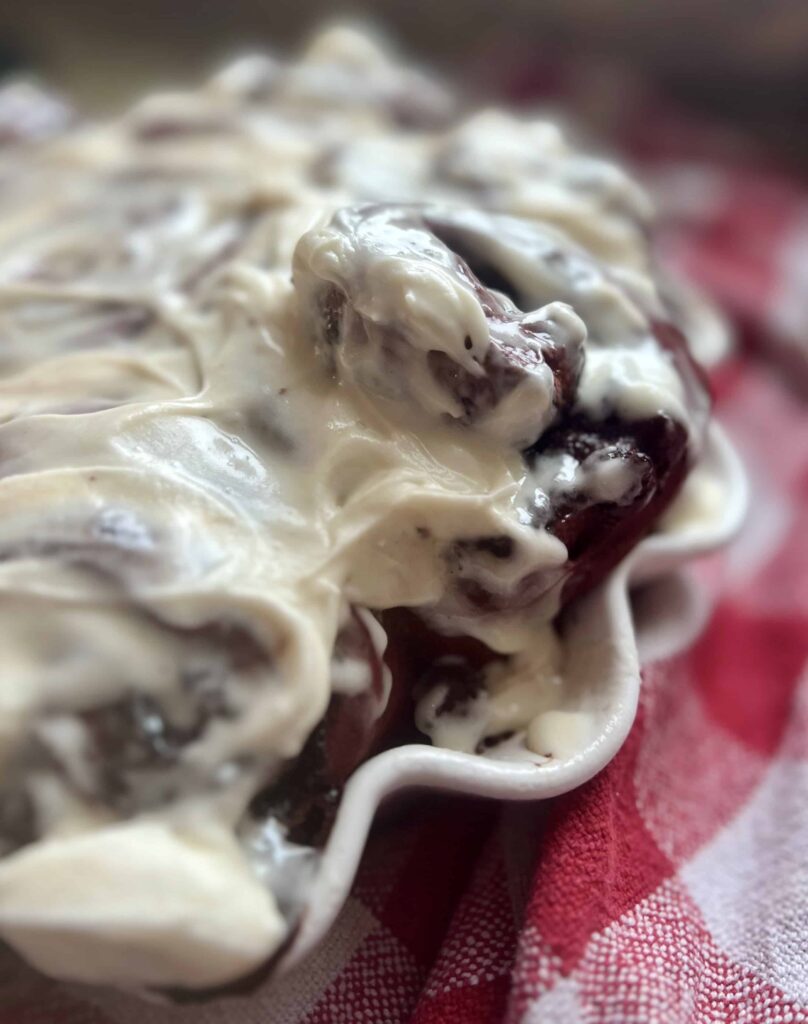
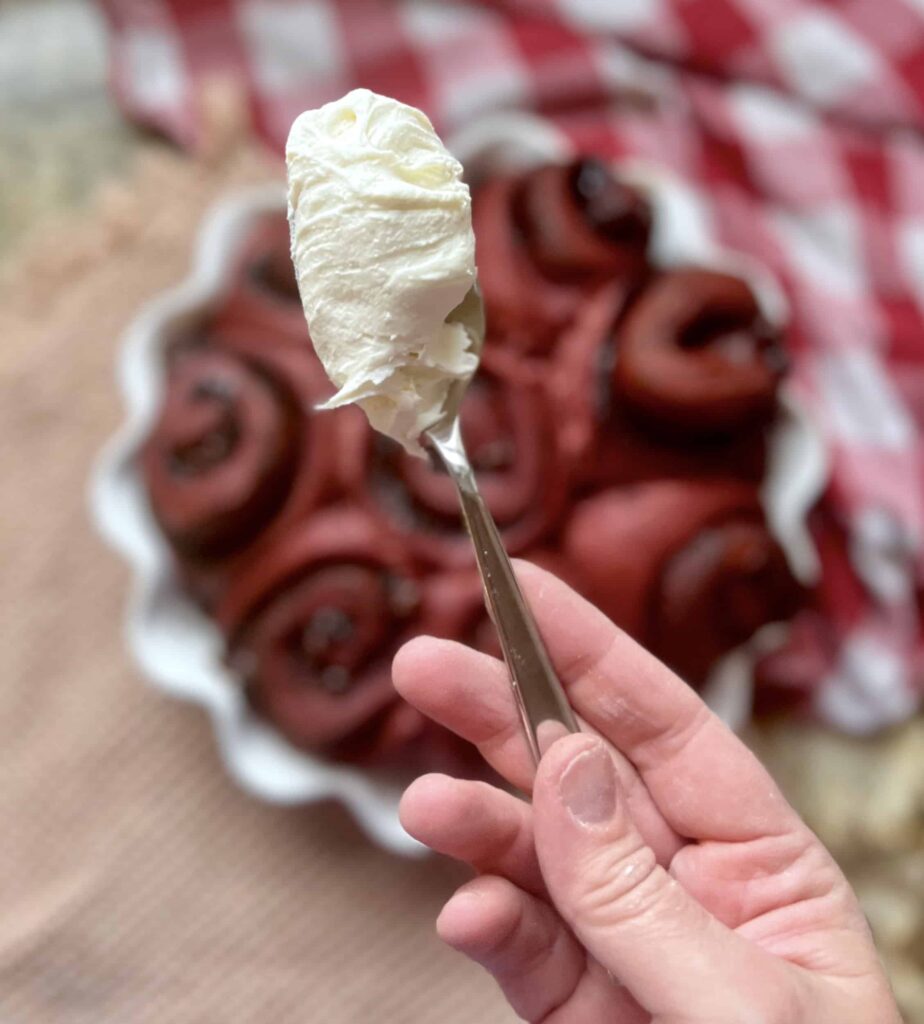
Whip up the Cream Cheese Frosting
Using a hand mixer, whip the softened butter and cream cheese together. Add the powdered sugar, vanilla extract and heavy whipping cream and salt. Whip together for 2-3 minutes, scraping down the sides of the bowl as needed. The frosting will be light and fluffy. Top the warm rolls with creamy cream cheese frosting and enjoy warm!

Frequently Asked Questions
Leave it out! Add 1 teaspoon (4 grams) vanilla extract and 40 grams or 1/4 cup of this Dragon Fruit Powder. It adds no flavor, just natural color to the rolls and is a little more muted than the red dye. You can also leave the dye out completely and make these into chocolate rolls instead – still delicious!
Note: I haven’t tried all types of Dragon Fruit Powder, so I don’t know if other brands will have an off-putting flavor. The brand I linked is a great option for a natural dye with little to no flavor.
These rolls should be eaten right away. If you have extras, let them cool and then stick them in a ziplock bag. Put the bag in the freezer and freeze for up to a month or two. To re-heat, pull the roll out of the freezer and warm up in the microwave to enjoy.
I always use unsalted butter when baking. It allows me to have more control over how much salt is added, which directly affects the taste of the recipe. If you choose to use salted butter, decrease the salt in the recipe accordingly.
Cinnamon Roll Recipes


If you tried these Red Velvet Sourdough Cinnamon Rolls or any other recipe on my website leave a 🌟 star rating and let me know how it went in the comments below. Happy Baking!

Red Velvet Sourdough Cinnamon Rolls
Save this for later!
Ingredients
Stiff Sweet Levain (10-12 hours/overnight)
- 20 grams sourdough starter, 100% hydration, see recipe notes, about 4 teaspoons
- 20 grams granulated sugar, about 1.5 Tablespoons
- 50 grams water, about 3 Tablespoons
- 100 grams all purpose flour, about 3/4 cup
Red Velvet Sourdough Rolls
- 130 grams stiff levain, about 1/2 cup
- 240 grams whole milk, warmed, about 1 cup
- 60 grams unsalted butter, melted, about 4 Tablespoons plus 1 teaspoon
- 60 grams granulated sugar, about 1/3 cup
- 1 large egg, about 50 grams
- 25 grams cocoa powder, see recipe notes, about 1/4 cup plus 1 Tablespoon
- 13 grams red velvet bakery emulsion, see recipe notes for natural dye substitute, about 1 Tablespoon
- 6 grams salt, about 1 teaspoon
- 480 grams bread flour, about 3 1/2 cups
Red Velvet Roll Filling
- 55 grams melted unsalted butter, about 1/4 cup
- 75 grams brown sugar, 1/3 cup
- 9 grams cocoa powder, see recipe notes, about 1 Tablespoon
- 10 grams all purpose flour, about 1 Tablespoon
- 2 grams ground cinnamon, about 1 teaspoon
- 4 grams vanilla extract, 1 teaspoon
- a pinch of salt
- 80 grams chocolate chips, about 1/2 cup
Cream Cheese Icing
- 55 grams unsalted butter, softened, about 4 Tablespoons
- 113 grams cream cheese, softened, about 4 oz
- 200 grams powdered sugar, about 1 2/3 cup
- 4 grams vanilla extract, about 1 teaspoon
- 80 grams heavy whipping cream, about 1/3 cup
- a pinch of salt
Instructions
Stiff Sweet Levain (10-12 hours/overnight at 78-80ºF)
- Mix together ripe sourdough starter, all purpose flour, granulated sugar and water. Knead the levain until it forms a cohesive ball. Set in a liquid measuring cup and cover for 10-12 hours until the levain has doubled in size and the top is rounded.
Red Velvet Sourdough Cinnamon Rolls
- Warm the milk in the microwave (about 1 1/2 minutes full power) or on the stove. It should be around 90-100 degrees F, no warmer than that. To the bowl of a stand mixer with a dough hook, add the ripe levain, warmed milk and melted butter.
- Add the sugar, egg, cocoa powder, red velvet bakery emulsion (see note for natural dye option), salt and most of the bread flour. Turn on the dough hook and knead for a few minutes. Add the remainder of the bread flour as needed. The dough should be tacky, not overly sticky and should all cling to one side of the bowl (or away from the edges depending on your mixer). Knead for a total of 8-10 minutes until the dough is smooth.Note: In an effort to use more natural food colors, I have started substituting this dragon fruit powder for the red velvet emulsion. Add 40 grams (4 Tablespoons) dragon fruit powder and 4 grams (1 teaspoon) vanilla extract to the dough in place of the emulsion. The rolls will look a little more muted from the natural color, but will taste delicious. You can also leave the emulsion out completely, add 1 teaspoon vanilla extract and have cocoa-colored rolls instead.
- Bulk Fermentation: Put the dough in a container and cover. Set the dough in a warm, 78º F place for 4 hours. Take the temperature of the dough as needed to make sure the dough temperature is right around 78 degrees F. This temperature is the optimal fermentation.
- At the end of about 4 hours, the dough should be puffed up and feel very elastic. If it doesn't feel this way, let it bulk ferment for another half hour and check again. If your dough is colder, this will take longer. If it's warmer, it will move faster.
- Mix up the Filling: Near the end of bulk fermentation, mix up the red velvet roll filling. To a small bowl, add the melted butter, brown sugar, cocoa powder, cinnamon, flour, vanilla and salt. Mix together. Set aside.
- Prepare Baking Pans: This recipe makes 8 giant red velvet rolls. Use a pie plate, fitting 4 rolls per pie plate for a beautiful circular shape. You could also use a 9 by 13 pan and put all the rolls in the pan. I've also crammed all 8 rolls in a large pie tin if you want a fuller look (but it will take longer to bake). Choose your pan and spray with cooking spray.
- Shaping: Roll the dough out in a 16 by 10 inch rectangle. Spread the filling over the dough. Sprinkle chocolate chips over the filling. Roll the red velvet rolls up, cinnamon-roll-style, starting at the edge closest to you and rolling tightly. Pinch the seam closed and flip seam-side down.
- Cut the log of dough into 8 equal pieces. Place each red velvet roll in the pan, nestling them together. You can also bake these on a baking sheet, spread out a little, if desired (they will take less time if they aren't nestled together, so watch carefully).
- Proofing: Cover the pan and let rise in a 78ºF place until puffed up and risen, about 6-8 hours. Do not bake these rolls if they have not risen. At this point you can bake the rolls or cover and refrigerate them overnight to bake in the morning (straight from the refrigerator to a preheated oven) – see recipe notes for morning roll options.
- Baking: Pre-heat the oven to 350ºF. For rolls that are 4 to a pan, bake for about 30-35 minutes until baked all the way through. For rolls 8 to a pan, bake a little longer, 40-45 minutes. For rolls baked on a baking sheet and not touching, bake for about 20-25 minutes.
- Cream Cheese Frosting: Using a hand mixer, whip together softened butter and cream cheese. Add the powdered sugar, vanilla extract and heavy whipping cream and salt. Whip together for 2-3 minutes, scraping down the sides of the bowl as needed. The frosting should be light and fluffy.
- Spread frosting over the tops of the red velvet rolls while they are still warm. Enjoy!
Notes
-
- Shape Rolls, Proof and Refrigerate to bake the next morning: Go through the entire process of shaping the rolls and then proofing them until just doubled in size. Cover them and stick the risen rolls in the refrigerator overnight. Bake straight from the fridge the next morning.
- Refrigerate the dough for 12-24 hours and shape rolls in the morning: Refrigerate dough, shape and fill the next morning. Rolls rise in a warm (80-85ºF) place for 3-4 hours and are typically ready for brunch.
- Shape and Let Rise Overnight: If you time it right and have consistently lower temperatures (76ºF-78ºF), it can work well to mix the dough in the evening and shape the rolls about 10-12 hours before you want to bake them, giving them time to rise overnight and bake when you wake up.
- Shape Rolls, Proof and Bake: Shape the rolls, proof them and bake the rolls when they are risen, light and airy. Cover with foil. Reheat the next morning in the microwave for 10-20 seconds, top with icing and enjoy.
Nutrition
Nutrition information is automatically calculated, so should only be used as an approximation.


Do you have a version of this using instant yeast?
No, that would be great though!
What about a discard version?
Not yet, but you could make it into a discard recipe by adding some commercial yeast to speed up the fermentation.
These tasted amazing! I used the dragon fruit powder but got more of a brownish color to these. How can I get that deep red or burgundy color without adding the red velvet emulsion? Could I add less cacao powder or maybe add a bit of beet powder too?
Hi Marissa,
You’re not going to get the bright red velvet color you get with artifical colors in this. I’ve tried this with beet root powder and the dragon fruit powder tastes better and has a better hue – even if it is more brown. You could probably leave out the cocoa powder (but then it wouldn’t taste quite as much like red velvet). Sorry there’s not a great solution for them turning bright red without artificial emulsions. Glad you loved the flavor though!
OMG! This is the best sourdough recipe I have ever made to date!
Great recipe. I will definitely be making these again! Thanks for sharing!
Thanks for the review!
Is it possible to freeze the rolls once they are shaped before baking?
Yes! I’d check out this guide for how to freeze cinnamon roll dough to decide which timing option works for you. Keep in mind that the freezer will kill off some of the sourdough levain, so sourdough cinnamon rolls shouldn’t be frozen for longer than a week. Happy baking!
I’m excited to try these for Valentine’s Day! I would also like to avoid food dyes for my customers . Is the photo you used of your rolls with the dragon fruit powder or with the bakery emulsion?
The picture is with the bakery emulsion. Enjoy!